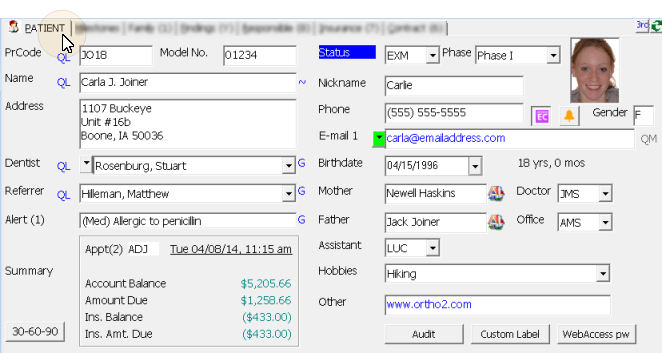
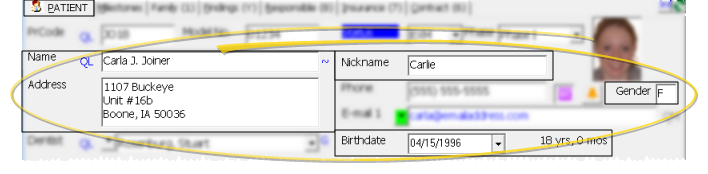
The Patient tab of the patient folder contains basic biographical information about the patient.
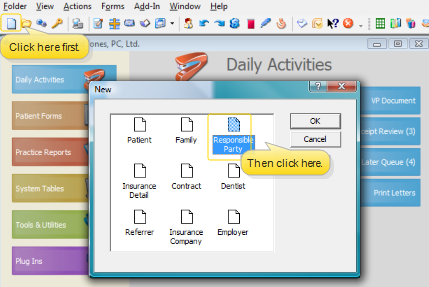
Patient Folder -  Open a patient folder > Patient tab. (See "Open Patient Folders" for details about accessing patient folders.) When you open a patient folder, the Patient tab opens first. If you go to a different patient folder tab, you can return by clicking the Patient tab at the top of the window.
Quick Search - You can also use Quick Search to locate patient folders. See "Quick Search" for details.

Patient Fingerprint - You can enable patients to open their own patient folder when they touch the fingerprint sensor installed at your workstation. See "Set Up ViewPoint Properties" for details.
Alert Stop - If the patient has an alert stop flag for this feature, the alerts box will appear when you initiate this feature for the patient. Review the alert information, then click the box to continue. (See "Patient Alerts" for details.)
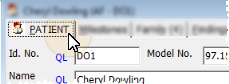
Patient ID numbers - Use these fields to identify this unique patient record.
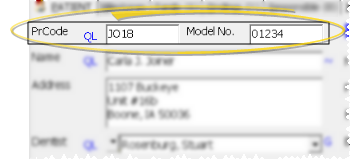
Id. No. / Model No. - Your patient identification numbers can be created automatically, or you can choose to enter one or both manually. (See "Set Up Patient Folder Default Responses" for details.) If you change a patient's ID fields, ViewPoint warns you of any duplications in other patient folders.
Auto-generate new ID numbers - If one or both AutoGenerate New Id. Number options is enabled when you change a patient name, ViewPoint will automatically assign a new primary and/or secondary code to the patient folder, If one of your identification codes includes letters from the patient name (for example, if your primary code begins with the first two letters of the last name), this feature provides a way to ensure that protocol is maintained, even when a patient's name is changed. However, if the AutoGenerate options are disabled when you change the patient name, ViewPoint will not change the Id. number.
Patient biographical information - Use the patient biographical fields to enter the patient name, address, nickname, birthdate, and gender, You can also use the tools near these fields to print quick patient labels and view the optional phonetic pronunciation of the patient name.
Phonetic name -
Nickname - This field defaults to the patient's first name, but you may change it as needed. The nickname is used on certain reports, appears in the patient folder header and the Treatment Chart and Treatment Plan heading, and can be used as a mail merge variable. Note that you can enter the patient's name phonetically by clicking the name or address field, not the nickname field.
Update linked records - When you change address fields or contact details for a patient or responsible party, you have the opportunity to change linked records to match. In some cases, you must  refresh the record before the update form appears. Click for details...
Print mailing label - Click the QL button beside the Name field to print a Patient Quick Label. See "Print Mailing Labels & Quick Labels" for details.
Print chart label - Click the QL button beside the Id. number field to print a Chart Label. See "Patient Chart Labels" for details.
Gender - The Gender field is mostly used for subgrouping, and for selecting appropriate wording in your mail merge documents.
Birthdate- The Birthdate field is primarily used for subgrouping, and can trigger a special greeting on your Patient Sign-In screen.
Dentist / professional fields - Enter the names of the professionals that work with your patients. This information provides a way for you to easily generate correspondence, and collect data for your practice reports.  Practice name option in the Display section of the properties window to list dentists, referrers, and professionals alphabetically by practice name. If this option is disabled, the lists are displayed by the person's name. See "Set Up Patient Folder Default Responses" for details.)
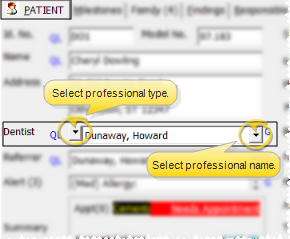
View / select professional type - Click the dropdown button to the left of the professional field to view the professionals already assigned to the patient, and to select the professional type to work with.
Assign professional to patient - Click the dropdown button to the right of the professional field to select the name to assign. If the professional is not in your list, select (new) to go to the Dentist table or Professional table where you can create a new record. You can also click the G button beside the field to open the currently selected record in the corresponding table.
Print mailing label - Click the QL button beside the field to print a Dentist Quick Label or Professional Quick Label for that party. (See "Dentist Labels" for details.)
Open dentist record - You can also click  Dentist on the ViewPoint toolbar to open the assigned dentist's record in your Dentist Table. (See "Set Up Dentist Records" for details.)

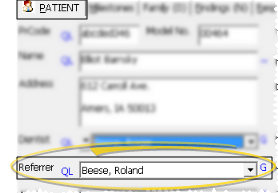
Referrer - Select the patient's referrer, often the patient's dentist, another patient in you office, or an advertisement campaign. If the referrer is not in your list, select (new)
to go to the Referrer table where you can create a new referrer record. You can also click the G button beside the field to open the currently selected record in the Referrer table. See "Set Up Referrer List" for details. Practice name option in the Display section of the properties window to list dentists, referrers, and professionals alphabetically by practice name. If this option is disabled, the lists are displayed by the person's name. See "Set Up Patient Folder Default Responses" for details.)
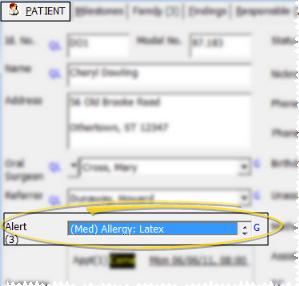
Alerts - You may assign important notes, or Alerts, to a patient folder as needed. The alert can appear on the Patient tab of the patient folder, on a stop sign that displays when an alert flag occurs, and on certain practice reports.The Alert field indicates how many alerts are assigned to the patient, and shows one message. If needed, you can hover over this field to read the entire alert message. If multiple alerts are assigned, click the Alert field to view more. In addition, you can click the G button to add / modify alerts for this patient. See "Patient Alerts" for details.
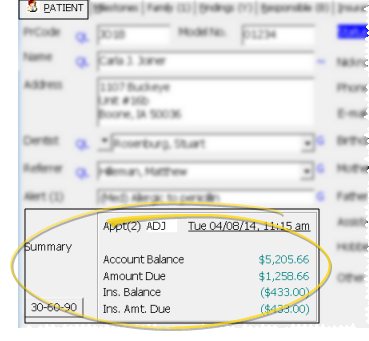
Summary & account aging - The summary shows the patient's next appointment, along with the account totals for all contracts, including expected insurance.
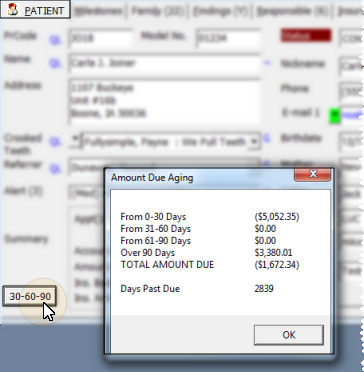
Detailed aging - To view the account aging, click the 30-60-90 button. Note that when you click this button from the Responsible Party tab, you see the aging summary of all contracts assigned to this billing party; when you click the button from the Patient tab, you see the aging summary of all contracts for the patient; when you click the button from the ledger, you see the aging of the currently selected contract.
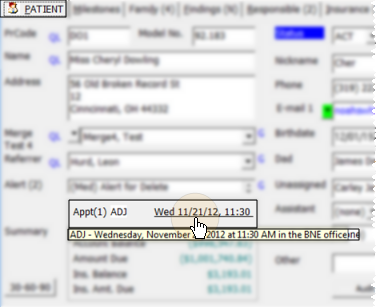
Appointment - Click the appointment field in the patient summary to open your Grid Scheduler to the scheduled appointment date, or to today if the patient does not have an appointment scheduled. Note that the next appointment summary is red if the patient is on your Needs Appointment list. (See "Manage Needs Appointment List" for details.)
You can also hover over the appointment field to view a tooltip of the appointment details
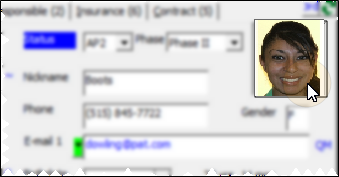
Status & Phase - It is important to keep your patient Status and Phrase fields current.

The Status field is used on your Practice Statistical Analysis report, Needs Appointment List, and other areas of ViewPoint. To keep the patient status current, you can either change the status field manually, or use Auto-Events. Each time you change a patient's status, the change is recorded in the patient's Status History. In addition, when an Auto-Event changes the status to a description that starts with Dismiss, you are prompted for the dismissal date, which will then be entered into the Milestones tab of the patient folder. (See "Set Up Status List" for details.) Note the colors of the Status field name changes to indicate the patient's current status. See "Set Up Status List" for details about setting up these colors.
The Phase field is used in areas such as financial contracts, insurance records, and treatment findings: It is important that you keep this field current for all patients. When you update the Phase on the Patient tab of the patient folder, you have the opportunity to copy the current treatment findings, and optionally treatment dates and notes, to the new phase. You can then review and edit the findings as needed. (See "Set Up Treatment Phases" for details.)
Photo - If you use an integrated imaging system, a thumbnail of the patient's most recent facial smile photograph can appear on the Patient tab, on the patient's treatment chart, and on the Patient Sign-In screen. Double-click the photo to manage this patient's images. (See "Patient Imaging Tab" for details.)
Phone numbers & email addresses - You may enter several types of contact information for each patient. Although these fields are independent of the information you have in the responsible party record, you have the opportunity to update linked records whenever a patient's contact information is changed. Click for details..
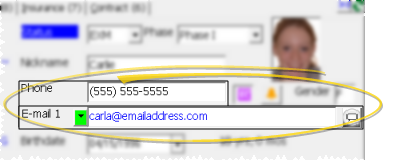
Phone - Enter the patient's home phone number in this field. Enter phone numbers as either 7 or 10 digits, and ViewPoint will supply area code parentheses and hyphens to facilitate viewing the number. If you enter any other number of digits, ViewPoint does not recognize the value as a phone number, and the visual indicators will not be added.
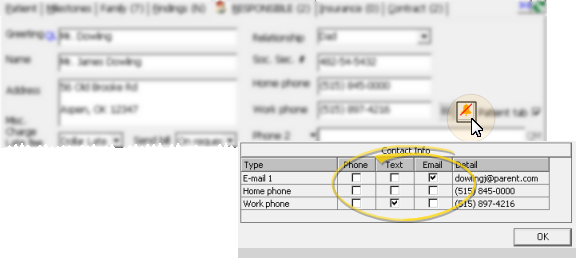
Contacts - ViewPoint can store several phone numbers and email addresses in the Contact field. Use your Contact Category
View contact details - Click the [V] button beside the contact field caption to view additional contact details. This button appears green on the Patient tab when multiple contact fields have information in them.
Select contact type to display - Click the box beside the contact type you want to display on your screen.
Dynamic formats - You may type web site and email addresses into contact fields and user-defined fields. Then, if your computer is connected to the Internet, you can double-click the field to open the web site, or initiate an e-mail message.
Send Quick Message - (Available only if you use VP Reminder.) Click QM beside the contact field to initiate a quick email message for this party. See "Quick Message" for details.
Send Text - (Available only if you use Edge Reminders.) Click  Text beside the contact field to review text message conversations, or send a new text message to this party. See "Text Patients & Responsible Parties" for details.
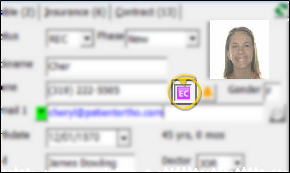
Electronic correspondence - Click to enable / disable the EC option to choose whether to send appointment cards to the patient's Email1 address, rather than printing them. (See "Set Up Form Email Options" for details.)
If you enable the electronic correspondence option for a patient or responsible party, you can always override the email, and choose to print an appointment card or receipt instead: When you generate a payment receipt by right-clicking a transaction in the patient ledger, you can choose to print or email the form. Or when you generate a receipt or appointment card from the ViewPoint Forms menu, you can check the Disable Electronic Submit option to override the electronic correspondence setting, and print the form on paper.
Note that you can set up your system so that patients earn points toward your Patient Rewards system when they opt into electronic correspondence. See "Set Up Patient Reward Triggers" for details.
Activate contacts for Edge Reminders / VP Reminders - Select the  icon beside the Contact field, then enable each phone number and/or email address you want to use for the delivery of Edge Reminders or VP Reminders messages.
If you flag multiple contact types, the party will receive multiple reminder messages; if you do not flag any contact types, the party will not receive any messages, even when they fit the subgroup you select. In addition, you can flag the same contact type for multiple messages: For example, you can flag the patient's cell phone to receive both phone and text messages.
Guardian fields - The two guardian fields (initially labeled Unassigned), are generally completed automatically as you enter information into certain fields on the Responsible party tab of the patient folder.
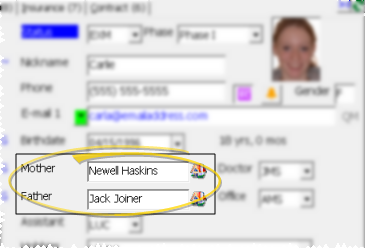
Patient / Responsible tab integration - When you enable the  Patient tab option on the Responsible tab of the patient folder, the responsible party name and relationship are entered into one of the Unassigned fields on the Patient tab of the patient folder. In addition,
if the responsible party and patient addresses match, a house icon (
Patient tab option on the Responsible tab of the patient folder, the responsible party name and relationship are entered into one of the Unassigned fields on the Patient tab of the patient folder. In addition,
if the responsible party and patient addresses match, a house icon (  ) indicates that the patient lives
with this party. If you later disable the
) indicates that the patient lives
with this party. If you later disable the ![]() Patient tab option, the name and relationship are removed and the field is renamed Unassigned.
Patient tab option, the name and relationship are removed and the field is renamed Unassigned.
Manual entry - If you manually enter information into a guardian field, then enable the Patient tab option from a Responsible tab, your text is overwritten by the responsible party information.
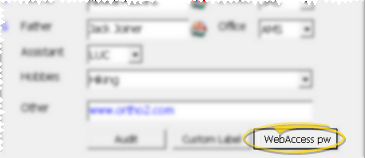
Doctor / office / assistant - Enter the patient's primary orthodontist, office location, and assistant. These fields are used for tracking patient appointments, transaction posting, and practice production.
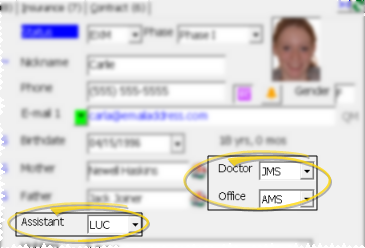
Financial transactions - If you change a patient's doctor or office assignment, subsequent transactions will be credited toward the new doctor or location, but prior transactions are unaffected by the change.
Image labels - If you change a patient's doctor assignment, you must manually update the orthodontist identification label of the patient's images by opening and re-save the images. See "Set Up Orthodontist / Practice Id Label" for details.
User-defined fields - The Patient and Responsible
Example Patient tab custom fields:
Example Responsible party tab custom fields:

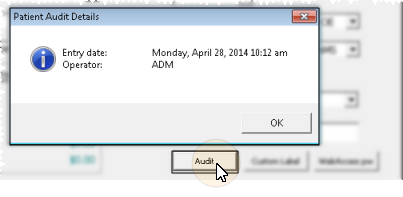
Audit folder - Click the Audit button at the bottom of the window to review the date, time the record was first created, and the operator that was logged into ViewPoint at that time.
Print custom label - Click the CL button at the bottom of the window to generate a Custom Patient Label for the patient. See "Print Custom Patient Labels" for details.

WebAccess password - Click this button to review and change the WebAccess Client Password for this party. You can also edit passwords from within WebAccess.
Go to Previous / Next Patient![]() While viewing any tab of a patient folder, you can click <--
Previous and -->Next on the ViewPoint toolbar to navigate to the prior or next patient, alphabetically by last name.
While viewing any tab of a patient folder, you can click <--
Previous and -->Next on the ViewPoint toolbar to navigate to the prior or next patient, alphabetically by last name.
Simultaneous Access - You may open multiple patient folders simultaneously, and multiple users may open the same patient folder simultaneously. However, multiple users cannot change the same field in the same patient folder at the same time.
Resize the Window - Hover your cursor at a corner of the patient folder window, then click and drag to the desired size. ViewPoint remembers you preferred size, even after you exit and re-enter the patient folder. Click for more...
Update via online forms - If you ask your patients to complete Online Forms, your patient folders can be updated with new data automatically. See "Use Online Forms " for details.
 │
│  │
│  │
│ 
Ortho2.com │1107 Buckeye Avenue │ Ames, Iowa 50010 │ Sales: (800) 678-4644 │ Support: (800) 346-4504 │ Contact Us
Chat with Software Support │Chat with Network Engineering │ Chat with New Customer Care
Remote Support │Email Support │ Online Help Ver. 12/18/2015