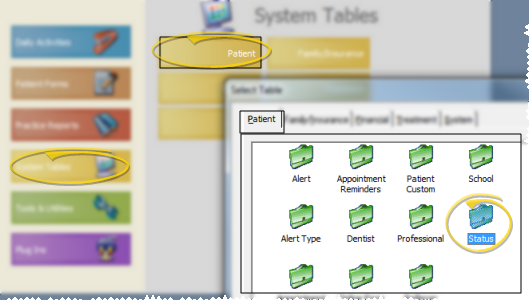
Use the Status
ViewPoint Main Menu - System Tables > Patient > Status.
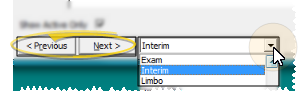
Choose Record to Work With - Use the Previous and Next buttons, or the dropdown button at the bottom of the table window to choose an existing record to work with.
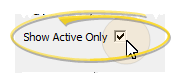
Display active / inactive records -
Create new status - Click New. Then enter the status description and other details, described below.

Edit status - Select a status to work with. If you just created a new status, it is selected automatically. If you cannot find the status you are looking for,
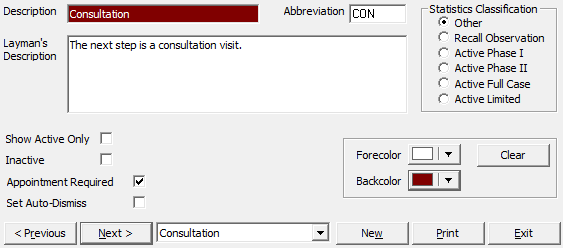
Description - You can change the name of your status in this field. Note that when a patient is assigned to a status description that begins with "Dismiss", you will be prompted for the dismissal date.
Abbreviation - The status abbreviation appears on the
Layman's description - Enter a layman's description of this status, perhaps in sentence format, primarily for use as a mail merge variable.
Inactive / active toggle - Once you create a record, you cannot delete it. You can, however, flag it  Inactive. Inactive records cannot be selected for your patients. You can, however, include inactive records in your list of records, and change them back to Active if needed.
Appointment required - Enable this option if every patient in this status should have an appointment scheduled with your office. When you process an appointment for a patient in a status that requires an appointment, you are given rescheduling opportunities, and the patient may be placed on your Needs Appointment list.
Set auto-dismiss - Enable this option to automatically enter the current date as the dismissal date (found on the Milestones tab of the patient folder) when the Status field on the Patient tab of the patient folder is changed to this status description. If the patient already has a dismissal date, this action is ignored. Also, when an Auto-Event changes the patient's status to a description that starts with "Dismiss", you are prompted for the dismissal date, which is then entered into the Milestones tab of the patient folder.
Statistics Classification - Select the classification to apply to this status. The classifications are compiled and used by your certain report and graphs. If you do not want this description included in any statistics, select Other.
Colors- Select colors to identify this status on the Status field of the Patient tab of the patient folder. You can also click Clear to reset the status to default colors.
Print -
Save your changes - Click
Default status - You can select a status to be the default for new patient folders. Of course, you can change the default for individual patients as needed, and select a different status to be the default at any time. See "Set Up Patient Folder Default Responses" for details.
Automated Status Changes - You can change a patient's status manually at any time, or trigger a status change
Status changes recorded - When you change a patient's status, the change is recorded in the patient’s Status History form. See "View Status History" for details.
 │
│  │
│  │
│ 
Ortho2.com │1107 Buckeye Avenue │ Ames, Iowa 50010 │ Sales: (800) 678-4644 │ Support: (800) 346-4504 │ Contact Us
Chat with Software Support │Chat with Network Engineering │ Chat with New Customer Care
Remote Support │Email Support │ Online Help Ver. 12/18/2015


