Use the
Confirm ViewPoint version - The ViewPoint / Element integration requires ViewPoint 9.0.5073 or greater. If you are unsure of your ViewPoint version, select Help from the ViewPoint shortcut menu and choose the About option to open your system information window. If the version number is less than 9.0.5073, please contact Ortho2 for update assistance.
Obtain integration ID & required components - Contact Element to set up your account, and to obtain and install any required components. If you want the processing provider to track credit card transactions individually by office or orthodontist, be sure to get a separate ID for each.
Enter Element credentials - Choose to complete the Element credentials fields in either your Orthodontist table or your Office table, depending upon whether you want to post Element transactions by orthodontist or by office.
If the integration fields are not available in the table you want to edit, you will need to run Data tool (602) - Toggle ViewPoint Credit Card Payment Type to switch your system's posting method. See "Use Data Tools" for details about running the tool.
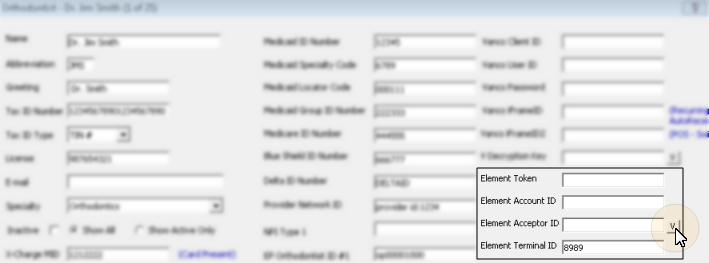
Option 1: Set up Element for each orthodontist - Skip this step if you will be tracking Element transactions by office instead, described below. Open your ViewPoint Orthodontist table, and complete each Element field with the information you have obtained from Element. (See "Set Up Orthodontist Records" for details about opening your Orthodontist table.)
After entering the credentials, click the V button beside the Element Acceptor ID field to verify that you have entered the correct data.
If you have multiple doctors, be sure to complete the fields for each orthodontist. Typically, this will be the same information for each orthodontist. However, you may have requested and received unique IDs for each doctor if your practice separates bookkeeping by orthodontist.
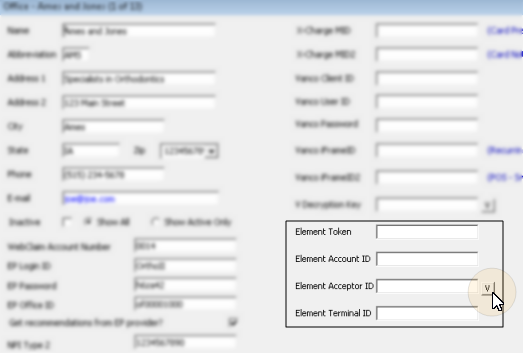
Option 2: Set up Element for each office - Skip this step if you will be tracking Element transactions by orthodontist instead, described above. Open your ViewPoint Office table, and complete each Element field with the information you have obtained from Element. (See "Set Up Office Locations" for details about opening your Office table.)
After entering the credentials, click the V button beside the Element Acceptor ID field to verify that you have entered the correct data.
Be sure to complete the fields for each office. Typically, this will be the same information for each office. However, you may have requested and received unique IDs for each location if your practice separates bookkeeping by office.
Post credit card transactions - You can use your Element integration to post credit card transactions for your patients. See "Post Credit Card Payments" for details.
Automate payments - You can use your Element integration in conjunction with Auto Receipts to automate either credit card or electronic transfer payments for your patients. See "Set Up Auto Receipt Plans" for details.
Update auto receipts contracts - (Optional.) If you have existing credit card Auto Receipts contracts, and you would like to update all of them to use your new Element account, run Data Tool (129) - Set AutoReceipt Payment Integration Type and select the Element option. If you do not use this tool, you will need to manually edit existing accounts to use the Element integration. See "Use Data Tools" for details.
Integration support - Ortho2 can help you with questions you have about system requirements, integration setup, and using your integrations within our system. However, you will need to contact the third-party supplier for specific details about using the integrated module.
│
│
│
Ortho2.com │1107 Buckeye Avenue │ Ames, Iowa 50010 │ Sales: (800) 678-4644 │ Support: (800) 346-4504 │ Contact Us
Chat with Software Support │Chat with Network Engineering │ Chat with New Customer Care
Remote Support │Email Support │ Online Help Ver. 12/18/2015