You can use the Other imaging integration to attempt to view your patient images in a ViewPoint patient folder, and use those images in merge documents.
Get Started
This integration is user-specific: You must activate the integration on each workstation where you would like to use it.
Activate Image Integration - FIrst, you need to tell ViewPoint about the imaging package you want to use.
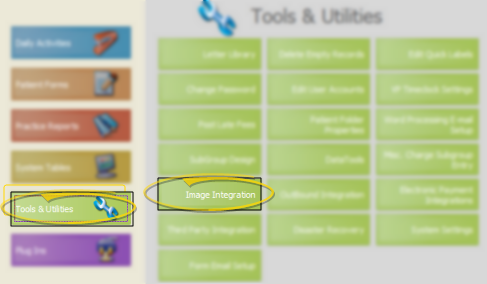
Open Image Integration Tools - ViewPoint main menu > Tools & Utilities > Image Integration.
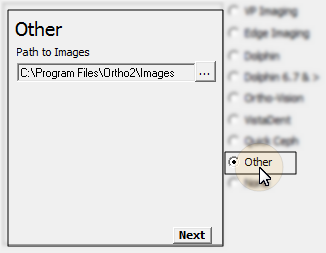
Enable "Other" Imaging Integration - Activate the Other imaging package option, and specify the location of your image files. Then, click Next to continue.
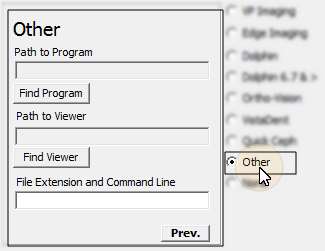
Specify Package Details - Enter your program and image paths, and specifics about your image files.
Path to program - Navigate to the folder where your imaging system files are located. You can use the Find Program button to help you locate your files. Note that this part of the integration is designed to work with imaging programs that open multiple images simultaneously.
Path to viewer - Navigate to the folder where you viewing program is located. You can use the Find Viewer button to help you locate these files. Note that this part of the integration is designed to work with viewing programs that display one image at a time.
File extension and command line - If required, type the image file extension and command line necessary for your imaging package. For example, if your imaging package is "xyzimaging" and it does not require an image extension, you might enter xyzimaging.exe JO18 in this field. However, if your imaging package requires a file extension of .IMG, you might enter xyzimaging.exe JO18.IMG in this field. Further, if your imaging package also requires a display command, you might enter xyzimaging.exe JO18.IMG/fullwindow in this field.
Set Up Image Files - Name your patient image files so that they begin with the patient's ViewPoint primary ID number, and include an alphabetical image type identifier. Note that the identifier -A is used as the thumbnail image in ViewPoint patient folders. Most often, offices choose their facial smiling image for this file type. For example, the facial smiling image for a patient whose ViewPoint primary ID is JO18 might be JO18-A.bmp. Additional image types may be identified with subsequent letters of the alphabet, i.e. -B, -C, -D through -J (up to 10 images). Be sure to be consistent when identifying your image types.
Use This Feature
Launch Imaging Package - When you double-click the image box in a ViewPoint patient folder, or click Imaging from the ViewPoint toolbar, ViewPoint attempts to launch your imaging package for that patient. Due to the intricate nature of imaging systems, Ortho2 makes no guarantee that yours will be able to function in this manner.
Double-click image box:
Click Imaging from the ViewPoint toolbar:
View patient images - Right-click the image box in the ViewPoint patient folder, then choose from the list of images for that patient.
Use Photos in ViewPoint Patient Folders - The image file that is labeled with -A is the image that will be displayed throughout ViewPoint, for example, in the patient folder, On-Deck, and the Treatment Chart.
 Imaging from the ViewPoint toolbar, ViewPoint attempts to launch your imaging package for that patient. Due to the intricate nature of imaging systems, Ortho2 makes no guarantee that yours will be able to function in this manner.
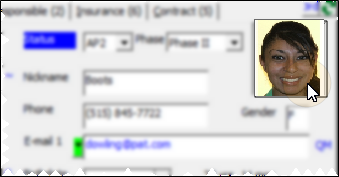


 │
│ 


