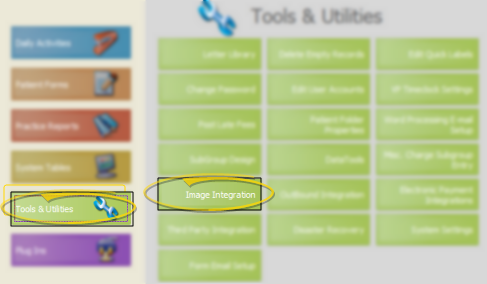
Open image integration tools - ViewPoint main menu > Tools & Utilities > Image Integration.
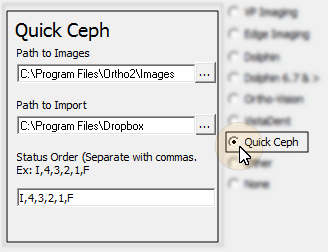
Enable Quick Ceph integration - Choose the  Quick Ceph integration type and enter your details.
-
Path to images - Navigate to the folder where your Quick Ceph images are located for ViewPoint access.
-
Path to import - Navigate to the folder where ViewPoint will save patient information for Quick Ceph to use.
-
Status order - Enter the first distinguishing character of each status (timepoint) in treatment order, separated by commas. Most often, this is something like I,4,3,2,1,F.
Image filenames - Note that your image files must be saved with the patient's ViewPoint primary ID as the first part of the filename. For example, a patient with the ViewPoint ID JO18 would need to have images saved as JO18x##.jpg, where the status character replaces the x and the image type replaces ##.
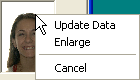
 Imaging from the ViewPoint toolbar, the Quick Ceph images for that patient are launched. You can then select an image to view in your default .JPG image viewer. If no Quick Ceph record exists for that patient, you are prompted to create one (described below).


 │
│ 


