Use the Gendex VixWin integration to start the VixWin software and open a patient's images directly from ViewPoint. The images can appear in your ViewPoint patient folder, On-Deck, and Treatment chart. In addition, you can use VixWin images ib your ViewPoint merge documents.
This integration is user-specific: You must activate the integration on each workstation where you would like to use it.
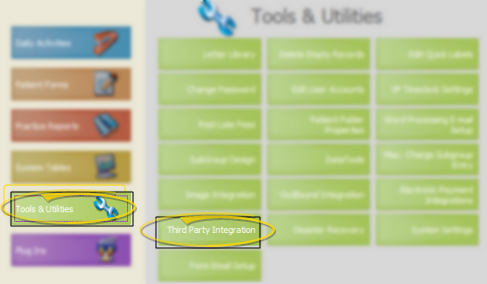
Open Third Party Integrations - ViewPoint main menu > Tools & Utilities > Third Party Integrations.
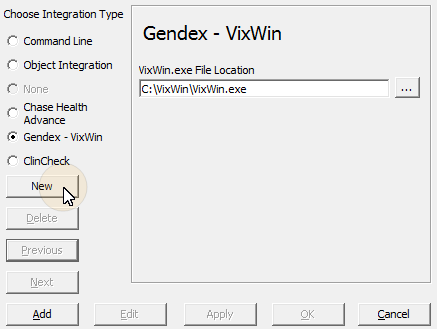
Create integration - Click New and enter your integration details.
Integration type - Choose the Gendex - VixWin integration type.
File location - Navigate to the location of your VixWin.exe file.
Finish - Click Add to submit your details, and Ok to complete the process.
IMPORTANT: You must modify your VIXWIN.INI for the ViewPoint / VixWin integration to function, However, once you have modified the file, existing patient images WILL NOT BE ACCESSIBLE from either ViewPoint or VixWin until they are re-imported into VixWin.
Activate integration - Locate and open the VIXWIN.INI file, and change the line which reads “database=1” to “database=0”.
Re-import existing patient images - Note that this process requires skill with MSExcel, and can take quite a bit of time to complete.
Navigate to your Gendex VixWin patient datafile, and open it in MSExel.
Select columns A, B, I, and J. These columns contain the patient first and last name, and a couple of Gendex-related identification numbers, including a hexadecimal ID.
Print just the selected columns (be patient - this was 88 pages for us).
With your printed output ready, search by the hexadecimal patient ID to locate .JIF files that start with the same characters, and end in 00, 01,02, etc (which distinguish different image types), and import these files into the database for each patient.
Confirm patient identification - Confirm that patient records in your VixWin database have the same Patient ID number as the corresponding ViewPoint patient folder.
View VixWin patient images - When you select VixWin from the ViewPoint toolbar Third-Party Integration icon, your VixWin software is launched, automatically loading the images for the current patient.
Edit integration - If you need to edit the integration, for example, to change a path, open your Third Party Integration tools, and use the Next / Previous buttons to select the integration to work with. Then, click Edit. Make your changes and click Apply. Then click Ok to exit.
Open your Third Party Integration tools:
Use Previous / Next to select the integration to work with.
Click Edit.
Make your changes and click Apply to save the changes.
Finally, click Ok to exit the integration dialog.
Remove integration - To remove the ViewPoint integration, open your Third Party Integration tools, and use the Next / Previous buttons to select the integration to work with. Then, click Delete.
Open your Third Party Integration tools:
Use Previous / Next to select the integration to work with:
Click Delete.
Confirm your action, then click Ok to exit the integration dialog.
Use images in merge letters - Use your patient images in your ViewPoint merge documents. See "Mail Merge Tool: Patient Images" for details.
Integration support - Ortho2 can help you with questions you have about system requirements, integration setup, and using your integrations within our system. However, you will need to contact the third-party supplier for specific details about using the integrated module.
│
│
│
Ortho2.com │1107 Buckeye Avenue │ Ames, Iowa 50010 │ Sales: (800) 678-4644 │ Support: (800) 346-4504 │ Contact Us
Chat with Software Support │Chat with Network Engineering │ Chat with New Customer Care
Remote Support │Email Support │ Online Help Ver. 12/18/2015