Dentist Records
Use the Dentist table to maintain records for the general dentists that work with your patients. Each record includes the dentist's name, practice name, address, phone number, several user-defined fields, correspondence history, list of patients assigned to and referred by this dentist, and a notepad you can use to add additional information. You can also schedule Office Calendar appointments with dentists, and review the history of past calendar appointments, directly from a dentist record.
 Open Dentist Table - You can open this feature in multiple ways: Use the method that's most convenient for you.
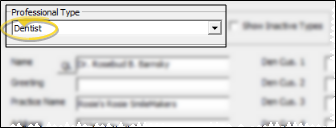
 Select Dentist Type - Select Dentist from the Professional Type drop down list. The information and features in the table vary slightly for professionals that are not dentists: See "Professional Records " for details.
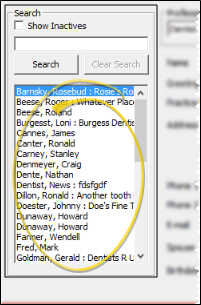
 Select Existing Dentist - Choose the Dentist professional type at the top of the window, and scroll through the list at the left of the screen to select a dentist. (You can also use the Search field to find the record you want to work with.) Then review and edit the details for this dentist. If not all your records appear in the list, you can enable the Show Inactive option to see records you have inactivated.
Enable the Practice Name option in the Display section of the Patient Folder Properties window to list dentists, professionals, and referrers alphabetically by practice name. If this option is disabled, the lists are displayed by the person's name. See "Set Up Patient Folder Default Responses" for details.
 Create a New Dentist - You can create new dentist records from the Dentist / Professional table, from the Referrer table, from the ViewPoint toolbar and shortcut menu, and from your patient folders. Use the method that's most convenient for you.
Dentist / Professional Table - "Dentist" professional type > New (or press Alt+W on your keyboard).
Referrer Table - "Other" referrer type > Copy To > Dentist. (This changes the Other referrer into a Dentist referrer record, and creates a new linked record in your Dentist table. See "Referrer Records" for details.
ViewPoint Toolbar / Shortcut Menu -Click  New on the ViewPoint toolbar , or Folder > New from the shortcut menu, and select the Dentist option. Or, press Ctrl-N on your keyboard from nearly any ViewPoint window.
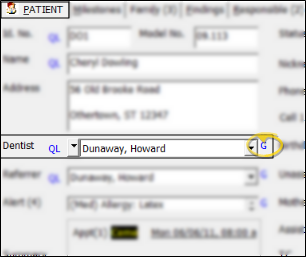
Patient Folder - Patient tab > "Dentist" professional type > Drop down list > New. See "Patient Tab" for details.
Create New Referrer / Dentist Records From Patient Folder - You can also create new dentist referrer records and the linked dentist record as you select a patient's referral source from the Patient tab of the patient folder. See "Patient Tab" for details.
 Dentist Details -Select a record and review and edit the details. Only dentist-related fields are in this table: To view and change the dentist's referral activity (such as referrer-related appointments and notepad entries), you must go to the linked record in your Referrer table, as described in "Toggle Linked Records", below.
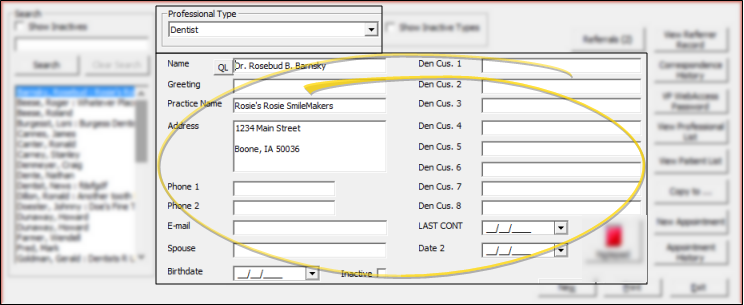
Name, Greeting, Practice Name - You can change the name and greeting fields if needed. The greeting field is primarily used for mail merge documents:
Enter the greeting as
you would like to see it in the salutation of a letter.The practice name appears along with the person's name when selecting a record. Once saved, you can use either the name or practice name to open the record.
Address, Phone, Email - Enter the address, phone numbers and email address of the party.
Spouse, Birthdate - You can optionally include a spouse name and birthdate in the record.
Inactive / Active Toggle - Once you create a record, you cannot delete it. You can, however, flag it Inactive. Records you flag as Inactive are not available for general use, but they remain in your system for reporting and other data collection needs. In addition, you can toggle records back to Active whenever needed.
User Defined Fields - Use the User Defined Fields table to set up the captions, or names, of unique fields available in several types of records, including your Patient and Responsible Party records, your Employer, Assistant, Dentist, Referrer, and Insurance tables, your Office Contacts list, and your patient identification fields. You can use these fields to track any sort of information you deem necessary. In
addition to regular text, you can type or paste a URL (Internet
hyperlink) into the field. Then, simply double-click the link to open that web page. (An active Internet connection is required for this feature to work.) See the "Dentist User Defined Field" in your User Defined Fields table for details.
Print Quick Label - Click the QLbutton beside the name field to print a Quick Label for this party. See "Dentist Labels" for details.
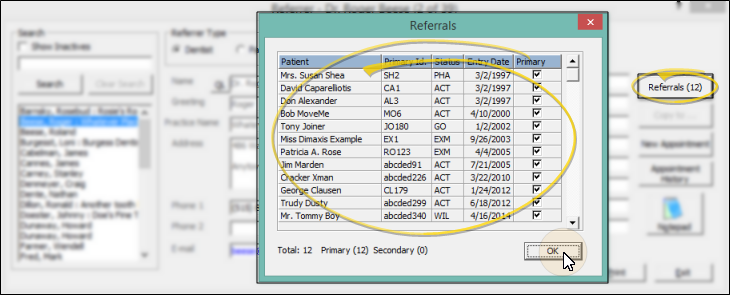
 View Referred Patients - Click Referrals to review the patients that were referred by this party. The pop up window includes the name and entry date of each patient that was referred, and whether this is the patient's primary referrer. In addition, you see the number of primary, secondary, and total referrals made by this party.
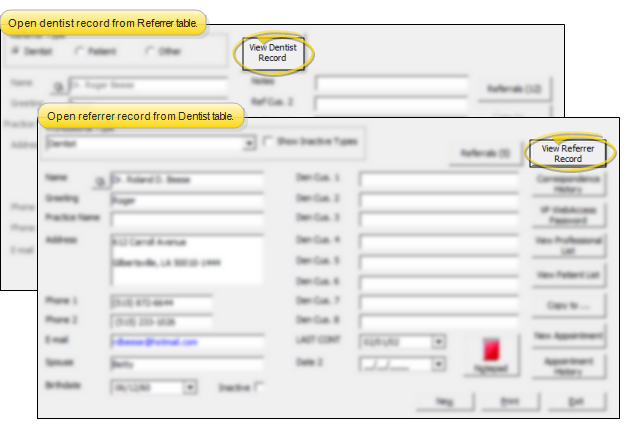
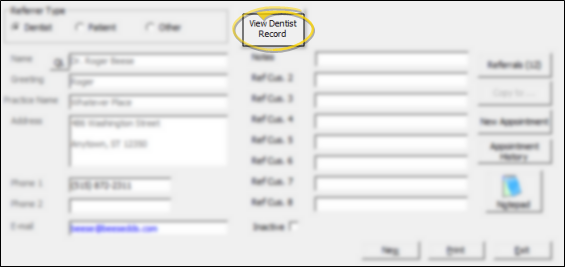
 Toggle Linked Records - Click View Dentist Record or View Referrer Record to open the corresponding ViewPoint table, with this party's linked record selected.
 View Correspondence History - Click Correspondence History to review the documents you have saved for this party.
 Use Correspondence History - You can open and view correspondence history items, add new documents, restrict access to certain documents, change a document's category, and inactivate items that you no longer need to see.
Filter Documents - Use the list of categories at the left of the correspondence history window to include only certain documents in the list, or enable the All Categories option to include all documents. ViewPoint remembers your filter settings: So, no matter what workstation you use, or which correspondence history you are working with, your favorite filters go along with you.
Change Category Assignment - Documents are added to your correspondence histories with a default category. However, you can click in the Category column to change the assigned category as needed.
Inactive / Active Toggle - Once you create a record, you cannot delete it. You can, however, flag it Inactive. Records you flag as Inactive are not available for general use, but they remain in your system for reporting and other data collection needs. In addition, you can toggle records back to Active whenever needed.
Include Inactive - Enable the Include Inactive option at the bottom of the window to include items that have been flagged Inactive in the correspondence history. If this option is disabled, only active items will appear in the list.
View a Document - Click View to open the document for viewing and printing. You must have an appropriate viewing / editing tool, such as Adobe Acrobat, installed to be able to open files. Document restrictions, described below, may prevent you from opening certain documents.
 Document Restrictions - Document restrictions control who can open an item in the correspondence history.
View Restricted Document - If
the Restricted column, at the far right edge of the window, is flagged as Yes,
only users assigned to a security
group
with Full Access
to the Miscellaneous> Restricted
Correspondence rights can view the document. If the Restricted column is No, anyone can view the document. (See "Set Up Security Access" for details.)
Add / Remove Restriction - To change the restriction status of a document, right-click the document and select the Restriction option. You can change document restriction status only if your security group allows Full Access to the Miscellaneous >
Manage Restricted Correspondence rights. (See "Set Up Security Access" for details.)
Import Documents - You can import any document, in PDF form, into your dentist, professional, insurance company and office contacts correspondence histories, as well as into your VP Document practice correspondence history. See "Import Documents" for details.
Capture Documents - As you print a non-merge document, report, or other printable item, you can use the Capture tool to save a copy of that document in the correspondence history. See "Capture Documents" for details.
Scan Document - Use the Scan tool to send a digital copy of any document from your scanning device to a correspondence history.See "Scan Documents" for details.
Replace a Document - Use the Replace feature to overwrite a document in a correspondence history with a new document. You might do this, for example, to update your company policy and procedure handbook. Right-click a document, and select Replace. Then choose whether to import, capture, or scan the new document, overwriting the original document.
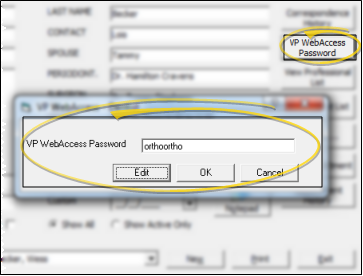
 VP WebAccess Password - Click VP WebAccess Password to review and edit the online password for this party. You or the individual may also
change the password from within the VP WebAccess system.
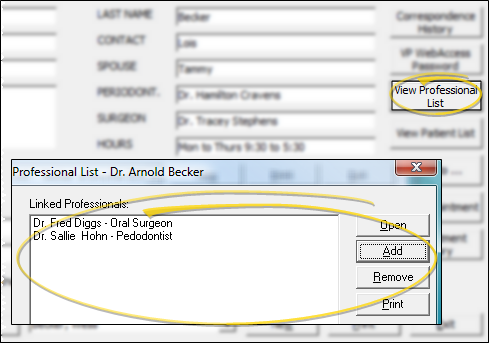
 View Linked Professionals - Click View Professional List to maintain the list of professionals that this dentist prefers to work with. From this window, you can link another professional, remove a professional from the list, print the list, and open linked records.
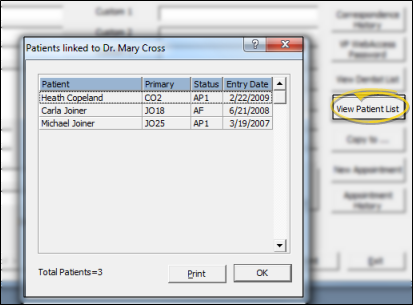
 View Patient List - Click View Patient List to see which patient folders are linked to this record. You can click Print (or press Alt-P on your keyboard) to print the list, and click OK to close the window.
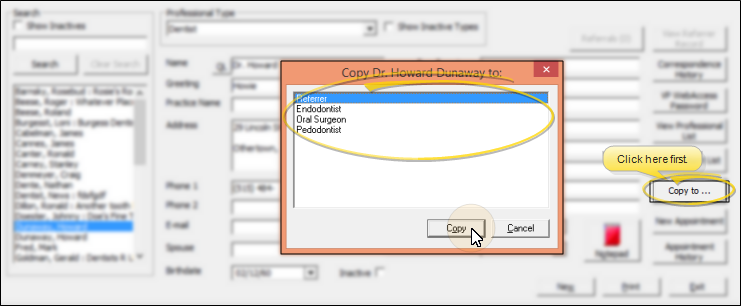
 Copy & Link Record - Click Copy To, then select the table where you would like to add a copy of this record. This feature is useful for quickly adding individuals that serve various roles (dentist, professional, referrer) to your database. In addition, dentist and referrer records that are created in this manner remain linked, so that when you change a name or address in one record, the linked record is updated also.
 Notepad - Click the
  Notepad icon to open the notepad window for this record. When the notepad is empty, the icon is red; when the notepad has existing text, the icon is blue. Use the notepad to type free-form notes. You can categorize your notes on several tabs to view only the categories of notes you need to see.

 View Notes - Click a tab at the bottom
of the notepad window to choose which page to work with. If a tab
contains text, a plus sign (+) appears
beside the tab caption. (See "Set Up Notepad Tab Captions" for details about naming the pages.)

 Resize the Window - Hover your cursor at a corner of
the window, then click and drag to the desired size. ViewPoint remembers you preferred size, even after you exit and
re-enter.

 Add & Edit Notes - Type your note in the notepad text box. You can use the notepad toolbar, right-click menu, and standard word processing keyboard shortcuts to complete your note, emphasize text, and add the current date and user initials. In
addition to regular text, you can type or paste a URL (Internet
hyperlink) into the field. Then, simply double-click the link to open that web page. (An active Internet connection is required for this feature to work.)
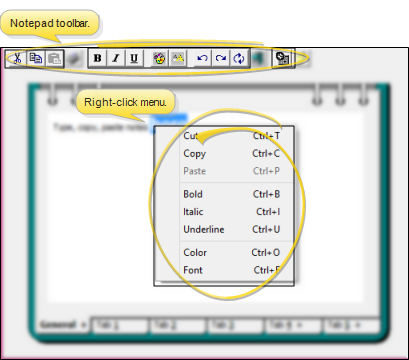
Your toolbar icons may appear slightly different, depending on which notepad you are working with.
Date Stamp - Click  Date Stamp on the notepad toolbar (or press F2 on your keyboard) to insert the current date and user's initials at the cursor location.
Cut, Copy, Paste Text - You can use the icons on the notepad toolbar to  Cut,
Cut,  Copy, and
  Paste notepad text You can also right-click to access a basic text editing menu, or use standard keyboard shortcuts.
Enhance Text - Use the notepad toolbar, right-click menu, or standard word processing keyboard shortcuts to edit the  Bold,
Bold,  Italics,
  Underline,
  Color, and
  Font properties of your text. If you change the text font, be sure you select a font that is available to everyone in your network, or the text may not display correctly on some workstations.
Undo / Redo Last Action - Use the  Undo /
  Redo icons on the notepad toolbar (Or press Ctrl+Z / Ctrl+Y respectively) to erase the most recently completed editing action, or reverse the most recent Undo action.
Reload - Use the  Reload icon on the notepad toolbar to discard any changes you have made since entering the notepad. You must confirm your action before continuing: Once you reload the original text, the action cannot be undone.
Print - Click  Print from the notepad toolbar (or press Ctrl+P on your keyboard) to send the contents of the currently active notepad tab to any printer available to your workstation.
Save and Exit - When you close the notepad window with either the  Exit icon on the notepad toolbar, or the
  in the upper-right corner of the window, all your changes are saved immediately.
Overwrite Prevention - Because multiple users can access an individual record simultaneously, ViewPoint verifies that no one else has changed the notepad text you've been working on before you are allowed to save it. If
the notepad has been edited by another user, you are given the option of reviewing and accepting
the updated notes (overwriting your own changes), or rejecting the changes, and saving your own changes. If the conflict cannot be resolved, the original and changed text are
both stored in a text file (NOTES.TXT)
that you can find in your ViewPoint system directory.
 Manager Calendar Appointments - You can schedule Office Calendar appointments, and view current and past appointments for this party directly from this record.
Schedule An Appointment - Click New Appointment, then complete the details about an upcoming appointment or event for this party. The appointment is saved to your Office Calendar, where you can review and edit the appointment details as needed. See "Office Calendar" for details.
View Appointment History - Click Appointment History to view the dates, times, and notes of current and past appointments that were scheduled for this party. You cannot change any details here: You must go to your calendar to edit or delete the appointment. See "Add & Edit Office Calendar Appointments" for details.
Print - Click Print
to send the list to your printer.You
may also want to print the list as a report. See "Dentist List" for details.
Save Your Changes - Click Exit to save the changes you have made and close the editing window.
Dentist Detail Report - Run the Dentist Detail - by Dentist report to obtain a list of the patients that are seen by each dentist, sorted by dentist name.The report includes each patient's contract fee amount, subtotaled by dentist. See "Dentist Detail Report" for details.
![]() Open Dentist Table - You can open this feature in multiple ways: Use the method that's most convenient for you.
Open Dentist Table - You can open this feature in multiple ways: Use the method that's most convenient for you.![]() Select Dentist Type - Select Dentist from the Professional Type drop down list. The information and features in the table vary slightly for professionals that are not dentists: See "Professional Records " for details.
Select Dentist Type - Select Dentist from the Professional Type drop down list. The information and features in the table vary slightly for professionals that are not dentists: See "Professional Records " for details.![]() Select Existing Dentist - Choose the Dentist professional type at the top of the window, and scroll through the list at the left of the screen to select a dentist. (You can also use the Search field to find the record you want to work with.) Then review and edit the details for this dentist. If not all your records appear in the list, you can enable the Show Inactive option to see records you have inactivated.
Select Existing Dentist - Choose the Dentist professional type at the top of the window, and scroll through the list at the left of the screen to select a dentist. (You can also use the Search field to find the record you want to work with.) Then review and edit the details for this dentist. If not all your records appear in the list, you can enable the Show Inactive option to see records you have inactivated.![]() Create a New Dentist - You can create new dentist records from the Dentist / Professional table, from the Referrer table, from the ViewPoint toolbar and shortcut menu, and from your patient folders. Use the method that's most convenient for you.
Create a New Dentist - You can create new dentist records from the Dentist / Professional table, from the Referrer table, from the ViewPoint toolbar and shortcut menu, and from your patient folders. Use the method that's most convenient for you. ![]() Dentist Details -Select a record and review and edit the details. Only dentist-related fields are in this table: To view and change the dentist's referral activity (such as referrer-related appointments and notepad entries), you must go to the linked record in your Referrer table, as described in "Toggle Linked Records", below.
Dentist Details -Select a record and review and edit the details. Only dentist-related fields are in this table: To view and change the dentist's referral activity (such as referrer-related appointments and notepad entries), you must go to the linked record in your Referrer table, as described in "Toggle Linked Records", below.![]() View Referred Patients - Click Referrals to review the patients that were referred by this party. The pop up window includes the name and entry date of each patient that was referred, and whether this is the patient's primary referrer. In addition, you see the number of primary, secondary, and total referrals made by this party.
View Referred Patients - Click Referrals to review the patients that were referred by this party. The pop up window includes the name and entry date of each patient that was referred, and whether this is the patient's primary referrer. In addition, you see the number of primary, secondary, and total referrals made by this party.![]() Toggle Linked Records - Click View Dentist Record or View Referrer Record to open the corresponding ViewPoint table, with this party's linked record selected.
Toggle Linked Records - Click View Dentist Record or View Referrer Record to open the corresponding ViewPoint table, with this party's linked record selected. ![]() View Correspondence History -
View Correspondence History - ![]() Use Correspondence History - You can open and view correspondence history items, add new documents, restrict access to certain documents, change a document's category, and inactivate items that you no longer need to see.
Use Correspondence History - You can open and view correspondence history items, add new documents, restrict access to certain documents, change a document's category, and inactivate items that you no longer need to see.![]() VP WebAccess Password - Click VP WebAccess Password to review and edit the online password for this party. You or the individual may also
change the password from within the VP WebAccess system.
VP WebAccess Password - Click VP WebAccess Password to review and edit the online password for this party. You or the individual may also
change the password from within the VP WebAccess system.![]() View Linked Professionals - Click View Professional List to maintain the list of professionals that this dentist prefers to work with. From this window, you can link another professional, remove a professional from the list, print the list, and open linked records.
View Linked Professionals - Click View Professional List to maintain the list of professionals that this dentist prefers to work with. From this window, you can link another professional, remove a professional from the list, print the list, and open linked records.![]() View Patient List - Click View Patient List to see which patient folders are linked to this record. You can click Print (or press Alt-P on your keyboard) to print the list, and click OK to close the window.
View Patient List - Click View Patient List to see which patient folders are linked to this record. You can click Print (or press Alt-P on your keyboard) to print the list, and click OK to close the window.![]() Copy & Link Record - Click Copy To, then select the table where you would like to add a copy of this record. This feature is useful for quickly adding individuals that serve various roles (dentist, professional, referrer) to your database. In addition, dentist and referrer records that are created in this manner remain linked, so that when you change a name or address in one record, the linked record is updated also.
Copy & Link Record - Click Copy To, then select the table where you would like to add a copy of this record. This feature is useful for quickly adding individuals that serve various roles (dentist, professional, referrer) to your database. In addition, dentist and referrer records that are created in this manner remain linked, so that when you change a name or address in one record, the linked record is updated also.![]() Notepad - Click the
Notepad - Click the  Notepad icon to open the notepad window for this record. When the notepad is empty, the icon is red; when the notepad has existing text, the icon is blue. Use the notepad to type free-form notes. You can categorize your notes
![]() Manager Calendar Appointments - You can schedule Office Calendar appointments, and view current and past appointments for this party directly from this record.
Manager Calendar Appointments - You can schedule Office Calendar appointments, and view current and past appointments for this party directly from this record.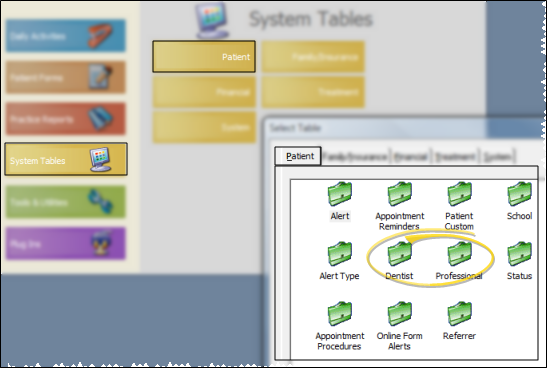
 Dentist.


 New on the ViewPoint toolbar , or Folder > New from the shortcut menu, and select the Dentist option. Or, press Ctrl-N on your keyboard from nearly any




 Date Stamp on the notepad toolbar (or press F2 on your keyboard) to insert the current date and user's initials at the cursor location.
 Cut,
Cut,  Copy, and
  Paste notepad text You can also right-click to access a basic text editing menu, or use standard
  Color, and
  Font properties of your text. If you change the text font, be sure you select a font that is available to everyone in your network, or the text may not display correctly on some workstations.
 Undo /
  Redo icons on the notepad toolbar (Or press Ctrl+Z / Ctrl+Y respectively) to erase the most recently completed editing action, or reverse the most recent Undo action.
 Reload icon on the notepad toolbar to discard any changes you have made since entering the notepad. You must confirm your action before continuing: Once you reload the original text, the action cannot be undone.
 Print from the notepad toolbar (or press Ctrl+P on your keyboard) to send the contents of the currently active notepad tab to any printer available to your workstation.
 Exit icon on the notepad toolbar, or the
  in the upper-right corner of the window, all your changes are saved immediately.

