 Patient Identification Code Details - (These are system-wide settings: Any changes you make affect all ViewPoint users.) Use the Identification Codes fields on the New Patient Defaults tab of your patient folder properties window to manage how ViewPoint handles patient identification codes.
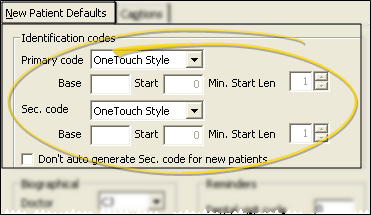
 Primary / Secondary Code Styles - Select a style for your identification codes. You may have different styles for your primary code and secondary code.
(none) - Select this option if you do not want to generate this identification code for new patient folders automatically. After a patient folder is created, you may manually assign a code as needed. The AutoGenerate New ID/Model No option when editing the patient name or address, will not work if you select this format.
Alphanumeric - Select this style to advance the identification code for each new patient folder numerically. The Base and Start fields, described below, then determine the format of the code.
OneTouch Style - Select this style to generate a unique identification code composed of the first two
letters of the patient’s last name and the next sequential number. (i.e. Alex Thompson's identification code might be "TH39".)
Base - (Alphanumeric style only) - Enter the text you want to include at the beginning of the alphanumeric format (i.e. 2017-). All alphanumeric identification codes will begin with this value. Some offices change this field each year to indicate when the patient started treatment.
Start - (Alphanumeric style only) Enter the next "counter" number to use when auto-generating an alphanumeric identification code. Generally,
you do not need to edit this field. However,
some offices re-set this field at the beginning of each year (or other period) to "count" the number of patients entered or started during that period of time.
Minimum Start Length - (Alphanumeric style only) Specify the minimum number of digits to generate for an alphanumeric identification number. When the next
available number has fewer digits than your minimum start length, leading 0's are inserted to fill in the extra space. For example, if your minimum start
length is 3 and the next available code number is 21, the number 021 will be assigned to the next patient folder. When the next available
number reaches 100 (three digits), no leading 0's will be inserted.
Don't AutoGenerate Sec. ID Code for New Patients - Enable this option if you do not want to generate a secondary ID code when you create a new patient folder. For example, you might not want to generate a secondary ID number until after the records appointment. When you want the code generated, you can click the patient name or address field on the Patient tab of the patient folder and enable AutoGenerate Sec. Code. ViewPoint will generate an appropriate secondary identification code (according to the format you selected above) at that time. See "Patient Tab" for details. You can alternately enter the code manually at any time.
Identification Code Names - Define the names for both the primary and secondary identification codes with the User Defined Fields table. You can also edit this caption from the Patient Folder Captions tab of your Patient Folder Properties.
Changing Patient Code Generation Defaults - If you change these default values, the identification codes of existing patients do not change automatically. However, if you auto-generate new ID codes for existing patients, the new defaults will determine how the new ID codes are created.
 Biographical Details - Use the Biographical, Res. Party, and Display sections of the properties window to set up certain default responses and viewing options for patient folders.
These are user settings: Your defaults may be different from another ViewPoint user's defaults. However, you can easily copy your office's preferred defaults to your user defaults (and override your existing settings) by using the Copy feature of the Database Defaults tab. See "Manage Patient Database Defaults" for details.
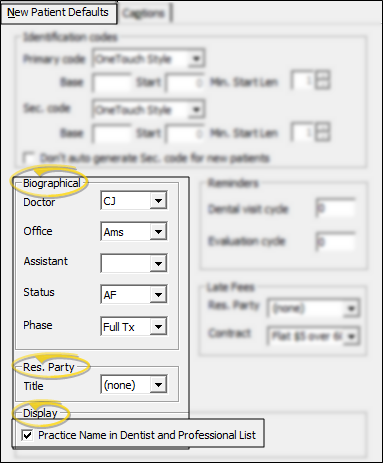
Doctor - Select the orthodontist to assign to new patient folders. You can change the assignment before you save the folder, or whenever necessary. You maintain the list of doctors in your practice in your Orthodontist table. The patient's financial transactions and appointments default to the doctor assigned to the Patient tab of the patient folder. See "Orthodontist Table" for details.
Office - Select the office to assign to new patient folders. You can change the assignment before you save the folder, or whenever necessary. Use the Office table to identify office locations in your practice. The patient's financial transactions and appointments default to the office assigned to the patient folder. Some fields are required for certain types of insurance claim submission and credit card transaction processing. See "Office Table" for details.
Assistant - (Optional.) Select the assistant to assign to new patient folders. You cannot change this assignment until after the patient folder is saved; therefore, many offices choose to assign none as the default assistant. You maintain the list of assistants in your practice in your Assistant table. The patient's appointments default to the assistant assigned to the Patient tab of the patient folder.See "Assistant Table" for details.
Status - Select the status to assign to new patient folders. You cannot change this assignment until after the patient folder is saved; therefore, many offices choose to assign Exam or a similar generic status. You maintain your list of status descriptions in your Status table. You may manually edit a patient's status from the Patient tab of the patient folder, or change it via Auto-Events as needed. See "Status Table" for details.
Phase - Select the phase to assign to new patient folders. You cannot change this assignment until after the patient folder is saved. You maintain your list of phase descriptions in your Phase table. The patient contract, findings, treatment chart and other data are saved by phase: That is, these items are flagged with the phase currently assigned to the Patient tab of the patient folder. See "Phase Table" for details.
Res. Party Title - Select the default title to add to the responsible party name (i.e. Mr. & Mrs.). You cannot edit the list of available choices. You can change the assignment before you save the folder, or whenever necessary.
Display Practice Name Option - Enable the Practice Name option in the Display section of the Patient Folder Properties window to list dentists, professionals, and referrers alphabetically by practice name. If this option is disabled, the lists are displayed by the person's name.
 Reminder Cycle Options - Use the Reminders fields of your patient folder properties settings to define the suggested number of months between dental visits and progress evaluations.
These are user settings: Your defaults may be different from another ViewPoint user's defaults. However, you can easily copy your office's preferred defaults to your user defaults (and override your existing settings) by using the Copy feature of the Database Defaults tab. See "Manage Patient Database Defaults" for details.
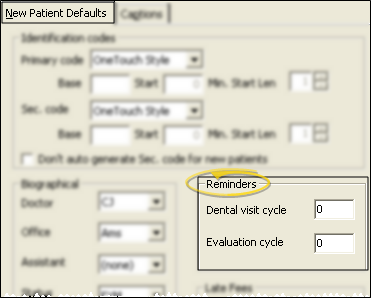
Dental Visit Cycle - Enter the number of months you suggest a patient wait between dental visits. This value is assigned to the Milestones tab of new patient folders automatically, but may be changed as needed. As you schedule appointments, the Grid Scheduler checks the dental visit dates on the Milestones panel of the patient folder, and prompts you to update them if appropriate. You may also change these dates on the Milestones tab at any time.
Evaluation Cycle - Enter the optimum number of months you wait between formal treatment evaluations. This value is assigned to the Milestones tab of new patient folders automatically, but may be changed as needed. As you schedule appointments, the Grid Scheduler checks the progress evaluation dates on the Milestones panel of the patient folder, and prompts you to update them if appropriate. You may also change these dates on the Milestones tab at any time.
 Late Fee Details - Use the Late Fee fields of your patient folder properties settings to define the default late fee for both individual transactions and contract fees.
These are user settings: Your defaults may be different from another ViewPoint user's defaults. However, you can easily copy your office's preferred defaults to your user defaults (and override your existing settings) by using the Copy feature of the Database Defaults tab. See "Manage Patient Database Defaults" for details.
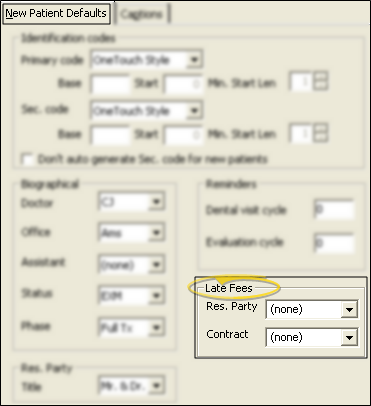
Res. Party - Select the default late fee policy to apply to miscellaneous charges posted to the responsible party. You cannot change the default until after the patient folder is saved. This default may be the same as, or different from, the policy assigned to contract fees.
Contract - Select the default late fee policy to apply to contract fees that fall past due. You can change this assignment as you create the contract for the patient. This default may be the same as, or different from, the policy assigned to contract fees.
Sibling Record Defaults - When you create a patient
folder from a non-patient family member record with the Make
Patient
tool, late fee policies default to the policy assigned
to the responsible parties you copy to the new folder. Otherwise, the default policy comes from your New Patient Defaults.
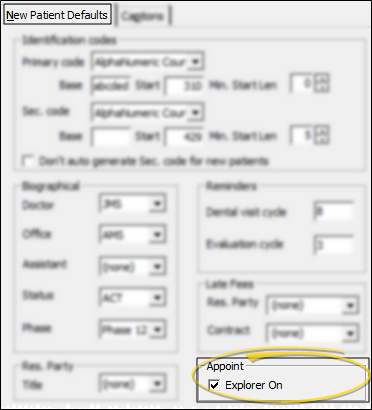
 Appointment Defaults - Use the Explorer On option of your patient folder properties settings to specify whether the Explorer opens for the patient when you use the Save & Appoint feature from a new patient folder. If the Explorer On option is disabled, the Save & Appoint feature opens your Grid Scheduler to a scheduling grid, with the new patient activated.
These are user settings: Your defaults may be different from another ViewPoint user's defaults. However, you can easily copy your office's preferred defaults to your user defaults (and override your existing settings) by using the Copy feature of the Database Defaults tab. See "Manage Patient Database Defaults" for details.
 Email Form Options - Enable the form options you would like to send via email, rather than printing them. Even though set up email form defaults for new patients in your Patient Properties, you can turn these features on/off directly from the Patient and Responsible tabs of the patient folder. When you email a form, rather than printing it, it is still recorded in the appropriate correspondence history.
These are user settings: Your defaults may be different from another ViewPoint user's defaults. However, you can easily copy your office's preferred defaults to your user defaults (and override your existing settings) by using the Copy feature of the Database Defaults tab. See "Manage Patient Database Defaults" for details.
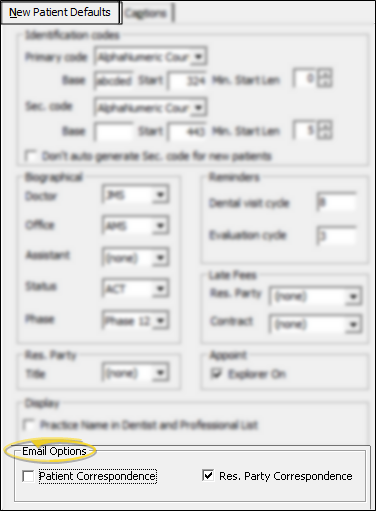
Patient Correspondence - Enable this option if you want to send the patient an email of their appointment card, rather than printing it.
Res. Party Correspondence - Enable this option if you want to send the responsible party an email of the patient's appointment card, as well as payment receipts via email rather than printing them.
If both the Patient and Res. Party email options are enabled, both parties will receive appointment card email messages.
 Open Patient Folder Properties Window - You can open this feature in multiple ways: Use the method that's most convenient for you.
 Open New Patient Defaults Tab - Click the New Patient Defaults tab, if needed.
  Enter Default Responses - As you enter the responses you want to automatically insert into new patient folders, be aware that certain fields are system-wide, and other fields are specific to your user account. Each type of response is noted below.
 Properties. (A patient folder must be open first: Otherwise, the Properties icon will open your Main Menu Properties instead of your Patient Folder properties window.)

