With the Treatment
You can open this feature in multiple ways: Use the method that's most convenient for you.
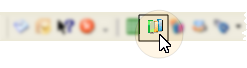
ViewPoint Toolbar![]()
 Treatment Chart.
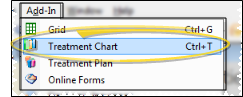
Shortcut Menu![]() Add-In > Treatment Chart. (Or, press Alt+D on your keyboard to open the Add-In menu options.)
Add-In > Treatment Chart. (Or, press Alt+D on your keyboard to open the Add-In menu options.)
Grid Scheduler - Right-click an appointment and select Treatment Chart to open the patient's full Treatment Chart page. Or, while using Explore to search for an appointment, click the Tx Chart button to view a limited version of the patient's treatment chart. (See "View & Navigate Your Schedule" for details.)
On-Deck Operatory - Click to a patient in your Operatory, then right-click and choose Treatment Chart to open the patient's treatment chart. (See "View Operatory " for details.)
Keyboard Shortcut - Ctrl+T.
Patient Fingerprint - You can enable patients to open their own treatment chart when they touch the fingerprint sensor installed at your workstation. See "Set Up ViewPoint Properties" for details.
Milestone Reminders (Optional.) - Depending on your Display Milestone Reminders setting, you may be prompted to update milestone dates when you either schedule an appointment or open the treatment chart for a patient whose Next Dental Visit and/or Next Progress Report date is either today or in the past. See "Manage Milestone Reminders" for details.
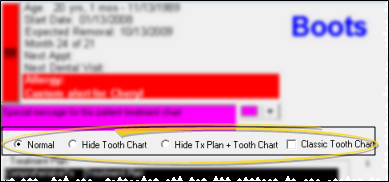
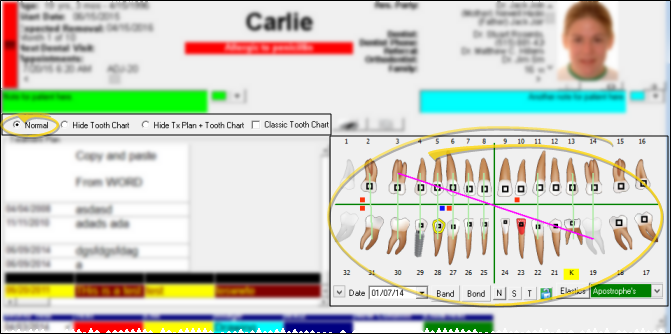
Viewing Mode![]() Choose whether to include / exclude tooth chart and treatment plan data on your Treatment Chart page.
Choose whether to include / exclude tooth chart and treatment plan data on your Treatment Chart page.
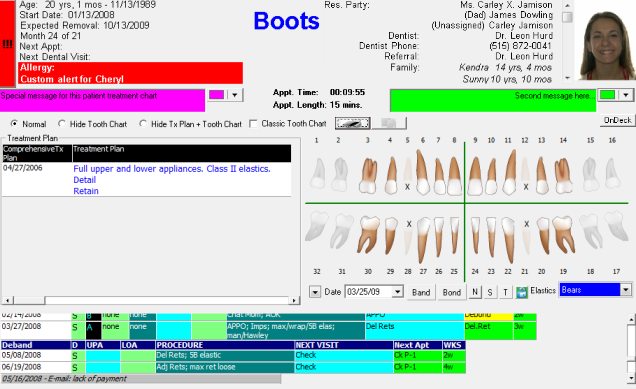
Patient Summary![]() The summary at the top of the screen includes
any medical
alerts, in RED.
In addition, the patient nickname displays in large letters, in the color defined by your heading properties. The
summary also includes future appointments scheduled, family relationships, the patient's photos (if you use integrated imaging), dentist name and phone number, and referral and orthodontist names.
and up to 2
messages
unique to this patient. If the patient's birthdate is within one month
of today's date, the patient age is highlighted. Note that you will usually need to use the scrollbar at the right side of the header to see additional information.
The summary at the top of the screen includes
any medical
alerts, in RED.
In addition, the patient nickname displays in large letters, in the color defined by your heading properties. The
summary also includes future appointments scheduled, family relationships, the patient's photos (if you use integrated imaging), dentist name and phone number, and referral and orthodontist names.
and up to 2
messages
unique to this patient. If the patient's birthdate is within one month
of today's date, the patient age is highlighted. Note that you will usually need to use the scrollbar at the right side of the header to see additional information.
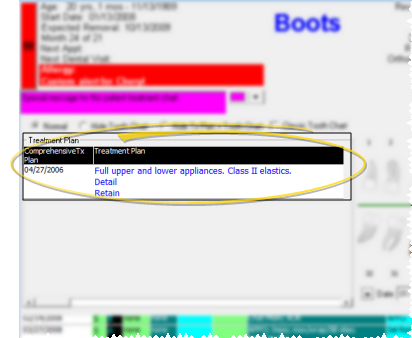
Treatment Plan![]()
Patient Images![]() In addition, double-clicking an image in the Treatment Hub opens the patient Imaging page to that image. The patient's most recent facial smiling photo appears when you open the treatment chart. Use the [<] and [>] buttons to progress through all images in the timepoint. You can also click [<>] to maximize the displayed image, or double-click the image to open the layout.
In addition, double-clicking an image in the Treatment Hub opens the patient Imaging page to that image. The patient's most recent facial smiling photo appears when you open the treatment chart. Use the [<] and [>] buttons to progress through all images in the timepoint. You can also click [<>] to maximize the displayed image, or double-click the image to open the layout.
Tooth Chart![]()
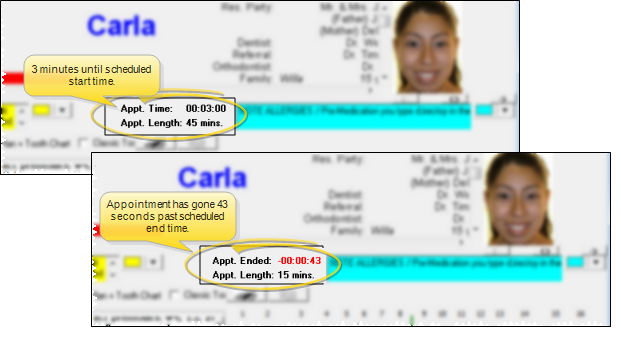
Appointment Timer![]() The appointment timer keeps track of how long you have until a patient's scheduled appointment time, and how long the appointment has taken so far. (If the patient does not have an appointment today, or if the appointment has been processed as Kept, the timer does not appear.)
The appointment timer keeps track of how long you have until a patient's scheduled appointment time, and how long the appointment has taken so far. (If the patient does not have an appointment today, or if the appointment has been processed as Kept, the timer does not appear.)
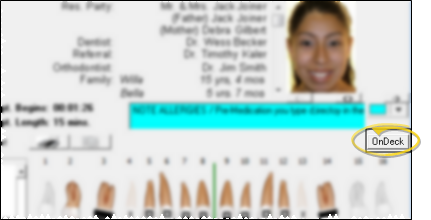
Operatory Processing![]() Click the OnDeck button at the right edge of the Treatment Chart window to process the patient's status in your Operatory Display. (The patient must be signed into On-Deck before this button will appear on the Treatment Chart.) See "Update On-Deck Operatory" for details.
Click the OnDeck button at the right edge of the Treatment Chart window to process the patient's status in your Operatory Display. (The patient must be signed into On-Deck before this button will appear on the Treatment Chart.) See "Update On-Deck Operatory" for details.
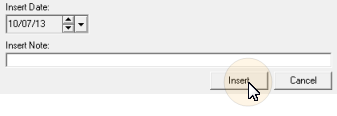
Patient History Notes![]() Click the
Click the
 icon on the Treatment Chart toolbar to add a new patient history note. Then enter note date and text, and click Insert. You can optionally display the notes within your list of treatment chart records (described below). You can also add and remove these notes from the Complete Patient History form, and the Pat. History Notes tab of the patient notepad.
Treatment Chart Records![]() Review the treatment chart records you have
created for this patient. The information shown in an individual record depends upon the style you used to create it The records are listed in the order you create them, so you accumulate a chronological record of activity as a patient progresses through treatment. See "Add, Edit, & Sign Treatment Chart Records" for details.
Review the treatment chart records you have
created for this patient. The information shown in an individual record depends upon the style you used to create it The records are listed in the order you create them, so you accumulate a chronological record of activity as a patient progresses through treatment. See "Add, Edit, & Sign Treatment Chart Records" for details.
Print Treatment Chart - Click the  icon on the Treatment Chart toolbar to print the currently displayed data, including the patient photo at the top of the screen. You might also want to generate
the Basic
Treatment Chart report
which does not include the patient photo.
icon on the Treatment Chart toolbar to print the currently displayed data, including the patient photo at the top of the screen. You might also want to generate
the Basic
Treatment Chart report
which does not include the patient photo.
Copy Column Text![]() You can right-click a treatment chart column to copy the text to your clipboard. You can then paste the text into another
You can right-click a treatment chart column to copy the text to your clipboard. You can then paste the text into another
Sign Treatment Chart Records - Users with appropriate security rights can right-click to sign treatment chart entries, lending additional accountability to the records. This feature is especially useful in university settings, where entries are double-checked for accuracy. See "Add, Edit, & Sign Treatment Chart Records" for details.
Audit Records - Right-click to audit any treatment chart record.
Add & Edit Treatment Chart Records - Add a treatment chart record to a patient folder to document each procedure you complete for a patient. You can manually enter treatment chart records, import findings data, and automatically add data while you edit a patient's tooth chart. In addition, you can verify treatment chart activity by requiring authorized persons (such as your orthodontists) to sign new entries before they become a permanent part of the patient's record.See "Add, Edit, & Sign Treatment Chart Records" for details.
Alert Stop - If the patient has an alert stop flag for this feature, the alerts box will appear when you initiate this feature for the patient. Review the alert information, then click the box to continue. (See "Patient Alerts" for details.)
Toggle Chart & Plan - Click the ![]() Chart/Plan icon from the Treatment Chart / Plan toolbar to toggle between viewing the patient's chart and plan.
Chart/Plan icon from the Treatment Chart / Plan toolbar to toggle between viewing the patient's chart and plan.
Open Health history - Click the HH button on the Treatment Chart toolbar to open the patient's most recent health history. See "View & Update Online Form Results" for details.
 │
│  │
│  │
│ 
Ortho2.com │1107 Buckeye Avenue │ Ames, Iowa 50010 │ Sales: (800) 678-4644 │ Support: (800) 346-4504 │ Contact Us
Chat with Software Support │Chat with Network Engineering │ Chat with New Customer Care
Remote Support │Email Support │ Online Help Ver. 12/18/2015


 icon on the Treatment Chart toolbar to include / exclude patient history notes (described above) within your list of treatment chart records. The entries are displayed chronologically, and appear in italics with a gray background to make them easier to distinguish from treatment chart records. (You can also view these notes from the