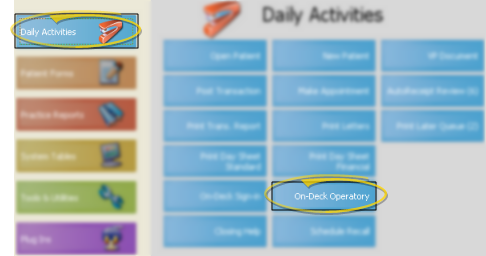
ViewPoint Main Menu - Daily Activities > On-Deck Operatory.
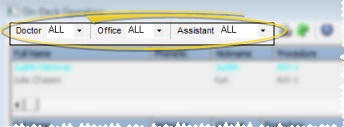
Doctor / Office / Assistant - You may select to display only the patients scheduled for a specific orthodontist, office or assistant, or select to view all patients signed into your Operatory. The doctor/office/assistant used for the Operatory display are those assigned to patient appointments, and not necessarily the doctor/office/assistant assigned as the primary orthodontist/location in the patient folder.
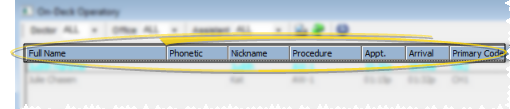
Appointment Details- The fields of information and color-coding that appear on your Operatory display are determined by your On-Deck Properties. If not all information fits on the screen, use the scroll bar at the bottom of the window to see more fields. See "Get Started with On-Deck" for details.
Medical Alerts - A (MED) notice appears before the patient full name if the patient has a medical alert. For the medical alert to appear, the patient full name must be selected as a field to view in your On-Deck Properties.
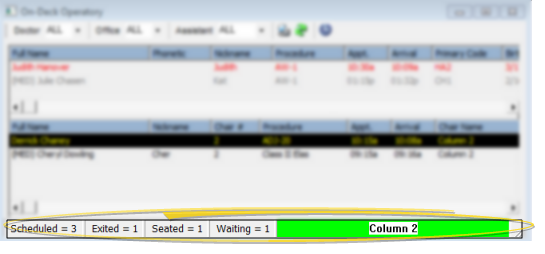
Split-Screen Division- If you are viewing the Operatory display in split-screen mode, you can drag the center bar between the two portions of the screen to adjust the amount of space allotted to each portion. See "Set Up Split-Screen View " for details.
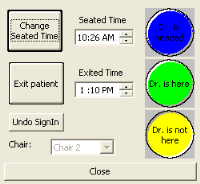
Status Bar- The status bar at the bottom of your Operatory window summarizes the number of patients scheduled for today, as well as the number of patients seated, exited and waiting. The chair number of the earliest appointment you have processed as Doctor Needed blinks, indicating the patient that needs assistance next.
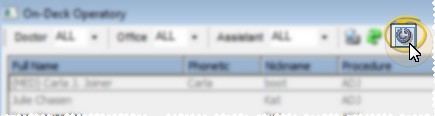
Sign Patients Into On-Deck - Click ![]() Sign-in from the Operatory toolbar, then
double-click the patient name. See "Use Staff Sign-In Options" for details.
Sign-in from the Operatory toolbar, then
double-click the patient name. See "Use Staff Sign-In Options" for details.
Process Patients - As a patient's appointment status changes, double-click the patient name to process the patient. If the patient has signed in for multiple appointments on the same day, be sure you are processing appropriate procedure. See "Update On-Deck Operatory" for details.
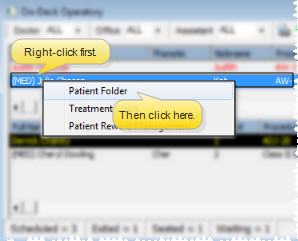
Open a Patient Folder - Select a patient in your Operatory, then right-click and choose Patient Folder to open the patient's record to the Patient tab. (See "Patient Tab" for details.)
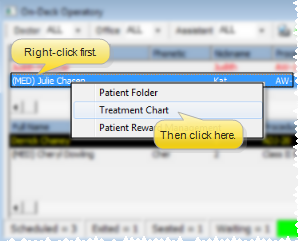
Open a Patient Treatment Chart - Select a patient in your Operatory, then right-click and choose Treatment Chart to open the patient's treatment chart. (See "View Treatment Chart" for details.)
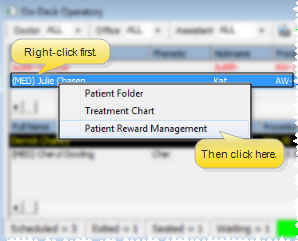
Open a Patient Rewards Window - Select a patient in your Operatory, then right-click and choose Patient Rewards Management to open the Patient Points tab of your Patient Rewards Management window. (See "Manage Patient Reward Points" for details.)
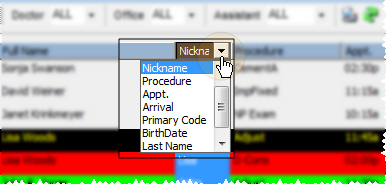
Rearrange Headings - Click and drag a column heading to a new location, or click a column heading, then click [V] and select a different heading name to rearrange your columns. The changes affect your workstation only, and remain in effect until you manually change them again. (To return to viewing default information, use Reset Grid from the Waiting, Seated or Classic tab of your On-Deck properties.)
Resize Columns- Click the edge of a column, and drag to increase or decrease the width. The column size remains in effect until you either manually change them again, or use Reset Grid from the Waiting, Seated or Classic tab of your On-Deck properties.
Refresh
screen - Click  Refresh to update your screen to
the newest information. You can also set up the Operatory display to reload periodically,
according to the Polling settings on the Operatory tab of your On-Deck
properties.
Refresh to update your screen to
the newest information. You can also set up the Operatory display to reload periodically,
according to the Polling settings on the Operatory tab of your On-Deck
properties.
Appointment Timer in Treatment Chart - The appointment timer that appears in the header of the patient's treatment chart keeps track of how long you have until a patient's scheduled appointment time, and how long the appointment has taken so far. See "View Treatment Chart" for details.
Operatory Status in Grid Scheduler - You can see a patient's Operatory appointment status at a glance directly from your Grid Scheduler screen. See "View & Navigate Your Schedule" for details.
Operatory Text Hard to Read - If you cannot see the text in your Operatory very well, review the text and background colors of your processing milestones: You may have selected colors that blend together. Try setting the text to White and the background to Black. If you can now see the display correctly, you can now adjust the colors to better suit you. See "Set Up Operatory Milestone Colors" for details.
Only One Section Appears in Operatory - If you can see only part of the patients that have been signed in and/or seated, you may be viewing your Operatory in split-screen mode, and may have adjusted the splitter bar too far up or down, so that you can see only one section of the display. Try dragging the splitter bar to a more accessible location (as described above).
 │
│  │
│  │
│ 
Ortho2.com │1107 Buckeye Avenue │ Ames, Iowa 50010 │ Sales: (800) 678-4644 │ Support: (800) 346-4504 │ Contact Us
Chat with Software Support │Chat with Network Engineering │ Chat with New Customer Care
Remote Support │Email Support │ Online Help Ver. 12/18/2015