ViewPoint toolbar >  Treatment Chart.
If a patient folder is not already open, you will use Fast Find to choose the patient
to work with. Otherwise,
Add a treatment chart record to a patient folder to document each procedure you complete for a patient. You can manually enter treatment chart records, import findings data, and automatically add data while you edit a patient's tooth chart. In addition, you can verify treatment chart activity by requiring authorized persons (such as your orthodontists) to sign new entries before they become a permanent part of the patient's record.
ViewPoint toolbar > Treatment Chart.
If a patient folder is not already open, you will use Fast Find to choose the patient
to work with. Otherwise,
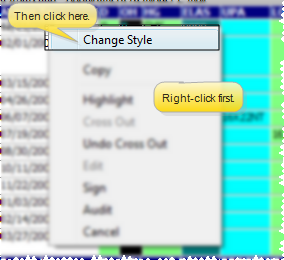
Select style to use (Optional) - If your new treatment chart entry needs to be created from a different style than the most recent entry (shown at the bottom of the window), you first need to select the style to use.
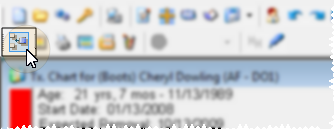
Add new record - Click 
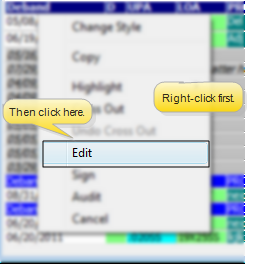
Right-click:
Edit records - You can edit only
Enter data - After entering data into a column, press the Tab key on your keyboard, or click in the next column. When you reach the final column, press the Tab key once more to add the record to the patient folder.
Column-specific data - Each column in your style can require a different type of input. For example, you can type text into some column types, while others require that you select a response from a list or choose an appointment procedure. (See "Set Up Treatment Chart & Plan Styles" for details about assigning column types and lists.)
The Text Only column type requires that you type (or copy & paste) text into the column. In addition, if you edit a patient's tooth chart while a Text Only or List and Text treatment chart column is active,
The List Only column type requires that you select a response from an assigned list. You cannot edit the response. (See "Set Up Treatment Chart & Plan Lists" for details)
When the  Text Search option
is enabled for a list, you can begin typing a list response, and your cursor will jump to the response that begins with your typed text. If
Text Search option
is enabled for a list, you can begin typing a list response, and your cursor will jump to the response that begins with your typed text. If  Text Search is disabled, your list responses will be numbered, and you can type a number to jump to the response you want.
To add or deduct Patient Reward points when a specific response is entered in a patient's treatment chart, enter a description and point value (either positive or negative) in the Patient Reward fields of your Treatment Chart List. For example, you might award 5 points when the response "Excellent" is selected for the Oral Hygiene column of a treatment chart record, or deduct 5 points if the response is "Poor".
The List and Text column type provides for both selecting from an assigned list, and/or typing text. You can select multiple responses from the list by pressing the space bar between responses. You can edit the text of the list responses, as well as add additional text as needed.
In addition, if you edit a patient's tooth chart while a Text Only or List and Text treatment chart column is active,
When the Text Search option
is enabled for a list, you can begin typing a list response, and your cursor will jump to the response that begins with your typed text. If Text Search is disabled, your list responses will be numbered, and you can type a number to jump to the response you want.
To add or deduct Patient Reward points when a specific response is entered in a patient's treatment chart, enter a description and point value (either positive or negative) in the Patient Reward fields of your Treatment Chart List. For example, you might award 5 points when the response "Excellent" is selected for the Oral Hygiene column of a treatment chart record, or deduct 5 points if the response is "Poor".
The Procedure List type requires that you select a single response from
Note that Text Search
The Drawing type pops a window onto your screen where you can create a free-hand drawing to include with the record. Once the record has been saved, you can right-click the field to display the drawing.
Copy & paste data - In addition to typing or using lists, you can cut, copy and paste data into most columns.
Treatment chart & tooth chart integration - The tooth chart / treatment chart integration provides a way for you to add narrative text to a patient's treatment chart as you edit a patient tooth chart. Simply add a new record to a patient's treatment chart, and place your cursor in a text or list and text column. Then enter data into the tooth chart. The tooth chart data will be translated into a narrative description in the active column of your treatment chart record. See "View & Edit Tooth Chart" for details.
Treatment chart & needs appointment list - Patients are automatically added to the
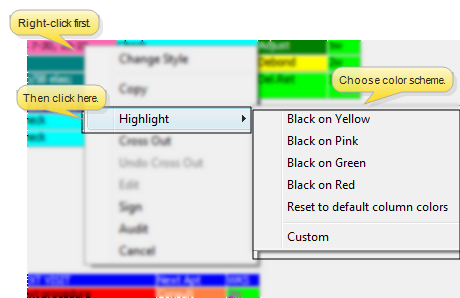
Highlight text - Right-click a column in any record, and select Highlight, then choose a color scheme to apply to the selected column, bringing special attention to that column. Right-click and select Reset to default column colors to return the column to its original colors.
Cross out text - Right-click a column in any record, and select Cross Out to draw a line through incorrect text. You can also right-click and Undo Cross Out if needed.

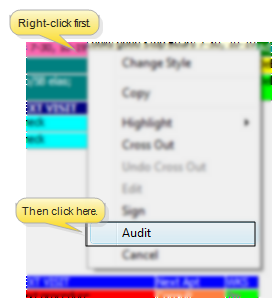
Audit record - Right-click any record and select Audit to review the operator, date, and time the record was created, as well as when it was last changed.
Sign treatment chart records - Once a treatment chart record has been verified, authorized persons, such as your orthodontists, may sign it to make it a permanent part of the patient's record. Right-click the entry you want to verify, and select Sign. Then enter your user name and password. Signed records are identified by
Sign a record:
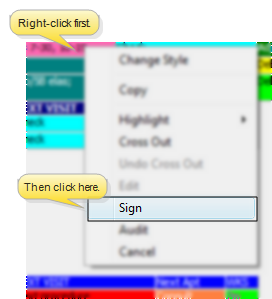
A checkmark flags the record as being signed:

Save -
Toggle Chart & Plan - Click the ![]() Chart/Plan icon from the Treatment Chart / Plan toolbar to toggle between viewing the patient's chart and plan.
Chart/Plan icon from the Treatment Chart / Plan toolbar to toggle between viewing the patient's chart and plan.
Records are permanent - CAUTION! As soon as you tab out of the final column, you create a record
that cannot be deleted!
Delete unfinished record- You may delete an unfinished record by pressing the Esc key on your keyboard, or exiting the patient folder before you tab out of the final column of the record.
The tooth chart appears on the Findings
 │
│  │
│  │
│ 
Ortho2.com │1107 Buckeye Avenue │ Ames, Iowa 50010 │ Sales: (800) 678-4644 │ Support: (800) 346-4504 │ Contact Us
Chat with Software Support │Chat with Network Engineering │ Chat with New Customer Care
Remote Support │Email Support │ Online Help Ver. 12/18/2015


