You receive an e-mail notification of an error.
The VP Backup icon that appears on your task bar
changes to this: ![]() to
indicate an error in the backup process.
to
indicate an error in the backup process.
VP Backup Service maintains a detailed log regarding the status of your backup processes. Although you might want to review the log regularly, it is especially important to view the log when:
You receive an e-mail notification of an error.
The VP Backup icon that appears on your task bar
changes to this: ![]() to
indicate an error in the backup process.
to
indicate an error in the backup process.
A message is logged for every process that is executed, including the reason for failure, if appropriate. This log is critical when you are trying to determine the cause of backup failure. To view the log:
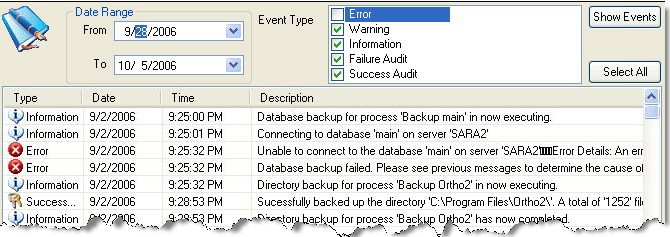
To view a more complete description, click on a message to see a screen like this:
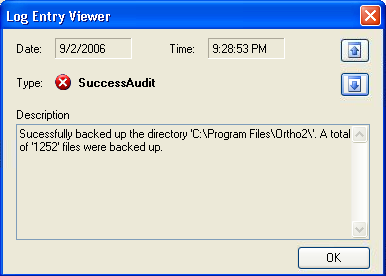
You can then click the ![]() {Previous}
and
{Previous}
and ![]() {Next} buttons
to progress through the complete descriptions of all the messages in the
list. When you are finished, click the [OK]
button to exit.
{Next} buttons
to progress through the complete descriptions of all the messages in the
list. When you are finished, click the [OK]
button to exit.
 │
│  │
│  │
│ 
Ortho2.com │1107 Buckeye Avenue │ Ames, Iowa 50010 │ Sales: (800) 678-4644 │ Support: (800) 346-4504 │ Contact Us
Chat with Software Support │Chat with Network Engineering │ Chat with New Customer Care
Remote Support │Email Support │ Online Help Ver. 12/18/2015


