Treatment Chart
With the patient folder Treatment Chart tab, you can access your patients' treatment plan, treatment chart records, tooth chart, treatment progress and images all in one convenient place.
You can open this feature in multiple ways: Use the method that's most convenient for you.
ViewPoint toolbar -  Treatment Chart. If a patient record is already active, that patient's information will be loaded automatically. Otherwise, you use Fast Find (either typing information or swiping a registered reward card) to search for the patient to work with.
ViewPoint shortcut menu - Add-In > Treatment Chart. (You can press Alt+D on your keyboard to open the Add-In menu options.) If a patient record is already active, that patient's information will be loaded automatically. Otherwise, you use Fast Find (either typing information or swiping a registered reward card) to search for the patient to work with.
Grid Scheduler - Right-click an appointment and select Treatment Chart to open the patient's full Treatment Chart page. Or, while scheduling an appointment with Explore or the Recall Appointment window, click the Tx Chart button to show/hide the patient's treatment chart records. (See "Your Grid Scheduler" for details.)
On-Deck Operatory - Select a patient in your Operatory, then right-click and choose Treatment Chart to open the patient's treatment chart. (See "On-Deck Operatory " for details.)
Keyboard Shortcut - Ctrl+T.
Patient Fingerprint - You can enable patients to open their own treatment chart when they touch the fingerprint sensor installed at your workstation. See "ViewPointProperties" for details.
Alert Stop - If the patient has an alert trigger enabled for this feature, the Alert Stop pop-up window will appear when you initiate this feature for the patient. Review the alert information, then either press Enter on your keyboard, or click the box to continue. You can also click the Edit link to open the Alert editor for that patient.
Milestone Reminders - Depending on the Display Milestone Reminders setting in your System Settings, you may be prompted to update milestone dates when you either schedule an appointment or open the treatment chart for a patient whose Next Dental Visit and/or Next Progress Report date is either today or in the past. See "Manage Milestone Reminders" for details.
Choose whether to include / exclude tooth chart and treatment plan data on your Treatment Chart page.
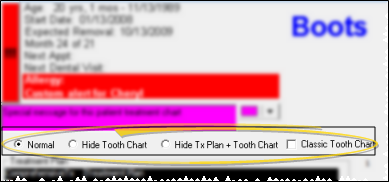
Normal - This mode includes both the treatment plan and the tooth chart.
Hide Tooth Chart - This mode displays the treatment plan, but removes the tooth chart from the display.
Hide Tx Plan & Tooth Chart - This mode displays only the treatment chart entries.
Classic Tooth Chart - Enable this option to view the tooth chart in the smaller graphical format instead of the larger realistic format. (See "Patient Tooth Chart" for details.)
The top of the treatment chart window includes a patient summary, medical alerts, patient-specific messages, and integrated patient images. The header also includes a current appointment timer, contact detail popup widow, and an On-Deck processing option.
 Patient Summary - The very top of the Treatment Chart and Treatment Plan windows include the patient nickname, full name, current status, primary id number, and gender. The patient summary includes additional information, including medical
alerts, treatment dates, next appointment information, contact details, and two patient-specific messages that you can color-code however you wish. You will usually need to use the scroll bar at the right side of the summary to see all of the information.

Medical Alerts - The patient's medical
alerts appear in RED, underneath the nickname. If the patient has at least one medical alert, a red !! button appears at the left of the window. Click this button to re-open the Alert Stop pop-up window that appeared when you first opened the Treatment Chart / Plan.
Nickname and Birthday - The color of the nickname is defined by your heading properties. If the patient's birth date is within one month
of today's date, the patient age is highlighted.
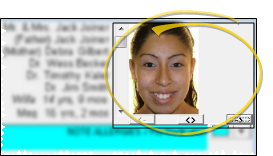
 Patient Images - The patient's most recent facial smiling photo appears when you open the treatment chart. Use the [<] and [>] buttons to progress through all images in the timepoint. You can also click [<>] to maximize the displayed image, or double-click the image to open the layout.
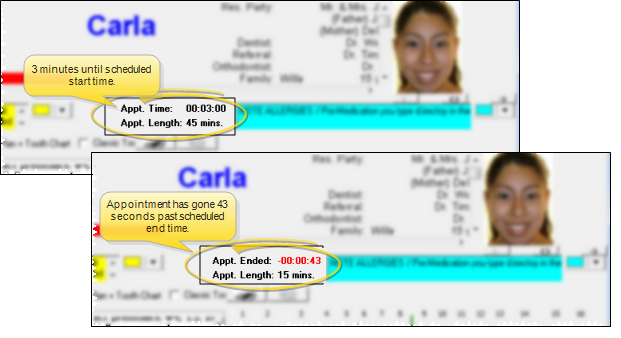
 Appointment Timer - The Treatment Chart appointment timer keeps track of how long you have until a patient's scheduled appointment time, and how long the appointment has taken so far. If the patient does not have an appointment today, or if the appointment has been processed as Kept, the timer does not appear.)
Prior to the scheduled appointment time, the label reads “Appt.Begins” and the timer counts down the time remaining until the scheduled beginning of the appointment. Once the start time is reached, the label reads “Appt. Time” and the timer counts down from the appointment length. After the appointment is scheduled to end, the timer turns red and continues to count down (i.e., displays a negative number). When you process the appointment as Kept, the timer no longer appears on the treatment chart.
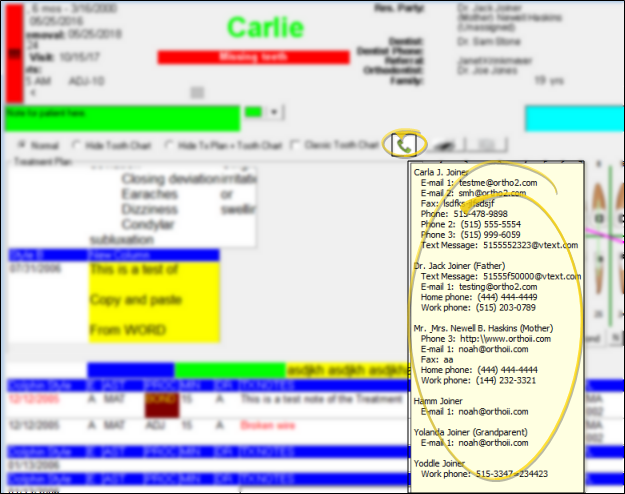
 Patient Contact Popup - While viewing a patient's treatment chart, you can hover over the
  Contacts icon to pop up a list of the patient's contacts, email addresses, and phone numbers.
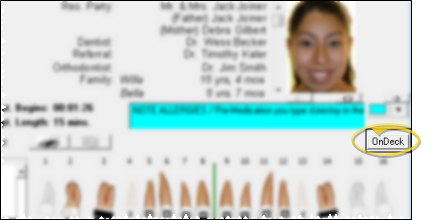
 Operatory Processing - If the patient is signed into On-Deck, you can click the On-Deck button in the middle of the Treatment Chart window to process the patient's On-Deck status. See "On-Deck Operatory " for details.
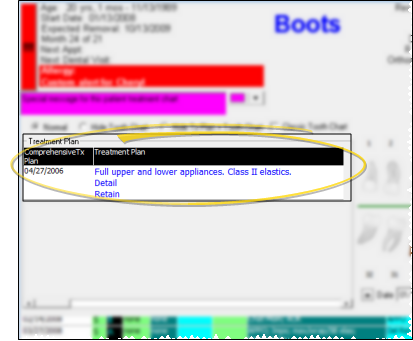
When you choose a treatment chart viewing mode that includes treatment plan information, treatment plan records created with styles that have the Tx Plan option enabled will be displayed on the patient's treatment chart, just under the patient messages section. (See "Treatment Chart & Plan Style Editor" for details about enabling chart and plan options.)
You can only view existing treatment plan records from the Treatment Chart page: Click the  Chart / Plan icon from the Treatment Chart / Plan toolbar to toggle between viewing the patient's chart and plan. See "Patient Treatment Plan" for details.
When you choose a viewing mode that includes the tooth chart, you can review and edit the patient's tooth chart for the current phase of treatment. You can also use the viewing mode options to choose either the larger Normal tooth chart, or the smaller Classic tooth chart. See "Patient Tooth Chart" for details about using the tooth chart.

The bottom portion of the Treatment Chart page contains the patient's treatment chart records. You can optionally display correspondence history items and patient history notes in this section of the window.
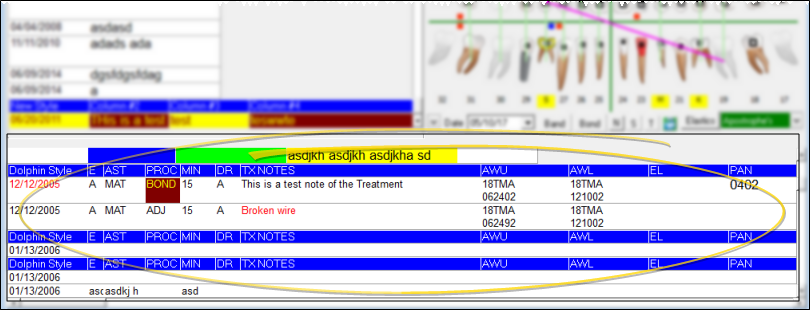
Multiline / Single Line Mode - Click the  Multiline/single
line icon on the Treatment Chart toolbar to toggle between displaying
only one line per record, or displaying the entire text of each treatment cChart record. Keep in mind that even in single line mode, you can hover over a
treatment chart cell to popup the entire cell contents.
Correspondence History Entries - Click the
 icon on the Treatment Chart toolbar to include / exclude correspondence history items within your list of treatment chart records. The items are displayed chronologically, and appear in italics with a gray background to make them easier to distinguish from treatment chart records. You can right-click a document name and select the Display option to open that document.
Patient History Notes - You can add and review unique notes about a patient from the Treatment Chart, the Notepad, and the Complete Patient History form. Click the
 icon on the Treatment Chart toolbar to show / hide patient history notes within your list of treatment chart records, and click the
 icon on the toolbar to add a new patient history note.The entries are displayed chronologically, and appear in italics with a gray background to make them easier to distinguish from treatment chart records.
Add and Edit Treatment Chart Records - Add a treatment chart record to a patient folder to document each appointment you complete for a patient. You can manually enter treatment chart records, as well as import patient findings and tooth chart data. In addition, authorized persons (such as the orthodontists), can verify treatment chart activity by signing the records. See "Add, Edit, & Sign Treatment Chart Records" for details.
View Treatment Chart Record Details - The information shown in an individual treatment chart record depends upon the style you used to create it, and whether you have imported any of the information. The records are listed in the order you create them, so you accumulate a chronological record of activity as a patient progresses through treatment. You can only edit a treatment chart record within 24 hours of creating it. Afterward, you cannot make any changes. See "Add, Edit, & Sign Treatment Chart Records" for details about creating and managing treatment chart records.
Print Treatment Chart Window - Click the  icon on the Treatment Chart toolbar (not the Print icon just above the tooth chart: This prints the tooth chart instead) to print the currently displayed data, including the patient photo at the top of the screen. You might also want to generate
the Basic
Treatment Chart report
which does not include the patient photo.
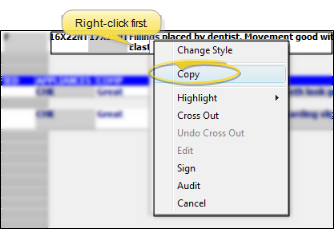
 Copy Column Text - You can right-click a treatment chart column to copy the text to your clipboard. You can then paste the text into another ViewPoint field, or a text application (such as a word processor or email message).
Sign Treatment Chart Records - Users with appropriate security rights can right-click to sign treatment chart entries, lending additional
accountability to the records. This feature is especially useful in university settings, where entries are double-checked for accuracy. See "Add, Edit, & Sign Treatment Chart Records" for details.
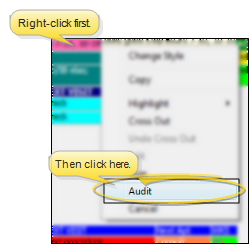
 Audit Record - Right-click any record and select Audit to review the operator, date, and time the record was created, as well as when it was last changed.
 ViewPoint Videos - Click the
  Video button from the treatment chart or tooth chart toolbar to find topic-specific video assistance. See "ViewPoint Videos" for details.

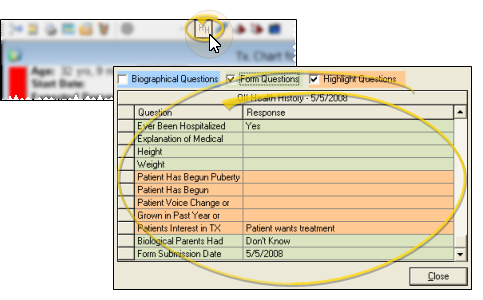
 Open Health History - Click the HH button on the Treatment Chart toolbar to open the patient's most recent health history. See "Patient Online Forms Data" for details.
![]() ViewPoint Videos - Click the
ViewPoint Videos - Click the  Video button from the treatment chart or tooth chart toolbar to find topic-specific video assistance. See "ViewPoint Videos" for details.
![]() Open Health History - Click the HH button on the Treatment Chart toolbar to open the patient's most recent health history. See "Patient Online Forms Data" for details.
Open Health History - Click the HH button on the Treatment Chart toolbar to open the patient's most recent health history. See "Patient Online Forms Data" for details.
 Treatment Chart. If a patient record is already active, that patient's information will be loaded automatically. Otherwise, you use Fast Find (either typing information or swiping a registered reward card) to search for the patient to work with.


 Contacts icon to pop up a list of the patient's contacts, email addresses, and phone numbers.


 icon on the Treatment Chart toolbar to show / hide patient history notes within your list of treatment chart records, and click the
 icon on the toolbar to add a new patient history note.The entries are displayed chronologically, and appear in italics with a gray background to make them easier to distinguish from treatment chart records.
  icon on the Treatment Chart toolbar (not the Print icon just above the tooth chart: This prints the tooth chart instead) to print the currently displayed data, including the patient photo at the top of the screen. You might also want to generate
the