Maximize an image to display that single image as large as possible in the imaging window, providing a closer look at the patient's condition. You can then use special tools to further present the case.
 Open patient folder > Imaging tab. (See "Open Patient Folders" for details.) > Double-click an image.
You can also maximize an image by clicking the [ < > ] button found directly under the image box in the patient's Treatment Chart summary. See "View Treatment Chart" for details.
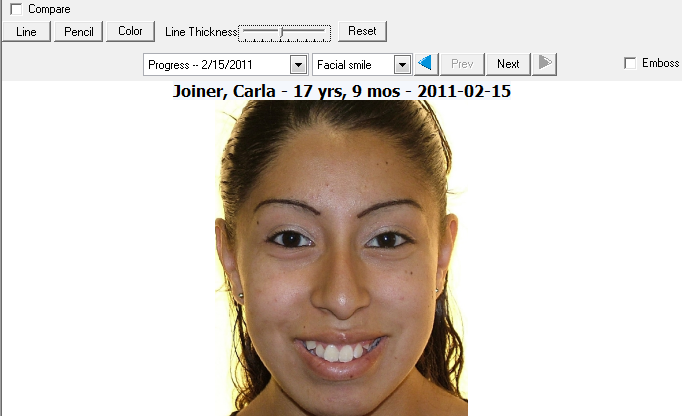
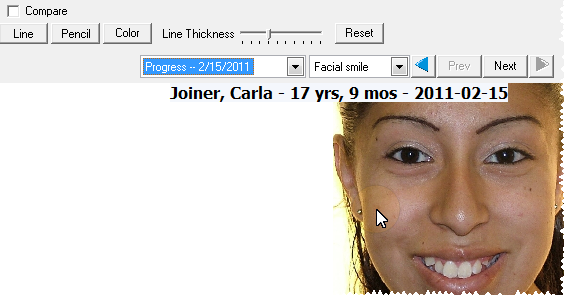
Identification label - The label at the top of the image includes the patient name, age, and image timepoint date. When you print them image (described below), the label prints, too. When you copy the image (described below), the label is not included, unless the label is permanently burned onto this image type. See "Set Up Patient ID Label" for details.
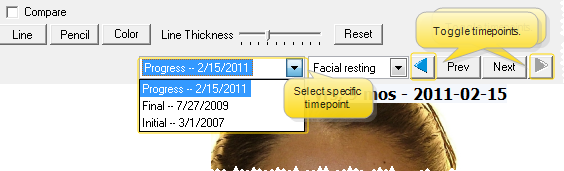
View a different timepoint - Use the timepoint dropdown menu to select a specific timepoint to view, or click the [<] and [>] buttons to toggle through all timepoints, without changing the image type.
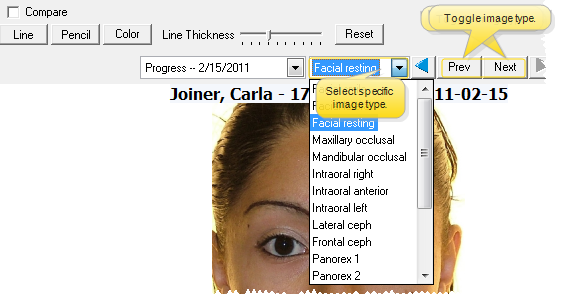
View a different image type - Use the image type dropdown meny to select a different image to view, or click the Prev and Next buttons to toggle through all image types within the timepoint.
Annotate - Use the Viewing Tools and Annotation Settings section of the
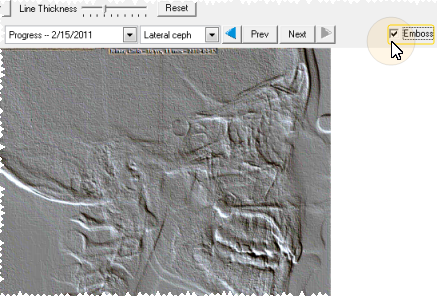
Emboss - Enable the  Emboss option to show additional details of the image.
Zoom - Left-click and drag to move the image within its window. Or, click the right mouse button, and drag to increase/decrease the image zoom (or, use the tracking wheel on your pointing device). Double-click to return the image to its original size and location.
Click and drag to select an area to magnify.
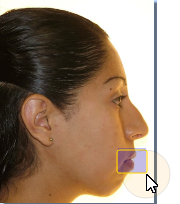
Release the mouse button to see the result.
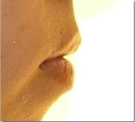
Click anywhere to return to the original image.
Move the image - Click your right mouse button and drag to move the image within its window. Click the mouse button again to return the image to its original position.
Print / Copy / Save an Image![]() Right-click an image, then select to print, copy, or save it.
Right-click an image, then select to print, copy, or save it.
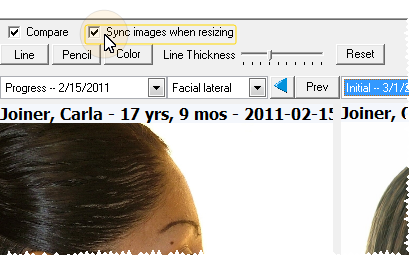
Compare images - Enable the ![]() Compare option to view two different images of the same patient side-by-side. You can select a different timepoint and image type for each image displayed.
Compare option to view two different images of the same patient side-by-side. You can select a different timepoint and image type for each image displayed.
Synchronize image actions - Enable the ![]() Sync option to zoom or move both images in tandem.
Sync option to zoom or move both images in tandem.
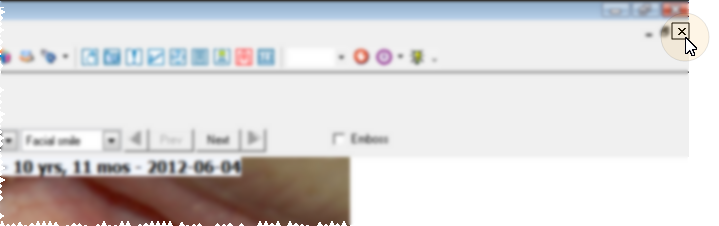
Exit image - Click the X in the upper-right corner of the image window, often just under the X that closes your ViewPoint system, to close the image and return to the patient folder Imaging tab.
 │
│  │
│  │
│ 
Ortho2.com │1107 Buckeye Avenue │ Ames, Iowa 50010 │ Sales: (800) 678-4644 │ Support: (800) 346-4504 │ Contact Us
Chat with Software Support │Chat with Network Engineering │ Chat with New Customer Care
Remote Support │Email Support │ Online Help Ver. 12/18/2015


