VP Imaging provides you with tools to import individual images, like this:
Open the patient folder.
Click the Imaging tab, or double-click the image box on the right side on the Patient tab, to go to the VP Imaging layout.
Click the layout field and select the appropriate layout type (i.e. Photos).
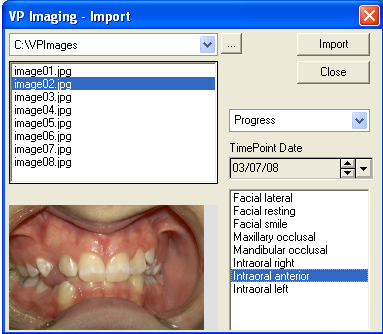
ClickSingle Import to see a screen something like this (the image types available will vary, depending upon the type of layout you chose)
Select the path where the original images are located (our example is c:\VPImages). If the correct path is not displayed, you may use the dropdown and select from the 5 most recently-used paths, or click [...] to browse to the appropriate location.
Select the image filename you wish to import (our example is image02.jpg).
Select the timepoint to use for this layout (as defined by your Timepoint Names table). Or type a unique timepoint for this patient. (Our example is Progress.)
Select the date the image was taken.
Select the image type you wish to assign to this image (our example is Intraoral anterior).
Click [Import].
If your VP Imaging Properties are set to ask whether to delete the original image files, you see this screen:
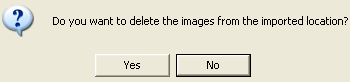
Click [Yes] to delete the original image files from the capture location once they have been imported, or click [No] to leave the image files intact.
If your VP Imaging Properties are set to always or never delete the files, this screen is omitted and VP Imaging takes the appropriate action automatically.
If original image files are not deleted now, be sure to delete them manually later, or you will run the risk of importing incorrect images into another patient's folder.
A Count notation appears beneath the [Import] button. You may repeat the process to select additional images as needed before exiting the [Single Import] feature. The count field indicates how many images you have selected so far. When you have finished, click [Close] to exit.
Once the images have been imported, you will see the Image Editor, with the layout of the new images. You may now view and edit images as needed. When you have finished, click [Save] or [Save and Exit]. If your VP Imaging system is set to burn labels onto this type of image, the label is imprinted at this time.
If you instead click [X] to close the Image Editor, the source images are still imported but the thumbnails and their position and scaling are not created.
 │
│  │
│  │
│ 
Ortho2.com │1107 Buckeye Avenue │ Ames, Iowa 50010 │ Sales: (800) 678-4644 │ Support: (800) 346-4504 │ Contact Us
Chat with Software Support │Chat with Network Engineering │ Chat with New Customer Care
Remote Support │Email Support │ Online Help Ver. 12/18/2015


