Run the Grid Day Sheet report to print a one-day schedule in a format similar to what you see on your screen, including comments you have typed onto your grid. You may even type comments onto the report before it prints! The report is highly customizable to produce the best result for any grid design.
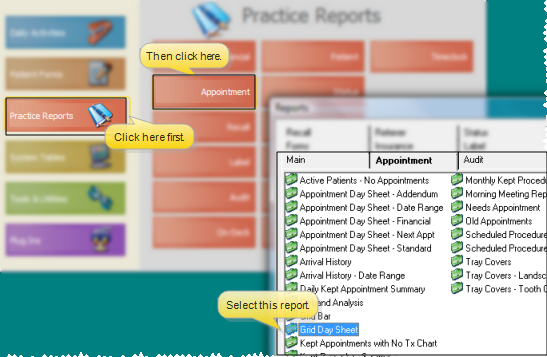
ViewPoint main menu > Practice Reports > Appointment > Grid Day Sheet.
Select the options to use for choosing records and generating this report. Be patient! You might need to experiment a few times to determine the best parameters for your Grid Day Sheet.
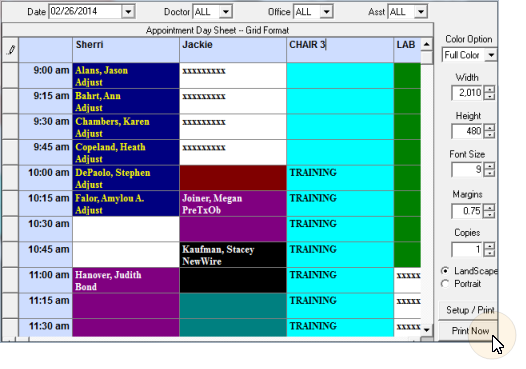
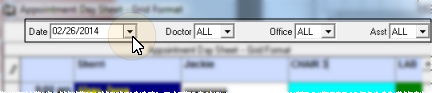
Date, Doctor, Office, Assistant - Use the selection tools at the top of the window to choose the date to print, and which appointments to include. Note that you can print the Grid Day Sheet for only one day at a time.
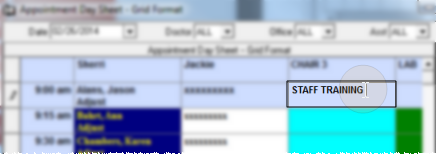
Add / Edit text - Click a grid cell to add notes the report. You might, for example, change the chair headings to add the name of the assistant for the day, or make notes of special visitors or events. You can type text, or use standard word processing keyboard shortcuts (i.e. Ctrl+C, Ctrl+V). The text is included on your report, but is not added to your actual scheduling grid.
Report format options - Use the formatting options at the right of the window to select how you would like the report to print. (Color options only work with full-color printers.) Keep in mind that the preview window and the printed report will not be exactly the same.
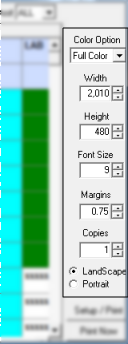
Color option - Choose full color to print the entire report just as it appears on your screen; Text only prints color only in cells that have text in them (either typed notes or scheduled appointments). Non-scheduled cells, or cells without text print black and white; Appt only prints color only in cells that have scheduled appointments. Non-scheduled cells and cells with typed notes print black and white; No color prints only the header in color. The remainder of the report prints black and white.
Width / height - Use the arrows beside these fields to adjust the size of the report columns and rows.
Font size - Select the text size for the report; note that changing the text size may change the report width as well.
Margins - Adjust the margins for your report as needed. In most cases you should leave the margins at about .75 for the best results: Remember, printers cannot print to the very edge of your paper.
Paper orientation - Select whether to print the report in landscape (sideways) or portrait (up-and-down) mode.
Print options - Use the print options at the bottom of the window to finalize your output and print the report.
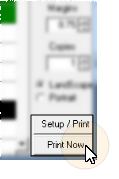
Setup & Print - Click this button to open a printer-specific window. You can then further adjust the paper type, margins, and print orientation as needed. When you are ready, click Ok to print the report to your workstation's default printer.
Print now - Click this button to print the report with the format options you have specified to your workstation's default printer.
Additional day sheet options - Run an Appointment Day Sheet to obtain a list of appointments scheduled for a specific date, or any range of dates.
 │
│  │
│  │
│ 
Ortho2.com │1107 Buckeye Avenue │ Ames, Iowa 50010 │ Sales: (800) 678-4644 │ Support: (800) 346-4504 │ Contact Us
Chat with Software Support │Chat with Network Engineering │ Chat with New Customer Care
Remote Support │Email Support │ Online Help Ver. 12/18/2015


