Patient Correspondence History
The patient correspondence history includes all mail merge documents and ViewPoint forms (such as payment receipts) you have generated for the patient and any associated responsible parties, as well as additional documents you have captured or scanned directly into the history. Certain mail merge documents generated for dentists and other professionals associated with the patient may be included as well. (See "Letter Library" for details.)
 Open Patient Correspondence History - You can open the patient correspondence history from either the ViewPoint toolbar or the ViewPoint shortcut menu. If a patient record is already active, that patient's information will be loaded automatically. Otherwise, you use Fast Find (either typing information or swiping a registered reward card) to search for the patient to work with.
ViewPoint Toolbar - Click the  Correspondence History icon.
ViewPoint Shortcut Menu - View > Correspondence History. (Or, press Alt+V on your keyboard to open the View menu options.)
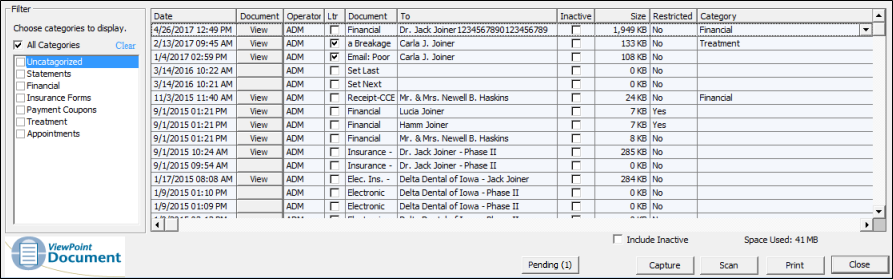
Use Correspondence History - You can open and view correspondence history items, add new documents, restrict access to certain documents, change a document's category, and inactivate items that you no longer need to see.
Filter Documents - Use the list of categories at the left of the correspondence history window to include only certain documents in the list, or enable the All Categories option to include all documents. ViewPoint remembers your filter settings: So, no matter what workstation you use, or which correspondence history you are working with, your favorite filters go along with you. See "History Category Table" for details about setting up your categories.
Change Category Assignment - Documents are added to your correspondence histories with a default category. However, you can click in the Category column to change the assigned category as needed.
Inactive / Active Toggle - Once you create a record, you cannot delete it. You can, however, flag it Inactive. Records you flag as Inactive are not available for general use, but they remain in your system for reporting and other data collection needs. In addition, you can toggle records back to Active whenever needed.
Include Inactive - Enable the Include Inactive option at the bottom of the window to include items that have been flagged Inactive in the correspondence history. If this option is disabled, only active items will appear in the list.
View a Document - Click View to open the document for viewing and printing. You must have an appropriate viewing / editing tool, such as Adobe Acrobat, installed to be able to open files.Document restrictions, described below, may prevent you from opening certain documents.
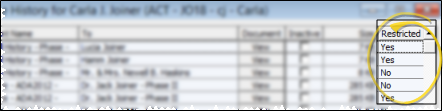
Document Restrictions - Document restrictions control who can open an item in the correspondence history.
View Restricted Document - If
the Restricted column, at the far right edge of the window, is flagged as Yes,
only users assigned to a security
group
with Full Access
to the Miscellaneous> Restricted
Correspondence rights can view the document. If the Restricted column is No, anyone can view the document. (See "Set Up Security Access" for details.)
Add / Remove Restriction - To change the restriction status of a document, right-click the document and select the Restriction option. You can change document restriction status only if your security group allows Full Access to the Miscellaneous >
Manage Restricted Correspondence rights. (See "Set Up Security Access" for details.)
Capture Documents - As you print a non-merge document, report, or other printable item, you can use the Capture tool to save a copy of that document in the correspondence history. See "Capture Documents" for details.
Scan Document - Use the Scan tool to send a digital copy of any document from your scanning device to a correspondence history.See "Scan Documents" for details.
Print Correspondence History List - Click Print at the bottom of the window to generate a list of all the items in the correspondence history.
Pending Correspondence - When you add a merge document to the Print Later Queue, it is placed in the Pending list of the patient's correspondence history. The document does not become a permanent part of the record until the merge is completed. You can click the Pending button to see the list of this patient's queued documents.

View Correspondence From Treatment Chart - Click the
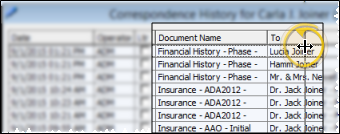
 icon on the Treatment Chart toolbar to include / exclude correspondence history items within your list of treatment chart records. The items are displayed chronologically, and appear in italics with a gray background to make them easier to distinguish from treatment chart records. You can right-click a document name and select the Display option to open that document. See "Treatment Chart" for details.
Exit - Click Close at the bottom of the window, or click the X at the upper-right corner, to exit the correspondence history.
Sort Data - Click a column heading to sort the data by that column. Click the same column heading to reverse the sort order.
Adjust Columns - You can adjust both the width and location of the columns in the window. All columns return to the defaults when you exit and re-enter.
Adjust Column Width - Click the bar between two columns to reallocate the column space. Be aware that it is possible to adjust a column to be so narrow that you no longer see it.
Change Column Order - Click a column heading and drag it to a new location within the window. Other columns adjust accordingly.
Mail Merge Documents - Processed mail merge documents are automatically added to the appropriate correspondence history, in .PDF format, as they are completed. Depending on the document's type and email to properties, it may be recorded in multiple correspondence histories, such as both the dentist and patient histories. (See "Letter Library" for details.)
Other Correspondence Histories - Your Dentist, Professional, Insurance Company and Office Contacts records also contain correspondence histories. These histories include certain mail merge documents, as well as files you have captured, scanned, and imported for that record. The HR Manager employee document archive includes all mail merge documents you have generated for the employee, as well as additional documents you have captured and scanned for that employee. VP Document is your practice correspondence history, where you can keep track of documents, images, and other files related to your practice. You can capture, scan, and import files into this history.