Scan Patient Images
Use the Scan feature, available from the Single Import or Auto Import window, to add an image or multiple images to a patient record from any scanning device available to your workstation. You can scan images into previously unused image types, or overwrite the patient's existing images. This feature is often used to scan patient x-rays.
Edge Imaging Systems Only - This article describes a feature of Edge Imaging for ViewPoint: If you use VP Imaging instead, it does not apply to you. See "Scan Images" for details about a similar VP Imaging feature.
Choose Scanner - (Optional.) Choose which scanning device or system to activate automatically when you initiate an image scan from this machine. See "Scanner User Options" for details.
![]() Scan Images into Patient Folders
Scan Images into Patient Folders
-
 Open Import Window - From the Imaging section of the Imaging ribbon bar, select either
  Single Import or
  Auto Import: You can scan an individual image from either import option, but you can only scan multiple images from the Auto Import option. Or, while viewing a patient's images, right-click an image location you want to replace and select Single Import.
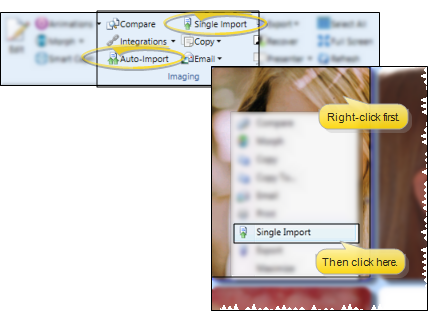
-
Enter Import Details - Choose the patient, time point, date, and image type or layout in the Import Details section of the window. (For details about these fields, refer to the Import Single Images or Auto Import Images articles.) If there are already images in the time point, you cannot change the date. You can ignore the Import Path and list of images when you are going to scan a new image.
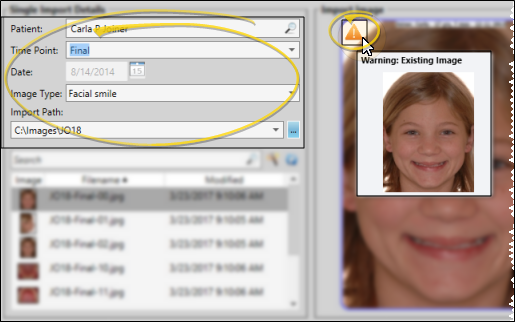
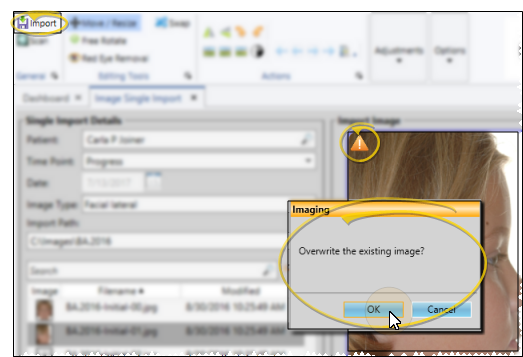
Overwrite Warning - If an image already exists for this image type in this time point, you will see a Warning icon in the preview section of the window. You can hover over the icon to view the existing image.
-
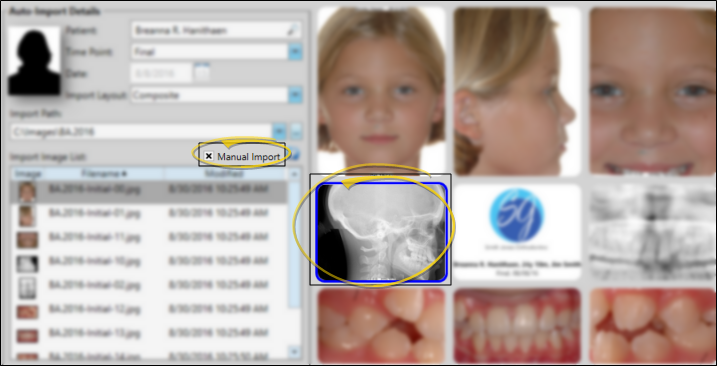
Enable Manual Import Option - (Auto Import only.) If you are using Auto Import, enable the Manual Import option. Then, if you are importing a single image, click the image location you want to scan into. (If you are using Single Import, skip this step: The image will be scanned into the layout location you started with.)
-
Initiate Scan - From the General section of the ribbon bar, click
 Scan to import a single image, or click
  Multi Scan to import multiple images (available from Auto Import mode only). Then follow the instructions for your scanning device to preview and initiate the scan.
-
Image Preview - A preview of your selected image appears at the right of the window. You can move, rotate, and edit the image as needed before importing it into the patient record.
Edit Images - Use the icons in the Editing Tools section of the
Image Actions - Use the tools in the Actions section of the
Image Adjustment - Use the tools in the Adjustments section of the
Image Options - Use the tools in the Options section of the
-
Import Image(s) - Click
 Import from the General section of the ribbon bar to save your selections and begin the import process.
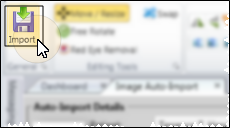
-
Verify Overwrite - If you are importing an image (or images) that will overwrite an existing image in this time point, you must confirm your action before continuing.
After images are imported, you see a completion notification dialog. If the Delete After Import option in your Imaging User Options is set up to either retain original images or delete original images, you simply see a notice that the process is complete. However, if the Delete After Import option is set up to prompt you before deleting original images, select either Yes or No to direct the handling of the original images.