Image Editing Adjustments
Brightness, Gamma, Saturation, Contrast, Hue
Use the tools in the Adjustments section of the
-
 Enable Edit Tool - To use these tools, enable the
  Edit icon from the Imaging section of the ribbon bar. Then, click in the layout to select the image you want to work with. Editing mode is not available from cardflow layouts. You can, however, maximize individual images in a cardflow layout to edit them. Your Edge Imaging background changes slightly to indicate when you are in Edit mode.
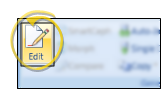
Auto-Import / Single Import - You can also use editing tools when you are Auto-Importing or Single Importing images.
-
Adjust Image - Use the slider bars on the Adjustments section of the ribbon bar to change the color values of the selected image. Place the button at the "0" position to return the image to its original colors. Once you save your changes, your new color settings become the "0" positions for this image.

-
Save Changes - Click
 Save in your Quick Access toolbar or File ribbon bar (or press Ctrl+S on your keyboard) to save any changes you have made. If you are in Edit mode, and have enabled the Exit Edit on Save setting in your Imaging User Options, you return to viewing mode after saving the image. Otherwise, you remain in Edit mode, where you can make more changes as needed.
Exit Edit Mode - Click
 Cancel in the Imaging section of the ribbon bar, if needed, to exit editing mode without saving any additional changes.

 Undo Use the Undo Last and Undo All tools in the Actions section of the
  Undo Last Action icon (or press Ctrl+Z on your keyboard ) repeatedly to reverse changes one at a time, or use the
  Undo All Actions icon to reverse all changes at once. After you save changes or exit editing mode, you cannot undo your actions. You can, however,
  Restore the image to its original state if needed.
 Redo Use the Redo Last and Redo All tools in the Actions section of the
  Redo Last Action icon (or press Ctrl+Y on your keyboard ) repeatedly to reapply changes one at a time, or use the
  Redo All Actions icon to reapply all changes at once. After you save changes or exit editing mode, you cannot redo your actions. You can, however, Restore the image to its original state if needed.
 Changes History Use the History tool in the Actions section of the
 Restore Original Image - Use the Restore tool in the Actions section of the
Temporary Option - Once you save your changes here, they become permanent. You can optionally make temporary brightness and contrast changes to an image while viewing it in a layout or while maximized. See "Viewing and Annotating Images" for details.