Use the Single Import feature to add an individual image to a patient folder. This feature is especially useful for replacing images imported in error, or for completing a timepoint.
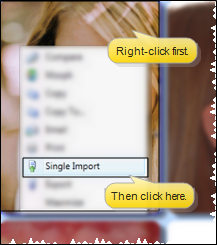
Open Image Single - Import Window![]() You can open this feature in multiple ways: Use the method that's most convenient for you.
You can open this feature in multiple ways: Use the method that's most convenient for you.
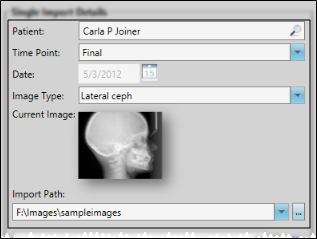
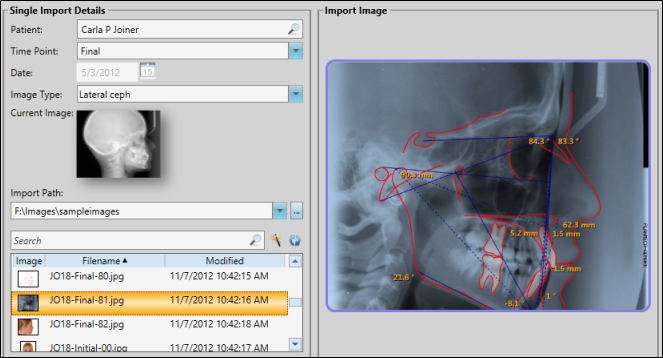
Single Import Details![]() Choose the patient, timepoint, date, image type and import path to use for this importing session.
Choose the patient, timepoint, date, image type and import path to use for this importing session.
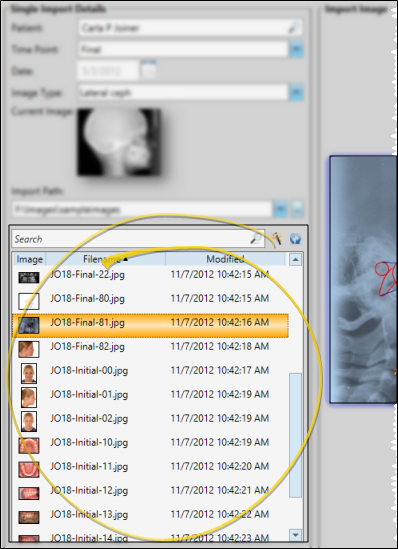
Image List![]() Choose the image to import. You can optionally type all or part of the image filename in the Search field to search for a specific image in the Image Path you selected, or use the Wizard icon to search for images that include the patient's last name. Your chosen image appears at the right of the window.
Choose the image to import. You can optionally type all or part of the image filename in the Search field to search for a specific image in the Image Path you selected, or use the Wizard icon to search for images that include the patient's last name. Your chosen image appears at the right of the window.
Image Preview![]() A preview of your selected image appears at the right of the window. You can move, rotate, and edit the image as needed before importing it into the patient record.
A preview of your selected image appears at the right of the window. You can move, rotate, and edit the image as needed before importing it into the patient record.
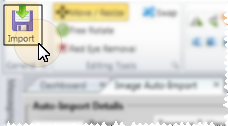
Import Image(s)![]() Click
Click  Import from the General section of the ribbon bar to save your selections and begin the import process.
After images are imported, you see a completion notification dialog. If the Delete After Import option in
 │
│  │
│  │
│ 
Ortho2.com │1107 Buckeye Avenue │ Ames, Iowa 50010 │ Sales: (800) 678-4644 │ Support: (800) 346-4504 │ Contact Us
Chat with Software Support │Chat with Network Engineering │ Chat with New Customer Care
Remote Support │Email Support │ Online Help Ver. 12/18/2015


 Single Import.