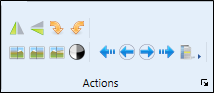
Use the tools in the Actions section of the Edge Imaging ribbon bar to mirror or flip the image orientation, rotate images by 90 degrees, sharpen, blur, or smooth image resolution, and apply auto-contrast. The Actions tools also provide you with a way to reverse or re-apply changes you have made to your images.
How to Get Here
You can open this feature in multiple ways: Use the method that's most convenient for you.
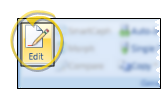
Enable Edit Tool To use any of these tools, enable the Edit icon from the Imaging section of the ribbon bar. Then click in the layout to select the image you want to work with. Editing mode is not available from Card Flow layouts. You can, however, maximize individual images in a Card Flow layout to edit them. Your Edge Imaging background changes slightly to indicate when you are in Edit mode.
Auto-Import / Single Import - You can also use these Edge Imaging tools when you are Auto-Importing or Single Importing images.
Use This Feature
Choose an Editing Action Select the image to work with, then enable the tool you want to use in the Actions section of the Edge Imaging ribbon bar.
Mirror- When you "mirror" an image, you turn it on its vertical axis. (Think of looking in a mirror.)
Flip - When you "flip" an image, you turn it on its horizontal axis. (Think upside down.) You can choose to flip certain image types as they are first imported into a patient record. (See "Set Up Image Types" for details.)
Rotate 90° - Use the Rotate 90 tools in the Actions section of the Edge Imaging ribbon bar to turn an image 90 degrees clockwise or counter-clockwise. If you can't remember which button rotates clockwise and which rotates counter-clockwise, you can hover over the buttons on the ribbon bar to see a tooltip. You can choose to rotate certain image types a specific number of degrees as they are first imported into a patient folder. (See "Set Up Image Types" for details.) You can also rotate images by 90 degrees with the tools available in the Actions section of the Imaging ribbon bar. See "Image Editing Actions" for details.
Sharpen - Use Sharpen to enhance the clarity of the image, or the currently selected area. Each time you click Sharpen, the image is affected further.
Blur - Use Blur to soften the entire image, or the currently selected area. Each time you click Blur, the image is softened further.
Smooth - Use Smooth to smooth the image, or the currently selected area. Each time you click Smooth, the image is affected further.
Auto Contrast - Use Auto Contrast to automatically correct poor contrast by adjusting shadows and highlights for the selected image while preserving image detail and color balance.
Undo Use the Undo Last and Undo All tools in the Actions section of the Edge Imaging ribbon bar to reverse un-saved changes you have made to the image. You can use the Undo Last Action icon (or press Ctrl+Z on your keyboard ) repeatedly to reverse changes one at a time, or use the Undo All Actions icon to reverse all changes at once. After you save changes or exit editing mode, you cannot undo your actions. You can, however, Restore the image to its original state if needed.
Redo Use the Redo Last and Redo All tools in the Actions section of the Edge Imaging ribbon bar to reapply un-saved changes you have made to the image, after using the Undo actions described above. You can use the Redo Last Action icon (or press Ctrl+Y on your keyboard ) repeatedly to reapply changes one at a time, or use the Redo All Actions icon to reapply all changes at once. After you save changes or exit editing mode, you cannot redo your actions. You can, however, Restore the image to its original state if needed.
Changes History Use the History tool in the Actions section of the Edge Imaging ribbon bar to review the un-saved changes you have made to an image. You can also click in the history list to return to a specific point in the editing trail.
Restore Original Image - Use the Restore tool in the Actions section of the Edge Imaging ribbon bar to return the selected image to the original, as it was imported into the patient record. This will undo all changes you have saved during any editing session.
Save Changes Click Save in your Quick Access toolbar or File ribbon bar (or press Ctrl+S on your keyboard) to save any changes you have made. . If you are in Edit mode, and have enabled the Exit Edit on Save setting in your Imaging User Options, you return to viewing mode after saving the image. Otherwise, you remain in Edit mode, where you can make more changes as needed.
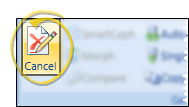
Exit Edit Mode Click Cancel in the Imaging section of the ribbon bar, if needed, to exit editing mode without saving any additional changes.
More Information
Additional Features - You can delete an image or a timepoint, and open image and timepoint properties in the Actions section of the Edge Imaging ribbon bar. See "Image Properties" for details.
 Edit icon from the Imaging section of the ribbon bar. Then click in the layout to select the image you want to work with. Editing mode is not available from Card Flow layouts. You can, however, maximize individual images in a Card Flow layout to edit them. Your Edge Imaging background changes slightly to indicate when you are in Edit mode.
 Save in your Quick Access toolbar or File ribbon bar (or press Ctrl+S on your keyboard) to save any changes you have made. . If you are in Edit mode, and have enabled the Exit Edit on Save setting in
  Cancel in the Imaging section of the ribbon bar, if needed, to exit editing mode without saving any additional changes.
 │
│  │
│  │
│ 


 Smooth to smooth the image, or the currently selected area. Each time you click Smooth, the image is affected further.

 Undo Last Action icon (or press Ctrl+Z on your keyboard ) repeatedly to reverse changes one at a time, or use the
  Undo All Actions icon to reverse all changes at once. After you save changes or exit editing mode, you cannot undo your actions. You can, however,
  Restore the image to its original state if needed.
 Redo Last Action icon (or press Ctrl+Y on your keyboard ) repeatedly to reapply changes one at a time, or use the
  Redo All Actions icon to reapply all changes at once. After you save changes or exit editing mode, you cannot redo your actions. You can, however,