Use the Select Patients by Subgroup tool to choose the patients that should receive messages according to any subgroup criteria you choose. For example, you might subgroup patients with birthdays within the next week, and send a Happy Birthday message.
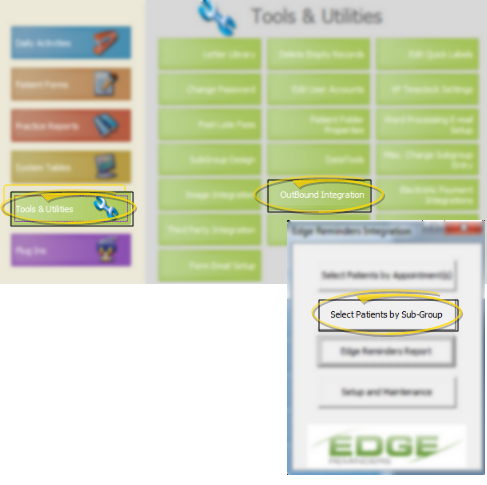
ViewPoint Main Menu - Tools & Utilities > Outbound Integration > Select Patients by Sub-Group.
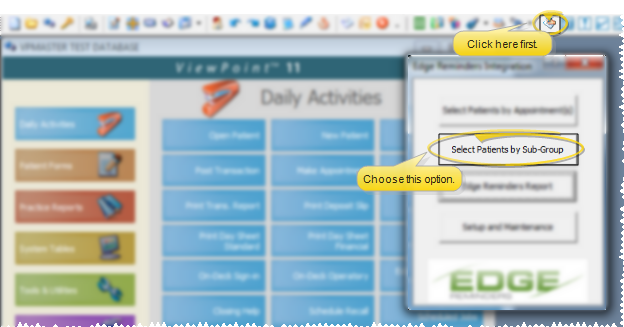
ViewPoint Toolbar -  Edge Reminders > Select Patients by Subgroup. (If the Edge Reminders option is not available, you first need to activate your Edge Reminders integration. See "Activate Edge Reminders Integration" for details.)
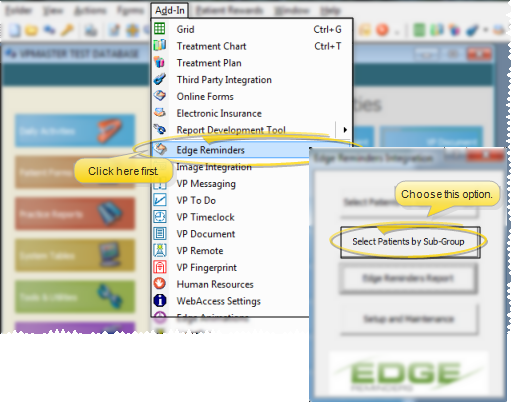
ViewPoint Shortcut Menu - Add-In > Edge Reminders > Select Patients by Sub-Group. (Or, press Alt+D on your keyboard to open the Add-In menu options.) (If the Edge Reminders option is not available, you first need to activate your Edge Reminders integration. See "Activate Edge Reminders Integration" for details.)
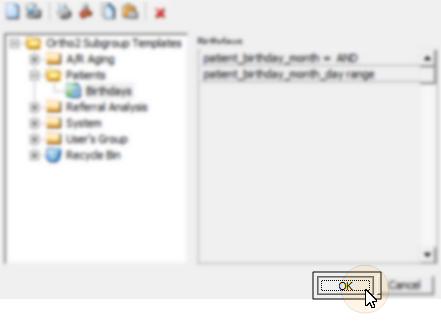
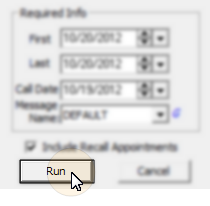
Select subgroup - Choose the subgroup criteria you want to use to determine whether a patient should receive the message, then click Ok. (See "Create & Manage Subgroups" for details about selecting a subgroup.)
Select message criteria - Choose the criteria for the message you want to send.
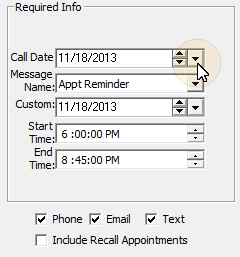
Call date - Enter the date you want telephone messages to be delivered. Note that while email and text messages are sent as soon as you submit a group of messages, telephone calls can be scheduled for this date.
Message name - Choose the message to send to this group of patients. See "Set Up Edge Reminders Messages " for details about creating your messages.
Custom date - This date field is used when you send an Office Closure message to notify patients of an upcoming, closure of your office (for weather, family emergency, or similar situation) . This field is ignored for all other message types.
Start / end times - Enter the time of day you want to initiate telephone reminder calls. Message delivery will be attempted only during the time range you set.
Choose delivery method(s) - Enable each type of delivery method, telephone, email, and/or text, that you want to use for this set of reminders. (You flag which phone number / email address to use for each type of message in the patient and responsible party
 Include recall appointments - Enable this option to include patients with recall appointments within the date range. If the option is disabled, only regularly-scheduled appointments will be included.
Generate patient list - Click Run to identify the patients that fit your criteria.
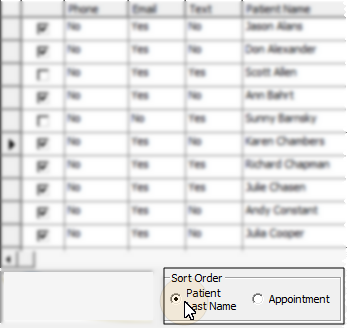
Review patient list - Review the list of patients that will receive messages, and make any necessary changes.
Choose sort order - Choose whether to sort the list by patient last name, or appointment date.
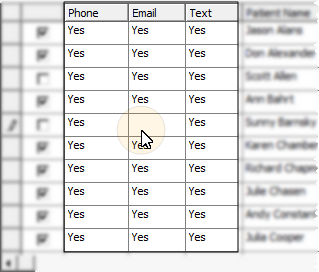
Choose patients to contact - Click to enable / disable the checkbox beside each patient to indicate whether you want that patient to receive the message. You can also use the Select All and Select None tools to choose the patients to include.
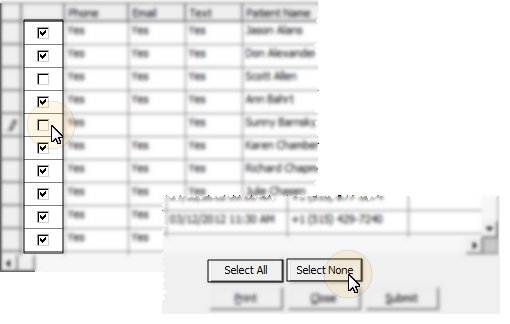
Choose delivery method(s) - Review the delivery method fields that indicate whether a patient will be receiving a Phone, Email, and/or Text message. If you need to make a change, simply type Yes or No in the appropriate field. If more than one method is enabled, the patient will receive multiple messages.
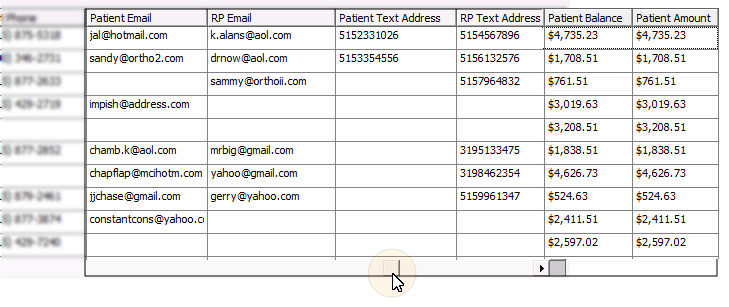
Review & edit contact info - Scroll to the right side of the list, and review the patient and responsible party phone numbers, email addresses, and text numbers to verify the messages will be sent successfully. If needed, you can type in the fields to change them. Note that the changes you make to this window will not be saved in the patient folder. (The patient current account balance and amount due are included at the far edge of the window for your review.)
Print - Click Print to send the list to any printer available to your workstation. If you edited phone numbers, e-mail addresses, or text addresses, you might use a printed list to update your patient folders.
Submit messages - Click Submit to initiate the message process. Note that email and text messages will be sent immediately, while telephone messages will be sent according to the Call Date you specified.
Cancel messages - If you initiated a message set in error, you can click Cancel Message Set from your Edge Reminders report to remove the set, preventing the reminders that have not yet been sent from occurring. Note that you can only delete message sets that have not yet begun to sent out messages.See "Edge Reminders Message History" for details.
Review submitted messages - Run the Edge Reminders report to help analyze the success of your automatic appointment reminder system. In general, we suggest you generate the report each business day after you have submitted messages.See "Edge Reminders Message History" for details.
Patient & responsible party data - See "Set Up Patients & Responsible Parties for Reminders" for details about which patient folder fields are used for each message delivery type.
Scheduled reminders option - Use the
 │
│  │
│  │
│ 
Ortho2.com │1107 Buckeye Avenue │ Ames, Iowa 50010 │ Sales: (800) 678-4644 │ Support: (800) 346-4504 │ Contact Us
Chat with Software Support │Chat with Network Engineering │ Chat with New Customer Care
Remote Support │Email Support │ Online Help Ver. 12/18/2015


