Advanced VP Imaging Settings
You can customize VP Imaging on an office-by-office basis for special situations, including modifying the order in which images are auto imported, adding extra images to the montage and changing layouts.
Get Started
Review the following notices before changing any VP Imaging advanced settings:
Advanced Setting Location - All VP Imaging advanced settings are saved in the Ourimaging.ini file, found in the "Path to Images" folder defined by your VP Imaging properties. To configure advanced settings, you must edit this file. If you are unfamiliar or uncomfortable editing program files, please contact Ortho2 for assistance.
Copy Current Settings - We highly recommend making a copy of your Ourimaging.ini file, and naming it Ourimaging.ini.old (or something similar) before proceeding. This provides a safety net if you make a mistake while editing the file.
Section Titles - Each section of the Ourimaging.ini file can be configured for your specific circumstances. Be careful not to change the name of the sections, or that feature will no longer function in VP Imaging.
Choose Your Settings
Open Advanced Settings File - Read and understand the notices listed above before you begin. Then, use your preferred text editor to open the Ourimaging.ini advanced settings file, and make changes to the appropriate sections as needed. Save your changes when finished. If you happen to have multiple Ourimaging.ini files on your computer, be sure you make changes to the file located in the “Path to Images” directory of your VP Imaging properties.
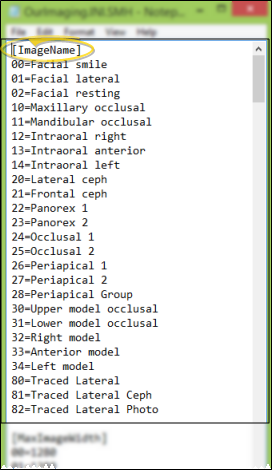
![]() Image Type Names - Use the [ImageName] section of the advanced settings file to add image types, or change the names of your existing VP Imaging image types. Also, you will refer to the image type number, and not the name, to make changes to other sections of the file.
Image Type Names - Use the [ImageName] section of the advanced settings file to add image types, or change the names of your existing VP Imaging image types. Also, you will refer to the image type number, and not the name, to make changes to other sections of the file.
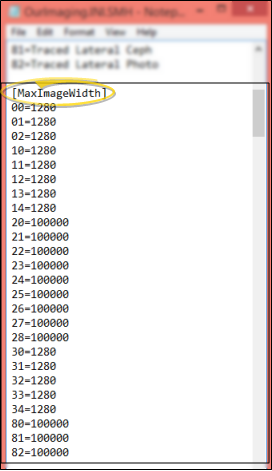
![]() Maximum Image Width - Use the [MaxImageWidth] section of the advanced settings file to restrict the maximum width of an image as it is imported into a patient folder.
Maximum Image Width - Use the [MaxImageWidth] section of the advanced settings file to restrict the maximum width of an image as it is imported into a patient folder.
![]() Auto Rotate - Use the [AutoRotateOnImport], [AutoRotate90LeftOnImport], and [AutoRotate90RightOnImport] sections of the advanced settings file to rotate specific images 180 degrees, or 90 degrees left, or 90 degrees right, respectively, upon importing them into VP Imaging.
Auto Rotate - Use the [AutoRotateOnImport], [AutoRotate90LeftOnImport], and [AutoRotate90RightOnImport] sections of the advanced settings file to rotate specific images 180 degrees, or 90 degrees left, or 90 degrees right, respectively, upon importing them into VP Imaging.
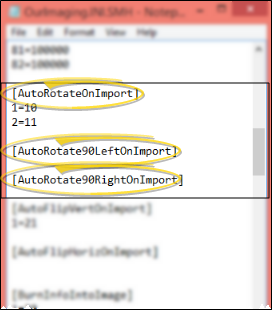
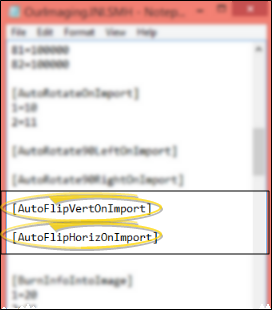
![]() Auto Flip Images - Use the [AutoFlipVertOnImport]section of the advanced settings file to achieve a mirror image top-to-bottom, and the [AutoFlipHorizOnImport] section of the file to achieve a mirror image, right-to-left upon importing them into VP Imaging.
Auto Flip Images - Use the [AutoFlipVertOnImport]section of the advanced settings file to achieve a mirror image top-to-bottom, and the [AutoFlipHorizOnImport] section of the file to achieve a mirror image, right-to-left upon importing them into VP Imaging.
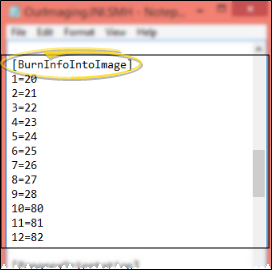
![]() Burn Patient ID Label - Use the [BurnInfoIntoImage] section of the advanced settings file to permanently add a patient identification label to an image type. See "Burn Patient ID Label Onto Images" for details about what patient information is included on the label, and when the label is burned onto the image.
Burn Patient ID Label - Use the [BurnInfoIntoImage] section of the advanced settings file to permanently add a patient identification label to an image type. See "Burn Patient ID Label Onto Images" for details about what patient information is included on the label, and when the label is burned onto the image.
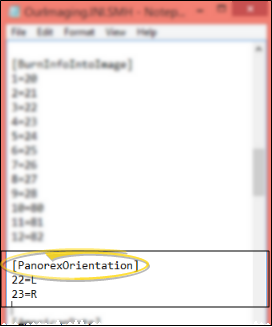
![]() Panorex Orientation Label - Use the [PanorexOrientation] section of the advanced settings file to include the orientation label "R"(for right) or "L" (for left) on specific images. See "Include Panorex Orientation Label on Images" for details about how this feature works.
Panorex Orientation Label - Use the [PanorexOrientation] section of the advanced settings file to include the orientation label "R"(for right) or "L" (for left) on specific images. See "Include Panorex Orientation Label on Images" for details about how this feature works.
![]() Date Format - Use the [AmericanDate] section of the advanced settings file to specify the date format to use for labels you burn onto imported images. See "Burn Patient ID Label Onto Images" for details about this feature.
Date Format - Use the [AmericanDate] section of the advanced settings file to specify the date format to use for labels you burn onto imported images. See "Burn Patient ID Label Onto Images" for details about this feature.

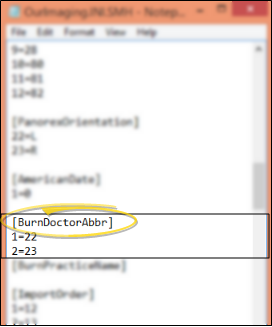
![]() Orthodontist Identification Label - Use the [BurnDoctorAbbr] section of the advanced settings file to add the patient's assigned orthodontist to the image. See "Include Orthodontist or Practice Name on Images" for details about this feature.
Orthodontist Identification Label - Use the [BurnDoctorAbbr] section of the advanced settings file to add the patient's assigned orthodontist to the image. See "Include Orthodontist or Practice Name on Images" for details about this feature.
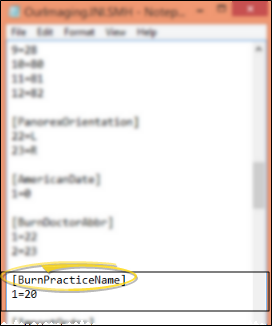
![]() Practice Name Identification Label - Use the [BurnPracticeName] section of the advanced settings file to add your practice name to the image. See "Include Orthodontist or Practice Name on Images" for details about this feature.
Practice Name Identification Label - Use the [BurnPracticeName] section of the advanced settings file to add your practice name to the image. See "Include Orthodontist or Practice Name on Images" for details about this feature.
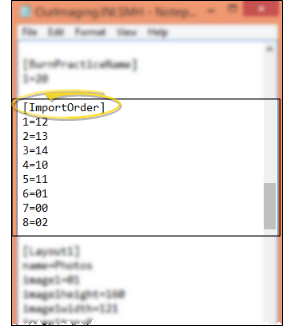
![]() Import Order - Use the [ImportOrder] section of the advanced settings file to change the order in which Auto Import adds your images to a patient folder. You might do this, for example, to match the
order in which you like to take images on your digital camera.
Import Order - Use the [ImportOrder] section of the advanced settings file to change the order in which Auto Import adds your images to a patient folder. You might do this, for example, to match the
order in which you like to take images on your digital camera.
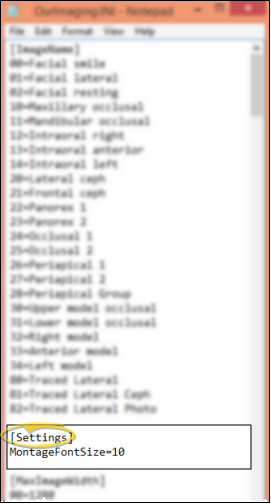
![]() Settings - By default, the OurImaging.ini file does not contain a [Settings] section. However, you may create one to adjust certain parameters, such as the font size that your practice name appears in your photo montage. See "View & Print Photo Montage " for details.
Settings - By default, the OurImaging.ini file does not contain a [Settings] section. However, you may create one to adjust certain parameters, such as the font size that your practice name appears in your photo montage. See "View & Print Photo Montage " for details.
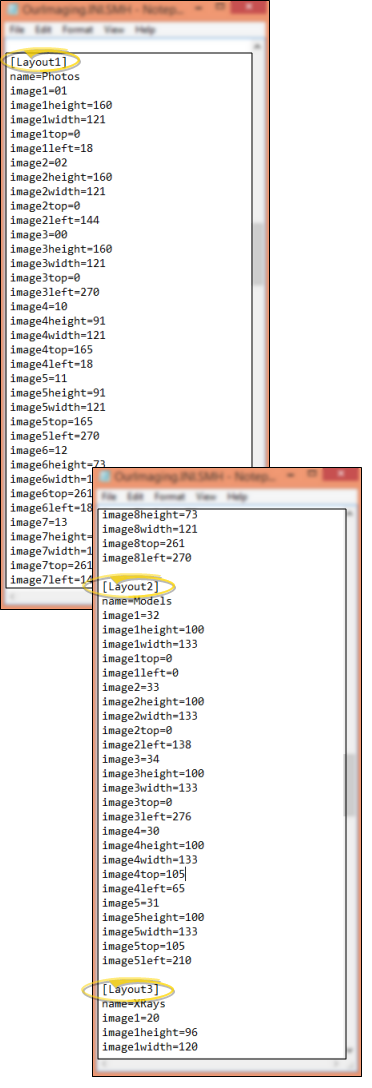
![]() Layouts - Use the [Layouts] section of the advanced settings file to customize the way your images look in your patient folders, change how your montage prints, and add SmartCeph traced ceph images to VP Imaging. See "Add / Edit Image Layouts" for details.
Layouts - Use the [Layouts] section of the advanced settings file to customize the way your images look in your patient folders, change how your montage prints, and add SmartCeph traced ceph images to VP Imaging. See "Add / Edit Image Layouts" for details.