Add / Edit Image Layouts
Use the [Layouts] section of the advanced settings file to customize the way your images look in your patient folders, change how your montage prints, and add SmartCeph traced ceph images to VP Imaging.
Copy Current Settings - We highly recommend making a copy of your Ourimaging.ini file, and naming it Ourimaging.ini.old (or something similar) before proceeding. It often takes some trial and error to get your layouts to look "just right". Having an original copy of your advanced settings file provides a safety net if you make a mistake or need to make further layout adjustments.
Get Started
Edit Advanced Settings File - Read and understand the notices listed in the Advanced Settings topic, and make a copy of your Ourimaging.ini file before you begin. Then, use your preferred text editor to open the Ourimaging.ini advanced settings file, and make changes to the [Layouts] section as needed. Save your changes when finished. If you happen to have multiple Ourimaging.ini files on your computer, be sure you make changes to the file located in the “Path to Images” directory of your VP Imaging properties. If you are unfamiliar or uncomfortable editing program files, please contact Ortho2 for assistance.
Choose Your Settings
![]() Layout Sections - The layout that displays when you open the VP
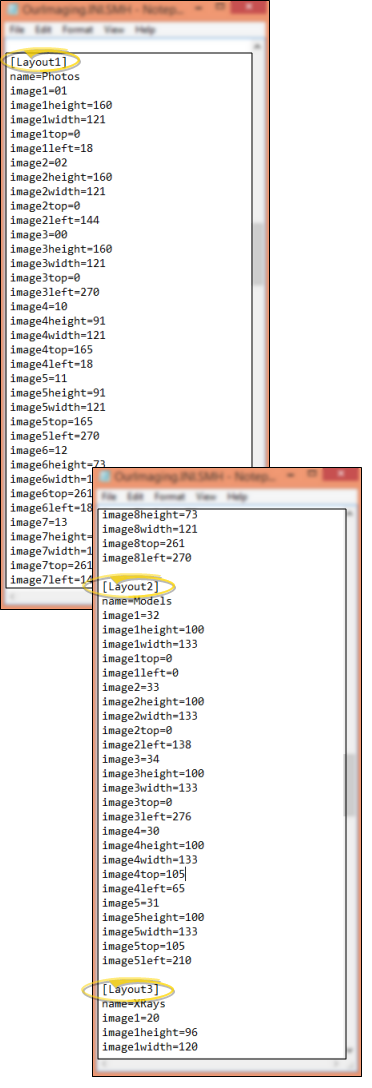
Imaging tab of the patient folder is listed as [Layout1] in the Ourimaging.ini file. Additional layouts are numbered sequentially. All the parameters that determine what the layout looks like are listed
under the corresponding [Layout] section. You can edit existing layout sections, and add more sections as needed. If you add sections, be sure each is numbered appropriately.
Layout Sections - The layout that displays when you open the VP
Imaging tab of the patient folder is listed as [Layout1] in the Ourimaging.ini file. Additional layouts are numbered sequentially. All the parameters that determine what the layout looks like are listed
under the corresponding [Layout] section. You can edit existing layout sections, and add more sections as needed. If you add sections, be sure each is numbered appropriately.
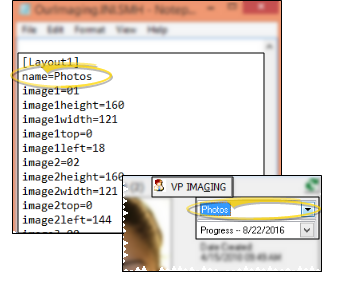
![]() Name - The first parameter under the [Layout] section heading is the layout name, such as "name=Photos". You use this name when choosing which layout to view in a patient's Imaging page.
Name - The first parameter under the [Layout] section heading is the layout name, such as "name=Photos". You use this name when choosing which layout to view in a patient's Imaging page.
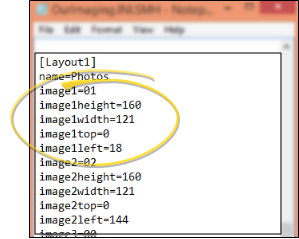
![]() Image Parameters - You identify each image in the layout by its image type, height and width, and position on your screen.
Image Parameters - You identify each image in the layout by its image type, height and width, and position on your screen.
Save - Be sure to save your changes to the Ourimaging.ini file when you have finished.


