Use the Tooth Oral Cavity Area
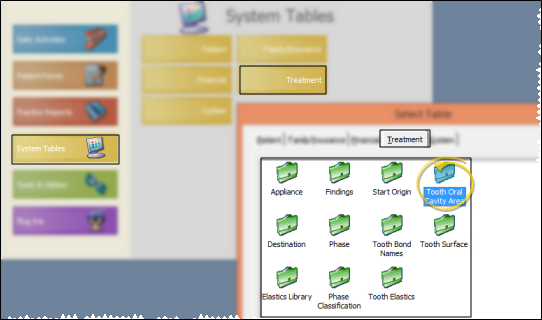
Open Tooth Oral Cavity Area Table![]() ViewPoint main menu > System Tables > Treatment > Tooth Oral Cavity Area.
ViewPoint main menu > System Tables > Treatment > Tooth Oral Cavity Area.
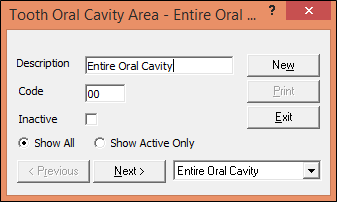
Select Existing Record to Work With - Choose an existing record from the drop down list at the bottom of the window, then edit the details as needed, as described below. You can also click Previous and Next to advance through all your choices. You can enable either the Show All or Show Active Only option to include / exclude inactive records in the dropdown list and Previous / Next toggle.
Create a New Record - Click New, then enter the details for your new record, described below.
Edit Oral Cavity Details- Select the record to work with, and make your changes to the description and insurance code as needed.
Inactive / Active Toggle - Once you create a record, you cannot delete it. You can, however, flag it Inactive when you no longer need it.
Save your changes - Click Exit to save the changes you have made and close the table window.
 │
│  │
│  │
│ 
Ortho2.com │1107 Buckeye Avenue │ Ames, Iowa 50010 │ Sales: (800) 678-4644 │ Support: (800) 346-4504 │ Contact Us
Chat with Software Support │Chat with Network Engineering │ Chat with New Customer Care
Remote Support │Email Support │ Online Help Ver. 12/18/2015