Use the Elastics Library table to set up pre-determined elastics templates that you can then apply to your patients' tooth charts.
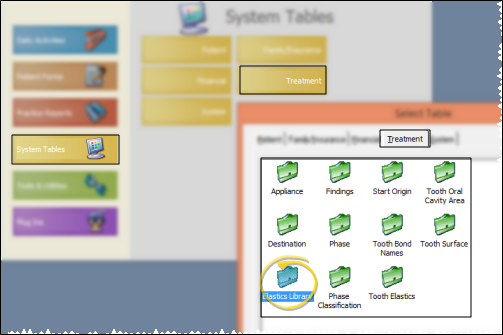
Open Elastics Library Editor![]() ViewPoint main menu > System Tables > Treatment > Elastics Library. (Note this is different from the Tooth Elastics table, which you use to set up the types of elastics you use.)
ViewPoint main menu > System Tables > Treatment > Elastics Library. (Note this is different from the Tooth Elastics table, which you use to set up the types of elastics you use.)
Choose a Template![]() You can make changes to an existing template, create a brand new template, or copy a template to a new name.
You can make changes to an existing template, create a brand new template, or copy a template to a new name.
Choose Elastics Type - Select the elastics type you want to use from the Elastics dropdown list. (See "Set Up Tooth Elastics Table " for details about maintaining your list of elastics types.)
Add Elastics- Click and hold the first tooth you want to work with. Drag your cursor to the last tooth you want included in the group and release your mouse button.
Save Changes - Click Save to save any changes you make to the names.
Exit - Click Exit to close the table window. If you made changes to the library, be sure to click Save first, or your changes will be ignored.
Clear Elastics - You can also select a template to work with, and click the Clear Elastics button to erase all elastics from the template and start over.
Delete Template - You can select the template to work with, then click Delete. Any tooth charts that already have this template applied will remain unaffected.
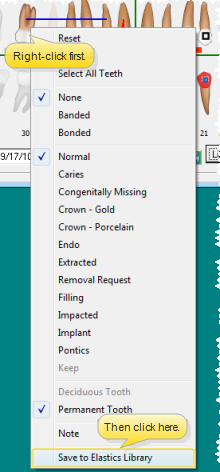
Save Elastics to Library - In addition to creating elastics templates with the Elastics Library, you can create a template from a patient's tooth chart by clicking the options button ( [V]) at the bottom of the tooth chart and selecting Save to Library.
 │
│  │
│  │
│ 
Ortho2.com │1107 Buckeye Avenue │ Ames, Iowa 50010 │ Sales: (800) 678-4644 │ Support: (800) 346-4504 │ Contact Us
Chat with Software Support │Chat with Network Engineering │ Chat with New Customer Care
Remote Support │Email Support │ Online Help Ver. 12/18/2015