Grid Tools from the Grid Scheduler toolbar.
Use
Global Template - Your template tools are initiated automatically when you create or edit global templates from the Templates editor. See "Set Up Grid Scheduler Templates" for details.
In general, changes you make to global templates will affect new dates that you assign to the template. Dates in your scheduler that are already using a template are not affected by these changes.
Individual Template![]() - Open your Grid Scheduler to the date you want to work with. Then click Grid Tools from the Grid Scheduler toolbar.
- Open your Grid Scheduler to the date you want to work with. Then click Grid Tools from the Grid Scheduler toolbar.
Changes you make to the template of an individual date in your scheduler do not affect any other date, or your global templates.
Template Hours![]() - Enter values in the Doctor Hours, Staff Hours, and Work Hours fields to be used for reporting purposes. Note that you can change these fields only for global grid templates: You cannot change these values when you edit the template for an individual date.
- Enter values in the Doctor Hours, Staff Hours, and Work Hours fields to be used for reporting purposes. Note that you can change these fields only for global grid templates: You cannot change these values when you edit the template for an individual date.
Template Color![]() - The template color is used with your scheduler's Month View mode
- The template color is used with your scheduler's Month View mode
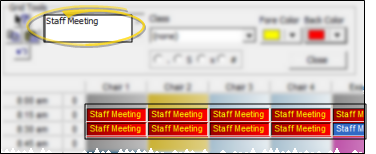
Cell Text ![]() - Select the cells to work with, then enter the text you want to see in the cell. Note that once an appointment is scheduled in the cell, your text is replaced with appointment information.
- Select the cells to work with, then enter the text you want to see in the cell. Note that once an appointment is scheduled in the cell, your text is replaced with appointment information.
Classification ![]() - Select the cells to work with, then choose the class you want to assign . You create and maintain your scheduling classes with the Classes editor, and specify which procedures should be scheduled to classified time slots with the Procedure editor.
- Select the cells to work with, then choose the class you want to assign . You create and maintain your scheduling classes with the Classes editor, and specify which procedures should be scheduled to classified time slots with the Procedure editor.
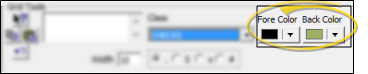
Cell Colors![]() - Select the cells to work with, then choose the colors you want to assign .
- Select the cells to work with, then choose the colors you want to assign .
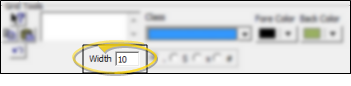
Width![]() - The cell width determines the maximum number of characters that can display in each time slot. If you define a template with wide columns, you may not be able to view the entire grid on your screen. In this case, you can use a scroll bar to view additional columns.
- The cell width determines the maximum number of characters that can display in each time slot. If you define a template with wide columns, you may not be able to view the entire grid on your screen. In this case, you can use a scroll bar to view additional columns.
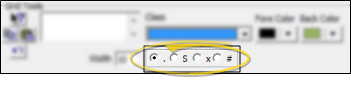
Cell Status![]() - Select the cells to work with, then choose the status you want to assign .
- Select the cells to work with, then choose the status you want to assign .
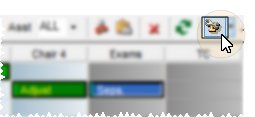
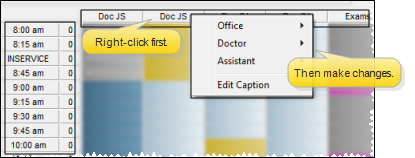
Column and Row Captions![]() - Right click a column or row heading to review the current doctor, office, and assistant assignments, and to edit the caption, if desired. (Note that you can only edit captions when working with global templates, and not when editing an individual scheduling grid.)
- Right click a column or row heading to review the current doctor, office, and assistant assignments, and to edit the caption, if desired. (Note that you can only edit captions when working with global templates, and not when editing an individual scheduling grid.)
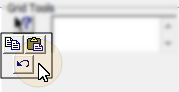
Copy, Paste, Undo Cell Properties![]() - After applying one or more properties to grid cells, you can select the cells to work with, then use the
- After applying one or more properties to grid cells, you can select the cells to work with, then use the  Copy( Ctrl+C) and
  Paste (Ctrl+V) those properties to other cells in the same template, or a different template.
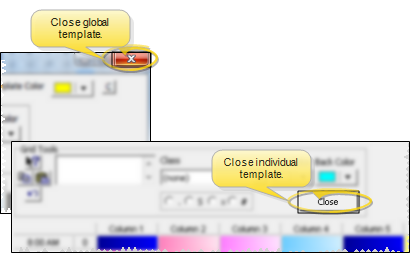
Save Changes![]() - If you have been working on a template in the Template Editor, click the X in the top-right corner of the window to save your changes and exit. If you have made template changes to an individual date, click the Close button to exit Grid Tools and return to your schedule.
- If you have been working on a template in the Template Editor, click the X in the top-right corner of the window to save your changes and exit. If you have made template changes to an individual date, click the Close button to exit Grid Tools and return to your schedule.
 │
│  │
│  │
│ 
Ortho2.com │1107 Buckeye Avenue │ Ames, Iowa 50010 │ Sales: (800) 678-4644 │ Support: (800) 346-4504 │ Contact Us
Chat with Software Support │Chat with Network Engineering │ Chat with New Customer Care
Remote Support │Email Support │ Online Help Ver. 12/18/2015


 Undo to reverse your last editing action.