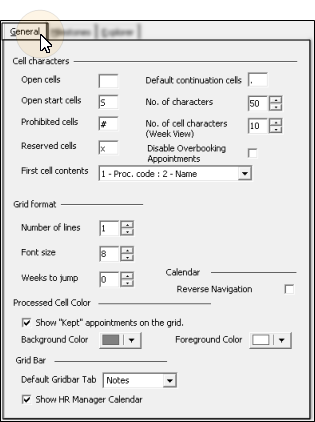
Open Cells (Optional.) - The open cell character displays in unappointed grid cells that have no class assigned to them. Many offices use a period (.) or leave open cells blank. If you change the default character in your Grid Scheduler properties, the character displayed in existing appointment grids does not change.
Open Start Cells (Optional.) - You flag cells as open start to show time slots that are appropriate for starting an appointment. If you change the default character in your Grid Scheduler properties, the character displayed in existing appointment grids does not change.
Prohibited Cells (Optional.) - You flag cells as prohibited to show time slots that are not appropriate for patient appointments. You cannot schedule to these cells. If you change the default character in your Grid Scheduler properties, the character displayed in appointment grids does not change.
Reserved cells (Optional.) - You flag cells as reserved to show time slots that should only be scheduled as a last resort. If you change the default character in your Grid Scheduler properties, the character displayed in appointment grids does not change.
First Cell Contents - The first cell contents setting in your Grid Scheduler Properties determines what type of information is displayed in the cell of a one-unit scheduled appointment, as well as the first unit of a multiple-unit appointment. You can choose from data such as the patient name, procedure code,and patient ID code. If you change this setting, the information displayed in appointment grids does not change.
Multiple Line Requirement - If the setting requires two or more lines to display properly, that choice is indicated with the format 1-Field : 2-Field. In this case, be sure the number of lines property setting (described below), is at least two. Otherwise, the second portion of your first cell contents information will be omitted from your Grid Scheduler screen.
Width Requirement - If the number of characters in your first cell contents exceeds the width of your grid cells (determined when you create a grid), the information will be truncated as needed.
Default Continuation Cells - The default continuation character displays in all but the first cell of multiple unit appointments, unless the scheduled procedure has its own continuation characters defined in the Procedure table. (The first cell contents setting, described above, displays in the first cell of all appointments.)
Number of Characters - This setting indicates the number of times to repeat the default continuation character (described above) in each cell of multiple-unit appointments, assuming the cell width is equal to or less than this setting.
Number of Cell Characters (week view) - The Number of Cell Characters (Week View) setting of your Grid Scheduler properties indicates the column width for displaying your schedule in Week View mode.
Disable Overbooking Appointments - Enable the Disable Overbooking Appointments setting in your Grid Scheduler properties to prevent scheduling multiple appointments to the same time slot. If this setting is disabled, you are warned before overbooking, and must confirm your action to continue.
Number of Lines (Workstation-specific.) - Define the number of lines to display for each grid cell. If you display multiple lines per cell, you type notes into the additional line, or select a two-line option for your first cell contents setting (described above).
Font Size - Select the text size. The bigger the number, the bigger the text.
Weeks to Jump - The Weeks to Jump setting is your default number of weeks to jump ahead in your schedule, generally the average amount of time between adjustment visits. While viewing your schedule, you can press Alt+J or Shift+Alt+J to jump ahead or behind (respectively) one jump.
Show Kept Appointments on the Grid - Appointments that have been processed as Kept can appear dimmed on your schedule, or can be removed from your schedule entirely. If the appointments appear on the schedule, you can hover over them to view the details and open the patient folder, just as you can with currently scheduled appointments. In addition, the amount of doctor time assigned to that appointment remains visible on your Scheduler.
Background / Foreground Colors - If you choose to show kept appointments, you can select the colors to use for those cells.
Default Grid Bar Tab - You can select whether you would like the grid bar Clipboard, Notes, or Needs Appointment section to open when you first enter the Grid Scheduler, and whenever you refresh your Grid Scheduler screen.
Show HR Calendar in Grid Bar - You can optionally display the appointments from your HR Manager calendar on the Notes tab of your Grid Bar.
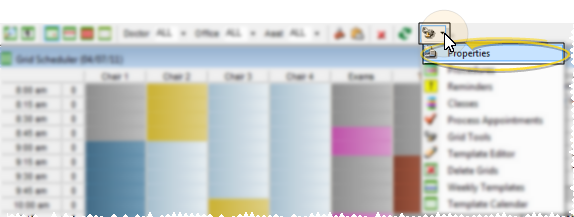
 Grid tools arrow >
  Properties > General. (Click here for ways to open your Grid Scheduler.)
  │
│  │
│  │
│