Use the Template Calendar to review and optionally assign or replace the scheduling template you want to use for each day of the month. Note that if you replace the template for a date that already has appointments scheduled, any appointments that do not fit into the new template will be removed from the patient folder and placed in the Needs Appointment list. (See "Set Up Schedule Rotation" for details about setting up the default template for each day of the week.)
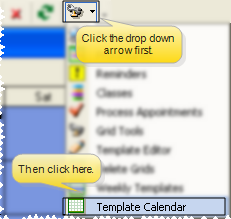
Grid Scheduler toolbar>  Grid Tools drop down arrow >
  Template Calendar.
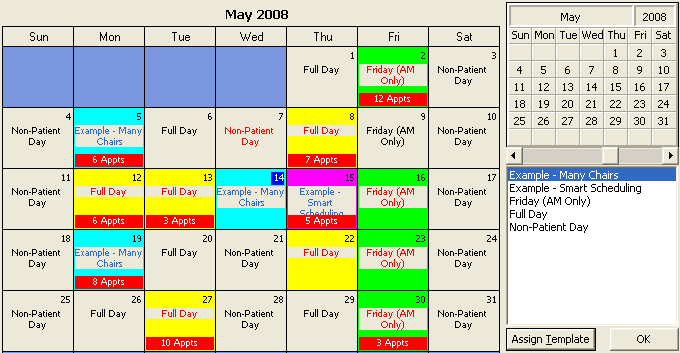
Review assigned templates - The text color of the template name indicates how the template was assigned to the date. The background color of each date indicates the template assigned to that day.
No template assigned - If no template is assigned to this date yet, the name of the default Weekly Template is displayed in black. See "Set Up Schedule Rotation" for details.
Weekly Template assigned - If the default weekly template is assigned, the template name is displayed in Red.
Template manually selected - If you manually assigned a template to the date, the template name is displayed in Blue.
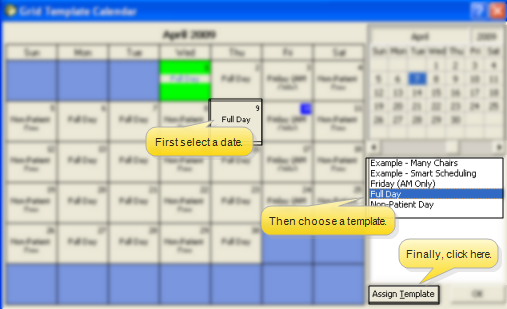
Assign a template - Select the date to work with and choose the template to assign. Then click Assign Template.
IMPORTANT RE-ASSIGNMENT NOTE - The number of appointment scheduled (if any) displays at the bottom of the date. If you re-assign a template to a date that has appointments scheduled, the Grid Scheduler attempts to re-schedule the appointments to the new template. Any appointments that cannot be re-scheduled on the new template are placed on a Rescheduled Grid Bar and MUST be re-scheduled manually.
You may right-click and [Print] a copy of the Template Calendar.
 │
│  │
│  │
│ 
Ortho2.com │1107 Buckeye Avenue │ Ames, Iowa 50010 │ Sales: (800) 678-4644 │ Support: (800) 346-4504 │ Contact Us
Chat with Software Support │Chat with Network Engineering │ Chat with New Customer Care
Remote Support │Email Support │ Online Help Ver. 12/18/2015