 Watch video tutorial. (Windows Media Player, an active Internet connection, and a valid Ortho2 customer login are required to run video tutorials, webinars, and training programs.)
Use the Disaster Recovery feature to make a copy of your ViewPoint data (and optionally Dolphin imaging data) on another machine on your network. This data backup can take place while ViewPoint is running, providing you with a quick way to get up and going again if your server ever goes down. You may initiate a Disaster Recovery backup manually at any time, or set up your system to automatically back up your data at a specific time of day.
Important! This datafile backup does not replace your regular backup routine: Even if you use this Disaster Recovery feature, we strongly recommend that you follow a regular system backup protocol, such as our Ultimate Backup Cycle, that includes offsite and/our cloud backup storage.
Watch video tutorial. (Windows Media Player, an active Internet connection, and a valid Ortho2 customer login are required to run video tutorials, webinars, and training programs.)
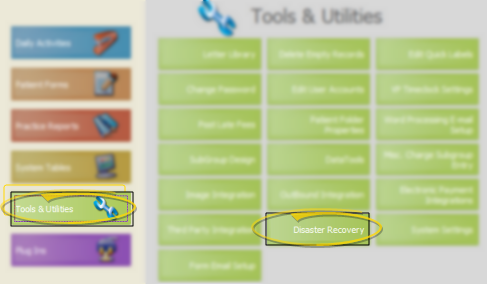
ViewPoint Main Menu - Tools & Utilities > Disaster Recovery.
Disaster Recovery Set Up - For the easiest setup and best results, set up Disaster Recover on the server and choose to save the backup file on a workstation.
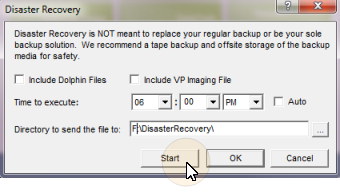
 Include Dolphin Files - If you use the ViewPoint / Dolphin Imaging integration, you can enable this option to include your Dolphin Imaging data in your Disaster Recovery backup. If you do not use the integration, or if this option is disabled, the backup ignores any Dolphin Imaging data.
Include VP Imaging File - If you use VP Imaging, enable this option to include your patients' imaging data in your Disaster Recovery backup. If you do not use the integration, or if this option is disabled, the backup ignores any VP Imaging data.
Time to Execute (Recommended.) - If you want to run a Disaster Recovery backup automatically each day, enter the time of day you would like the backups to begin, such as over your lunch hour. Note that the automated backup occurs only when the Auto option, described below, is enabled.
Auto - Enable the Auto option to start the Disaster Recovery backup each day at the time specified, described above. If this option is disabled, the backup will not start automatically. You can, however, initiate a Disaster Recovery backup manually whenever you wish, as described below.
Directory to Use - Type or browse to the location you wish the backup file to be saved. We suggest you save your Disaster Recovery files to a low-use workstation on your network (not the server, as Disaster Recovery is designed to protect your data in case some disaster affects your server). Also this must be a machine on which full access and plenty of hard drive space are available. Consider creating a special DisasterBU directory on the backup workstation to keep your files organized and easy to find.
Exit & Reboot - Click Ok to close the Disaster Recovery window. Note that you must exit ViewPoint and reboot your computer before any automatic backup settings will take effect.
Run a Backup - Before running a Disaster Recovery backup, be sure both your server and the destination backup workstation are turned on and SQL is running. (You can test these requirements by opening ViewPoint on the destination workstation.) You may click Start to manually start a backup whenever you wish, in addition to scheduling automatic backups, as described above. You and any other ViewPoint users may continue to work while the backup is running.
Backup Details - Disaster Recovery creates a /Reports folder inside your backup directory that contains copies of all the ViewPoint reports found on the station running the backup. In addition, it creates a .DMP file in the specified directory that includes the name of the ViewPoint database being backed up and the day of the week (i.e. Ortho2BU-Mon.dmp). So, if you run a Disaster Recovery backup every day, you will have a week-long backup history. Each time you run a Disaster Recovery backup, any previous backup file for the current day of the week will be overwritten by your new backup file.
Restore a Disaster Recovery Backup - If your server is down due to hard drive crash, theft, or other disaster, call Ortho2 Support. We can advise you on setting up a temporary server and help you restore your data.
 │
│  │
│  │
│ 
Ortho2.com │1107 Buckeye Avenue │ Ames, Iowa 50010 │ Sales: (800) 678-4644 │ Support: (800) 346-4504 │ Contact Us
Chat with Software Support │Chat with Network Engineering │ Chat with New Customer Care
Remote Support │Email Support │ Online Help Ver. 12/18/2015


