Import Single Images
Use the Single Import feature to add one or more individual images to a patient folder. This feature is especially useful for linking images to the patient's tooth chart, replacing images imported in error, or for completing a timepoint.
Use This Feature
-
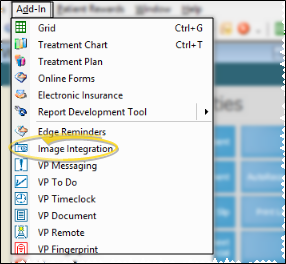
 Open Patient Imaging Page - You can open this feature in multiple ways: Use the method that's most convenient for you.
 -
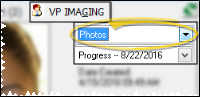
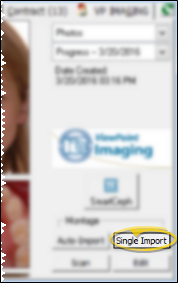
Choose Layout - Click the drop down button to select the layout you want to work with (i.e. Photos). You do not need to select the timepoint (i.e. Progress) yet.
-
Initiate Single Import - Click Single Import at the bottom-right of the screen.
-
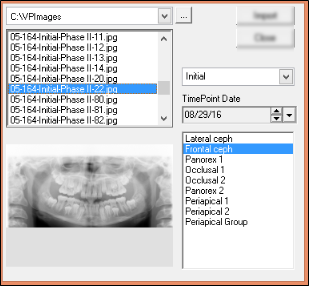
Choose Image Details - Choose the image you want to import, then select the timepoint, the timepoint date, and the image type to assign to that image.
-
Begin Import Process - Click Import to start the import process. If an image already exists for the selected image type, you have the opportunity to overwrite the existing image, or cancel the import process. If your VP Imaging Properties are set to ask whether to delete original image files,
you will be prompted to remove or keep the original file. However, if your VP Imaging Properties are set to always or never delete the original files, VP Imaging takes the appropriate action automatically.
-
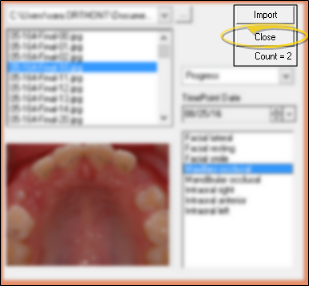
Import Additional Images - You may repeat this process, importing additional single images into this layout and timepoint as needed. The "Count" field indicates the number of images you have imported so far. When you have finished, click Close to exit.
-
Review Images - Once the images have been imported, you will see the Image Editor, with the layout of the new images. You may now edit images, or simply save them as-is.
-
Save Images - When you are ready, click Save
to save the current images and continue editing, or click Save and Exit to save the files and return to the patient's Imaging tab.If your
VP Imaging system is set to burn labels onto this type of image, the label
is imprinted at this time.
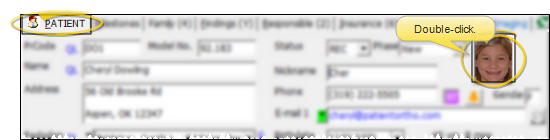
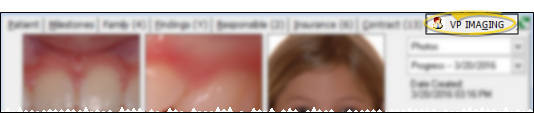
 Image Integration icon. If a patient record is already active, that patient's information will be loaded automatically. Otherwise, you use Fast Find (either typing information or swiping a registered reward card) to search for the patient to work with.


More Information
Imported Image Size - All imported and scanned images are converted to the width specified in the [MaxImageWidth] section of your advanced settings file, up to a maximum width of 1280. The image size maximum helps prevent significant slowing down of your ViewPoint system during the import process.
Manually Delete Original Files - If you choose not to delete the original files as you auto import images, or your VP Imaging Integration settings are set to never delete the files as they are being imported, you will need to delete them manually from the Path to Capture location. See "Set Up VP Imaging Integration" for details.