Edit Patient Images
Use the VP Image Editor to manipulate the images you have imported and scanned into your patient folders.
This article is for VP Imaging users only. If you use Edge Imaging, click here for information about your imaging system.
 Open the Image Editor - Patient Folder > Imaging tab > Edit.
-
Open Patient Imaging Page - You can open this feature in multiple ways: Use the method that's most convenient for you.
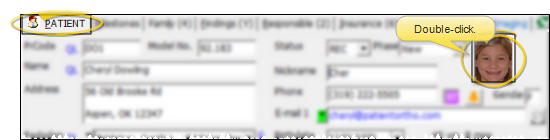
Patient Folder (from Patient tab) - Click the Patient tab, if needed > Double-click the patient image or image placeholder.
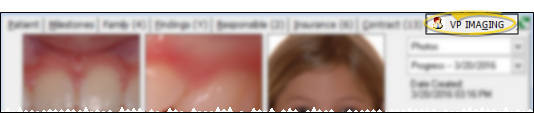
Patient Folder (from any patient folder tab) - Imaging tab > Click the Imaging tab at the top of the patient folder window to open the patient's Imaging page.
ViewPoint toolbar -  Image Integration icon. If a patient record is already active, that patient's information will be loaded automatically. Otherwise, you use Fast Find (either typing information or swiping a registered reward card) to search for the patient to work with.
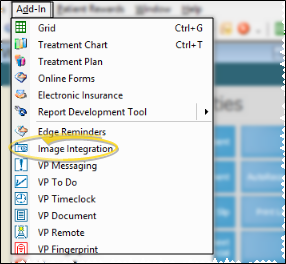
ViewPoint shortcut menu - Add-In > Image Integration. (You can press Alt+D on your keyboard to open the Add-In menu options.) If a patient record is already active, that patient's information will be loaded automatically. Otherwise, you use Fast Find (either typing information or swiping a registered reward card) to search for the patient to work with.
-
Open the Image Editor - Click Edit at the bottom of the patient's Imaging page.
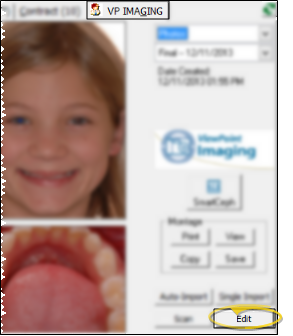
You are also taken to the Image Editor automatically after importing or scanning images into the patient folder.
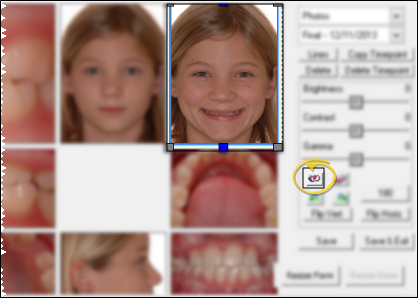
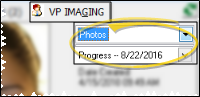
Choose a Layout & Timepoint - Click the dropdown button beside in the layout and timepoint fields to select the images you want to view and work with.
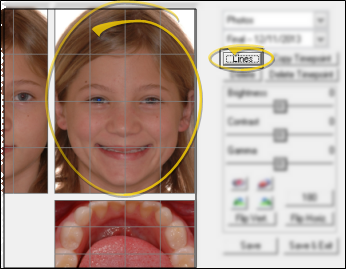
Show / Hide Grid Lines - Click the Lines button to show / hide grid lines over the image layout. Showing the lines may assist you as you resize
and/or realign an image, described below.
Edit the Image - Click the image you want to work with, then use the editing tools at the right of the window.
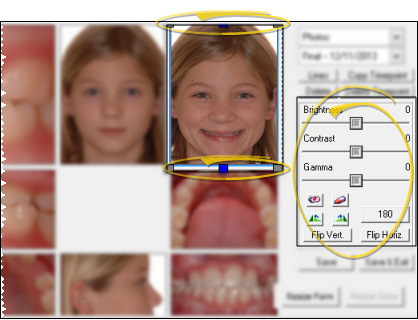
Brightness & Contrast - Click to select the image you want to work with, then use the Brightness, Contrast, and Gamma slider bars as needed. Place the slider at the "0" position
to return the image to its original colors. Once you save your changes,
your new color settings become the "0" positions for this image.
Red Eye Reduction - Use the Red Eye Removal tool to remove or reduce the "red eye" effect in your patient images.
-
Click the image you wish to work with, then
click the  Red Eye Removal button.
-
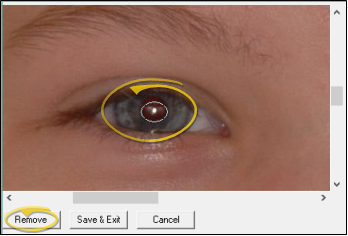
Click and drag to select
the portion of the image you wish to change.You will see the
image without any brightness or contrast changes you may have applied to it. Because VP Imaging
enlarges the picture so that you can be as accurate as possible, you will
likely need to use the scroll bars at the side and bottom of the picture
to view the area you wish to edit.When you have selected
the portion you wish to change. click Remove
at the bottom of the window
-
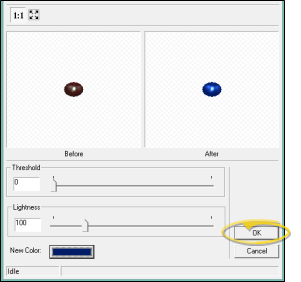
The Red Eye Removal
editor shows you several color controls, along with "before"
and "after" samples
of the section of the image you selected. Work
with color options to neutralize the original redness.You can enlarge the sample
even more by clicking the  button at the top of the screen; Click
  to return to the original sample size.When you are satisfied
with the "after" image,
click Ok. (Or,
click Cancel to ignore your changes.)
to return to the original sample size.When you are satisfied
with the "after" image,
click Ok. (Or,
click Cancel to ignore your changes.)
-
You then return to the Red Eye window, where you can work with the other eye, or click Save & Exit to finish.
Hue / Saturation - Use the  button to work with the color qualities of the selected image.
-
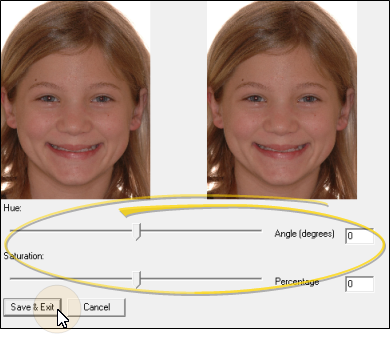
First click the image you wish to work with, then click the Hue / Saturation button.
-
You will see the image without any brightness or contrast changes you may have applied to it. Click and drag the slider bars, or enter numerical values to change the color qualities of the image. The changes you make to the hue are shown by the right-hand picture; the changes you make to saturation are shown by the left-hand picture.
-
When you have finished making changes, click the Save &
Exit button at the bottom of the window.
Rotation - Click to select the image you want to work with, then use the  Rotate Left/ Right buttons to rotate an image 90 degrees, or the 180 button to rotate the image 180 degrees. Or, grab a top or bottom blue handle and move your cursor to manually turn the image as needed.
Flip Vertically / Horizontally - Click Flip Vert to achieve a mirror image top-to-bottom; or click Flip Horiz. to achieve a mirror image, flipped right-to-left.
Resize - Click and hold a black corner handle and drag your cursor to enlarge or reduce the image size. To return the image to its original size, right-click and select Reset Image Size.
VP Imaging supports maximum width settings by image type. This
feature allows you to, say, resize Facial images to 800 wide, while X-rays
are left at original resolution. The settings are defined by the [MaxImageWidth] parameter in the OurImaging.ini file that is found in the folder where your patient images are stored. For assistance with this feature, please contact Ortho2.
Realign - Click and hold your left mouse button, then move your cursor to move the image within the viewing box. To return the image to its original position, right-click and select Reset Image Size.
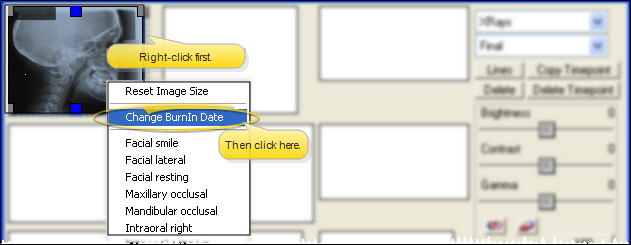
Change Burn-In
Date - By default, the date on images that you burn with the patient ID label is the timepoint date. If this is not the date the image was actually take, you can right-click the image to modify the date.
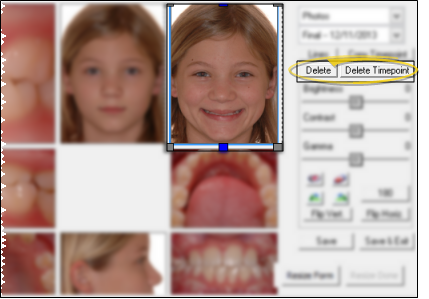
Delete Images - To remove an individual image, click the image you want to remove, then click the Delete button. Or, click Delete Timepoint to remove all the images in the selected timepoint. You may now scan or import different images into the timepoint as needed.
A copy of deleted images is retained
in a /BU
folder, in the directory where your VP Imaging files reside, with the
current date and time as the filename.
Swap Image Types - To change the image type assigned to an image, right-click the image, then select the new image type. VP Imaging swaps the image types, giving your selected image the name you have chosen, and assigning your image's old type to the image that had previously been assigned to the image type you chose. Therefore, you may have to continue swapping until all images have been assigned to the appropriate image type name.
Copy Images to a New Timepoint - Click Copy Timepoint to copy all the images from the timepoint you are currently viewing to another timepoint for this patient. The images will remain in the current timepoint as well.
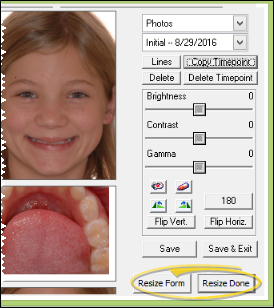
Resize Editing Window - Click Resize Form, then click and drag the edges of the Image Editor window to make the window bigger or smaller as needed to view all of the images in the selected layout. When finished, click Resize Done to return to the editing tools.
Save Images - Click Save
to save the current images and continue editing, or click Save and Exit to save the files and return to the patient's Imaging tab.

Burn Patient Id Label - If your
VP Imaging system is set up to burn labels onto certain image types, and those labels were not applied when the images were first imported, the label
is permanently imprinted as soon as you click Save or Save & Exit. However, if you instead click the X in the upper-right corner of the window to exit the Image Editor, any missing ID labels will not be burned onto images until you return to the Image Editor and click Save or Save & Exit. Once burned, the patient id label cannot be removed from an image.
Add / Remove Doctor, Practice, and Pano Labels - If your VP Imaging system is set up to include the doctor or practice name, and / or a panorex orientation label on certain image types, the label is added to those images when you Save or Save & Exit from the Image Editor. If you have images that previously included a doctor or practice name, or panorex orientation label, and you have edited your advanced settings file to remove those image types from being labeled, the label will be removed when you click Save or Save & Exit from the Image Editor.