Edit User Accounts
Use the
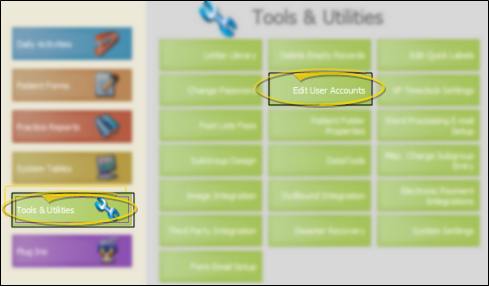
Select Tools & Utilities from the ViewPoint main menu, then select Edit User Accounts. Enter your

Create a new
New Record -Confirm the Users tab at the top of the window is selected, then click New User.
Select Existing Record - Your list of existing records appears at the left. Click the record to work with, then review and edit the details at the right. (You might need to click the Users tab at the top of the window first.) If not all your records appear in the list, enable the Show Inactive option at the bottom of the list.
All of the settings in this

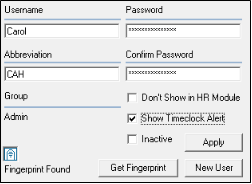
Username - This is the name the employee will use to log into
Abbreviation - The employee abbreviation identifies the
Password - Enter the desired password in both the Password and Confirm Password fields. The abbreviation is the same for the employee's
Don't Show in HR Module - If you use the HR Manager, you can "hide" this record from the employee list by enabling this option. This feature is useful for accounts you have created for administrative purposes, such as a patient sign-in station account.
Show Timeclock Alert - Enable the Timeclock Alert option in your operator accounts if you want ViewPoint to warn an operator when they log into ViewPoint without first clocking in.
Inactive / Active Toggle - Once you create a record, you cannot delete it. You can, however, flag it Inactive. Records you flag as Inactive are not available for general use, but they remain in your system for reporting and other data collection needs. In addition, you can toggle records back to Active whenever needed.
Get Fingerprint - If you use VP Fingerprint, click Get Fingerprint to acquire fingerprint data for this user. See "Acquire Staff Fingerprints" for details. A red fingerprint icon indicates no fingerprint data has been recorded yet.
Apply Changes - Click Apply at the bottom of the window to permanently create the new user account, or apply changes to an existing account.
Assign to Security Group - After clicking Apply to create a new user account, click the Group tab at the top of the window, and use the Members section to assign the user to a security group. See "Set Up Security Access" for details. All user accounts must belong to a security group before you can exit the security function.
Save Your Changes - Click Apply to save the changes you have made, then click Close to exit the editing window. If you make changes to someone that is currently logged into
Additional Employee Information - If you use the HR Manager, additional information can be found in the HR Manager employee record. See "HR Manager Employee Records" for details.
One Person / One Account Rule - We highly recommend you create an account for each employee. If multiple people use the same account,
you diminish the integrity of the
Print - You may want to print this list as a report for reference. See "Operator List" for details.
Print an Operator Log - Run an Operator

