Timeclock Status Viewer
Use the VP Timeclock status viewer to see which employees are clocked
in and out, review any messages, and edit time stamps.
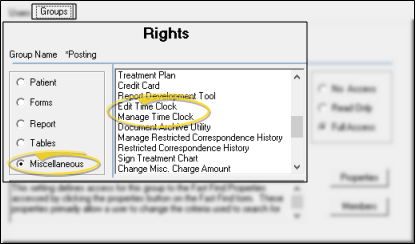
Timeclock Security - Use the Miscellaneous > Edit Time Clock and Manage Time Clock options of your security group rights editor to set up the level of access employees have to time clock features. See "Set Up Security Access" for details.
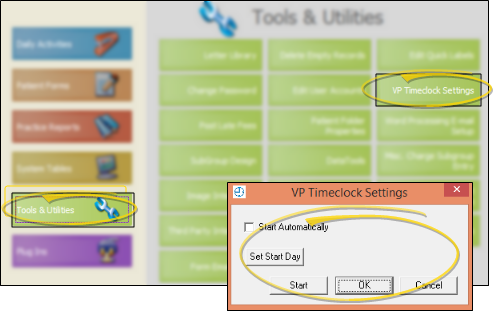
Set Up Start of Week - Use the VP TimeClock Settings window to select select the day of the week you start your work week, and choose whether to automatically load the timeclock whenever you start your workstation. See "VP Timeclock Settings" for details.
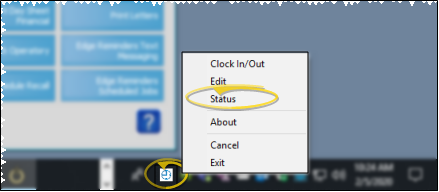
Start VP Timeclock on your computer, then right-click the  VP Timeclock icon in the computer notification area of your screen, and select Status.
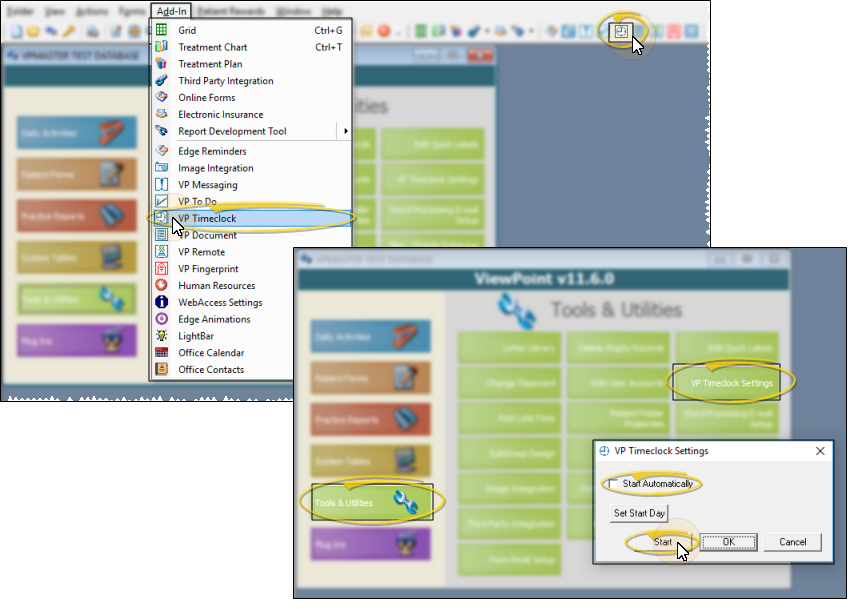
If the VP Timeclock icon is not in your computer notification area, you can start the app by clicking the VP Timeclock icon on your ViewPoint toolbar or the Add Ins shortcut menu. Or, from the ViewPoint main menu, choose Tools & Utilities and open the VP Timeclock Settings window. Then select Start.
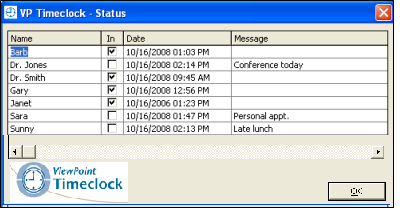
Status List - All ViewPoint users (with the exception of those flagged "Don't Show in HR Module" in yourUser Accounts table) are included in the status list, showing whether they are clocked in or out, and displaying any message they have included with their time stamp.
With proper security rights (described in Getting Started, above), you can insert, edit, and delete employee time stamps.
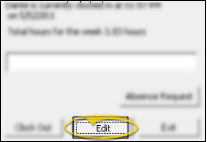
Initiate Edit - Open VP Timeclock from the ViewPoint toolbar or shortcut menu, or right-click the VP Timeclock icon in your computer notification area, and select Edit or Clock In/Out. Enter your username and password, then click Edit. (The Edit button appears only if you have appropriate time clock security rights.)
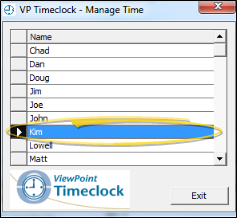
Select Employee - Double-click the name of the employee you want to work with
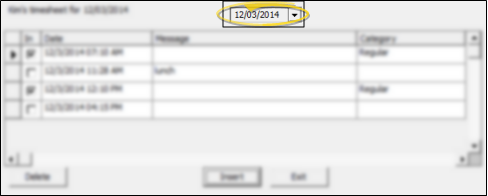
Select Date - Select the date to work with.
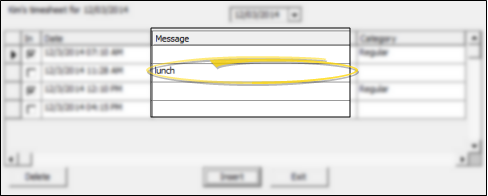
Edit Message - Click in the Message column to make changes to the time stamp message.
Edit Time Stamp - Double-click a time stamp to edit the date and time for both the stamp you selected and its corresponding "in" or "out" stamp. If you select an "in" stamp that does not yet have an "out" stamp, you can enter the appropriate time of day to create the "out" stamp on the fly. Pay special attention to the "AM" or "PM" designation. You are not allowed to save a set of time stamps that don't make sense.
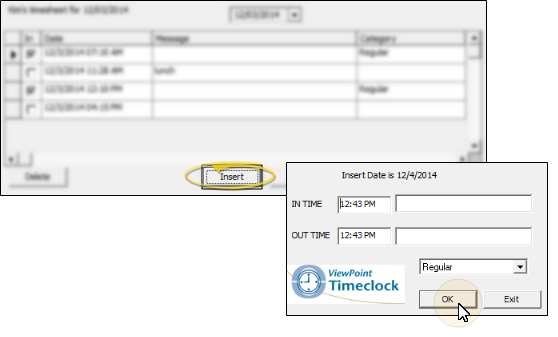
Insert a New Time Stamp - Click Insert to add a time stamp to this employee record. Then enter the time, category, and optionally a message. This feature provides a way for supervisors to add vacation and sick leave hours to the system, as well as add records for employees that simply forgot to clock in or out. You can also add time stamps into the future if needed, for example, to enter vacation hours before you leave.
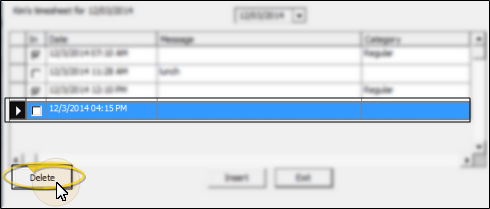
Delete a Time Stamp - Click a time stamp, then click Delete to remove the stamp from the employee record. When deleting stamps, be sure to delete both the "in" and "out" record.
Save Changes - When you have finished reviewing and editing the information, click Exit to save your changes and exit.
Print Timesheets - Run a Timesheet report to obtain the details about when employees clocked in and out, as well as the total hours worked, for any range of dates. All
timesheet reports include all employees. See "Timesheet Reports" for details.