Email Merge Letters
Use the Email mail merge action to send merge documents via email, as well as recording them in the appropriate correspondence histories. The text of the merge document will be used as the body of the email message, and included as an attachment in .PDF format. If the merge document includes any patient images, those images will not appear in the body of the email message, but will be included in the resulting .PDF, and can optionally be included as individual email attachments.
Watch the movie. (Windows Media Player, an active Internet connection, and a valid Ortho2 customer login are required to run video tutorials, webinars, and training programs.)
Get Started
Set Up System Email - Complete the Word Processing Email Set Up. Be sure to select whether you want to print a paper copy of a letter when a valid email address is not available in the patient folder. See "Mail Merge Email Setup" for details.
Set Up Document Properties - The Email To and Attach Images properties in your Letter Library are specific to emailing merge documents: Review your documents to be sure the appropriate settings are enabled. See "Letter Library" for details.
![]() Obtain Email Addresses - Enter email addresses for your patients, responsible parties, dentists, referrers, insurance companies, and other professionals.
Obtain Email Addresses - Enter email addresses for your patients, responsible parties, dentists, referrers, insurance companies, and other professionals.
Use This Feature
-
 Initiate Mail Merge - You can open this feature in multiple ways: Use the method that's most convenient for you.
-
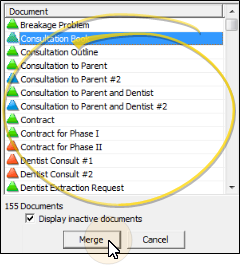
 Choose Document to Merge - Select the document to merge, then click Merge at the bottom of the window, or double-click the document name. You can merge any document that is preceded by a green or yellow icon. (Documents preceded by other colors are not ready to merge. See "Letter Library" for details.) You can use the scroll bar to view additional letters in your list, or simply begin typing the document name.
 -
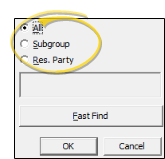
 Choose Recipient(s) - Choose whether to merge the document for all records, a subgroup of records, or a single record. The choices you have for selecting recipients depend on the "type" of document you chose to merge. (See "Letter Library" for details about assigning the document "type".)
-
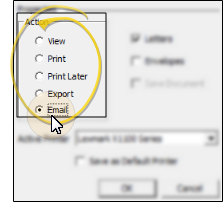
 Choose Merge Action - Choose the Email merge action.
 -
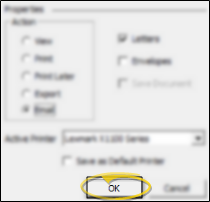
 Finish - Click Ok to continue, then type a subject for your message, and click Ok again. Your message will immediately be sent to the recipient(s), and recorded in the appropriate correspondence histories. The text of the merge document will be used as the body of the email message, and included as an attachment in .PDF format. If the merge document includes any patient images, those images will not appear in the body of the email message, but will be included in the resulting .PDF, and can optionally be included as individual email attachments. (See "Letter Library" for details about the Attach Images option.)
More Information
View First, then Email - You can use the View merge action to view mail merge documents before emailing them. See "View Mail Merge Documents" for details.
Print Letters That Cannot be Emailed - (Optional.) You can set up your system so that when mail merge encounters a document that does not have a proper email address associated with it, the document will automatically be printed instead. See "Mail Merge Email Setup" for details.
Correspondence History Records - Once processed, your mail merge documents are automatically added to the appropriate correspondence history, in .PDF format. Depending on the document selection type, it may be recorded in multiple correspondence histories, such as both the dentist and patient histories.(See "Letter Library" for details.)
Use Email Add-In to Send Quick Email with Attachments - Use the Email Via Outlook add-in to locate a patient, and send a message to one or more of the email addresses associated with the patient folder, including the patient, responsible party, dentist, referrer, insurance company, and other professional email addresses. You can include patient images and correspondence history items as attachments to these email messages. This option requires Outlook 2007 or greater, and a special ViewPoint plug-in. See "Email via Outlook Add-In" for details.
Double-Click to Send Quick Email - You can double-click an email address anywhere in ViewPoint (such as the Patient tab of the patient folder, dentist table, or insurance company table) to open your email editor and send a message to that recipient. This feature does not require mail merge or the Email via Outlook add-in. These messages are not recorded in any ViewPoint correspondence history.


 Letter.


