Create & Manage Subgroups
Use the Subgroup Template window to create and manage the different types of criteria you want to use for including / excluding records during a subgroup search, such as reporting, mail merge, stacks, and other ViewPoint tasks.
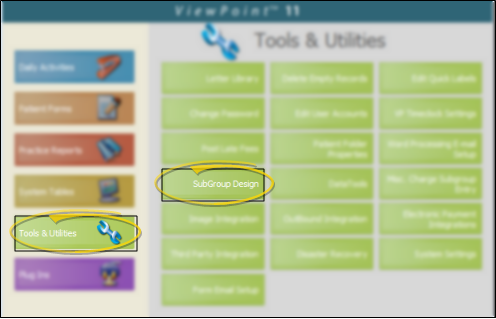
 Open the Subgroup Templates Window - ViewPoint main menu > Tools & Utilities > Subgroup Design. You also go to the subgroup templates window when you choose to generate a report,
form, or mail merge document for a subgroup.
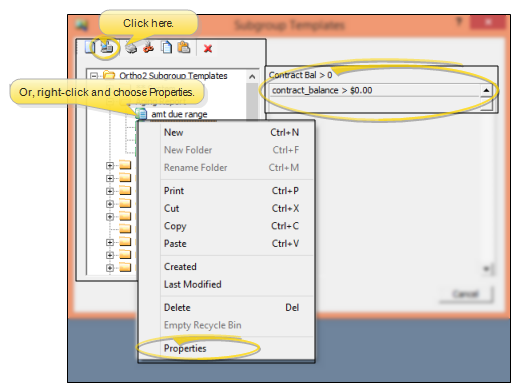
 Work with an Existing Subgroup - Generally, you arrange subgroups into folders to help you categorize their use. You can click the + and - icons beside folder names to expand / collapse the folders as needed. When you click a subgroup name in the list at the left, a summary of the subgroup criteria appears on the right side of the window. To open the selected subgroup for editing, click the
  Properties icon from the subgroup toolbar (or right-click and choose Properties, or double-click the subgroup name).
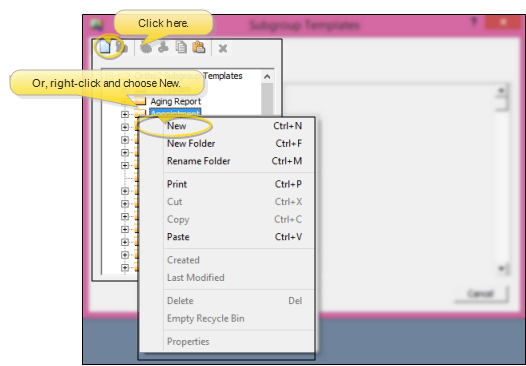
 Add a New Subgroup - Click a folder name to select the location of your new subgroup. Or, create a new folder to use (described below). After selecting a folder, click the
  New icon from the subgroup toolbar, or right-click and select New ), or press Ctrl+N on your keyboard to open the subgroup design window. You can now edit the Subgroup Details, described below.
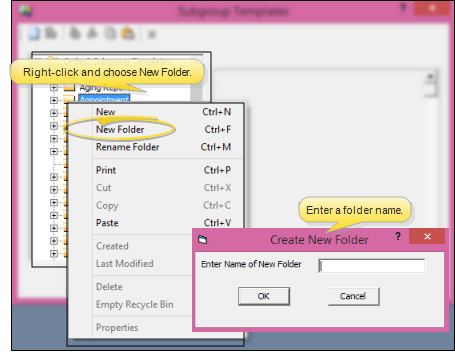
 Add a New Folder - Right-click anywhere in the list of subgroup templates, and select New Folder (or press Ctrl+F on your keyboard). Type a name for your folder and click Ok. Folders are listed alphabetically in your subgroup template list.
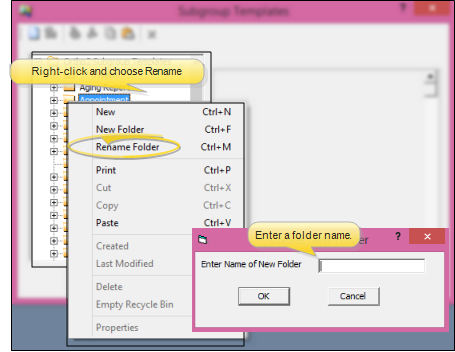
 Rename a Folder - Right-click the folder you want to change, and select Rename Folder (or press Ctrl+M on your keyboard). Then type a new name for your folder and click Ok.
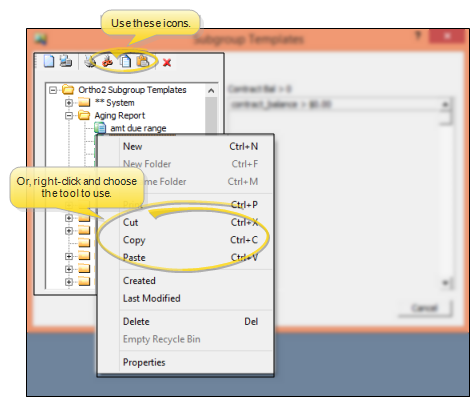
 Cut / Copy / Paste a Subgroup - Click a subgroup name, then use the
  Cut,
Cut,  Copy, and
  Paste icons in the subgroup toolbar (or, right-click the subgroup name and use the tools from the popup menu) to either copy (duplicate) the subgroup, or cut (move) it from one folder to another. You can also use standard keyboard shortcuts to Cut (Ctrl+X), Copy (Ctrl+C) and Paste (Ctrl+V) subgroups.
Subgroup templates that you cut, but do not paste before you exit the subgroup window are permanently deleted: Be
sure to paste your template to its new location immediately to avoid accidental
deletion.
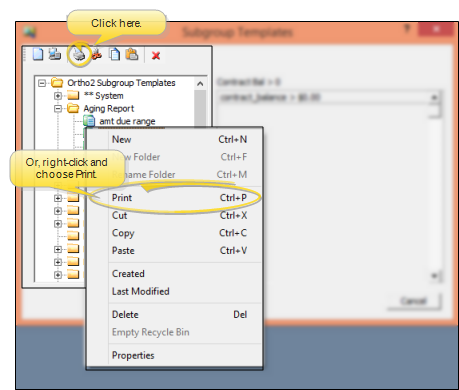
 Print Criteria - Choose the subgroup to work with, then click the
  Print icon in the subgroup toolbar (or, right-click and select Print from the popup menu, or press Ctrl+P on your keyboard) to print the list of that subgroup's criteria.
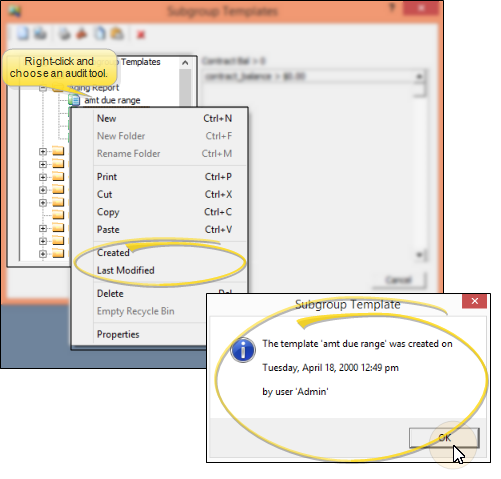
 Audit Subgroup - Right-click a subgroup name, and select Created or Last Modified from the popup menu to display an audit window for that subgroup. After reviewing the information, click Ok to close the window.
 Delete a Subgroup or Folder - Click a subgroup or folder name, then click the
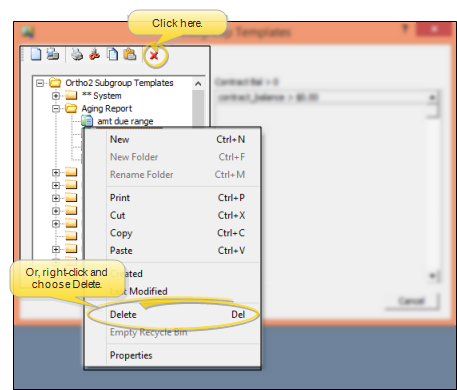
  Delete icon on the subgroup toolbar (or, right-click and select Delete, or press the Delete key on your keyboard). You can only delete empty folders. Deleted subgroups and folders are stored in the recycle bin folder that appears at the bottom of the subgroup template list, until you permanently delete them.
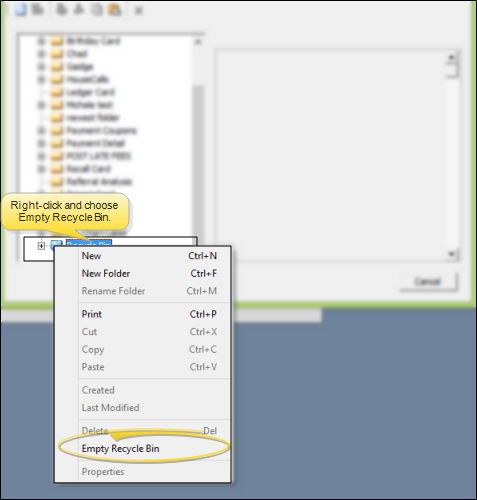
 Empty Recycle Bin - To permanently delete a subgroup, you must either open the recycle bin folder and delete it individually (described above), or right-click the recycle bin folder and choose Empty Recycle Bin to permanently delete all stored subgroups.
 Edit Subgroup Templates - Your subgroups are comprised of a list of criteria that determine how ViewPoint will evaluate patient records for inclusion / exclusion. After opening an existing subgroup template, or creating a new subgroup, the Subgroup Fields window opens, where you can add, remove, and change the criteria.
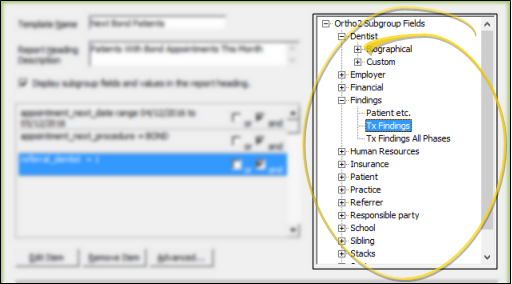
 Add New Criteria - Double-click an Ortho2 Subgroup Field from the right side of the window to open a window where you can enter the details about how to evaluate this criteria, as described below. You may expand and collapse the Ortho2 Subgroup Field categories as needed to make it easier to find the data you are looking for. When finished, your new criteria will be added to the end of your subgroup template. (You can use Advanced properties, described below, to rearrange your criteria.)
 Edit Criteria - Click the subgroup criteria you want to work with, then click Edit Item at the bottom of the window (or press Ctrl+E on your keyboard) to open a window where you can edit the details about how to evaluate this criteria, as described below.
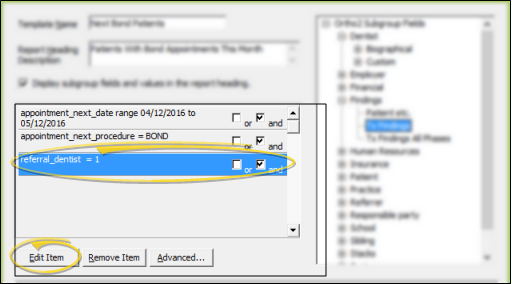
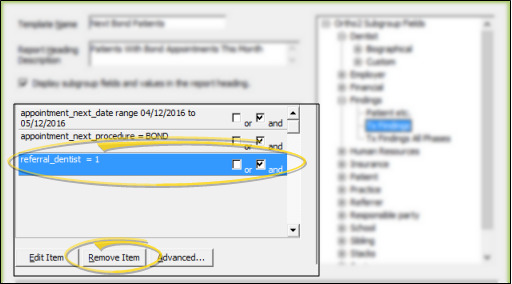
 Delete Subgroup Criteria - Click the criteria you want to remove from the subgroup, and click Remove Item from the bottom of the window (or press Ctrl+R on your keyboard). This only deletes the criteria you selected, it does not delete the entire subgroup. (See Delete a Subgroup above to remove a subgroup from your system.)
 Subgroup Details - Enter a template name, description, and details to evaluate the criteria you have selected for this subgroup.
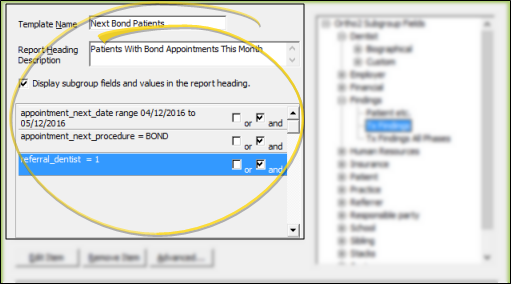
Template Name - You will use this name when selecting the subgroup to use when running a report, form, or word processing document.
Report Heading Description - This description that will appear in the header of reports that use the subgroup. If you leave this field blank, the report will not include a subgroup description.
Display Subgroup Fields in Report - Enable this option to include the subgroup criteria in the header of a report that you generate with this subgroup.
 Subgroup Criteria - The criteria for this subgroup is listed on the bottom left side of the window. As ViewPoint performs a subgroup, items grouped with precedence are
tested first as a unit, then criteria are tested from the top down, according
to the AND or OR operator assigned to the requirement above it. To change the criteria, click the description you want to work with, then click Edit Item. The parameters available depend upon the type
of data you are working with. (See "Subgroup Operations" for detailsabout working with each type of criteria.)
AND / OR Operator - When your subgroup contains multiple criteria, use the AND and OR operators to define whether a patient record must satisfy the current criteria AND the next, or whether the record must satisfy either the current criteria OR the next in order to be included in the group. If you subgroup contains only one criteria, the operator is not needed. In addition, the final criteria of a multiple-criteria subgroup does not require a detail operator, because its inclusion in the group is dependent upon the detail operator just above it.
 Advanced Properties - As ViewPoint performs a subgroup, items grouped with precedence are
tested first as a unit, then criteria are tested from the top down, according
to the AND or OR operator assigned to the requirement above it.
You can use Advanced properties to rearrange the criteria and apply precedence as needed.
-
Click the Advanced button at the bottom
of the Subgroup Fields window (or press Ctrl+A on your keyboard).
-
Fine-tune your subgroup criteria.
Rearrange Criteria - Use the Move Up and Move Down buttons to rearrange the list of criteria. Remember, ViewPoint tests criteria from the top down.
 Create Precedence Group - As ViewPoint performs a subgroup, criteria grouped and marked with precedence (
 )
are tested together as a unit.
-
Use the Move Up and Move
Down buttons to sequentially list the criteria you want grouped
together.
-
Click
the first criteria to include.
-
Click the last criteria to include.
-
Click Add Precedence.
Precedence markers (such as  ) indicate where your group begins and ends.
If precedence already exists for this
subgroup, your new group is “layered” outward. The outermost
precedence group is tested first as ViewPoint performs the subgroup.
Delete Precedence Groups - To remove precedence
markers so that each criteria is tested of its own accord, click Delete
Precedence. If more than one “layer” or set of precedence markers
exists for the subgroup, the outermost set of precedence is removed first.
-
When you are satisfied with the order in which ViewPoint will test your
criteria, click Ok to save your
changes and return to the Subgroup Fields window.
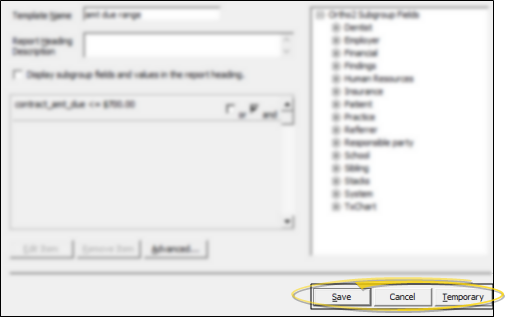
 Save & Exit Template - Click Save at the bottom of the window (or press Ctrl+S on your keyboard) to permanently
save the changes you have made to the subgroup template. Or, click Temporary
(or press Ctrl+T) to save the changes for the current job only. You then return to the Subgroup Templates list.
![]() Open the Subgroup Templates Window - ViewPoint main menu > Tools & Utilities > Subgroup Design. You also go to the subgroup templates window when you choose to generate a report,
form, or mail merge document for a subgroup.
Open the Subgroup Templates Window - ViewPoint main menu > Tools & Utilities > Subgroup Design. You also go to the subgroup templates window when you choose to generate a report,
form, or mail merge document for a subgroup.![]() Work with an Existing Subgroup - Generally, you arrange subgroups into folders to help you categorize their use. You can click the + and - icons beside folder names to expand / collapse the folders as needed. When you click a subgroup name in the list at the left, a summary of the subgroup criteria appears on the right side of the window. To open the selected subgroup for editing, click the
Work with an Existing Subgroup - Generally, you arrange subgroups into folders to help you categorize their use. You can click the + and - icons beside folder names to expand / collapse the folders as needed. When you click a subgroup name in the list at the left, a summary of the subgroup criteria appears on the right side of the window. To open the selected subgroup for editing, click the  Properties icon from the subgroup toolbar (or right-click and choose Properties, or double-click the subgroup name).
![]() Add a New Subgroup - Click a folder name to select the location of your new subgroup. Or, create a new folder to use (described below). After selecting a folder, click the
Add a New Subgroup - Click a folder name to select the location of your new subgroup. Or, create a new folder to use (described below). After selecting a folder, click the  New icon from the subgroup toolbar, or right-click and select New ), or press Ctrl+N on your keyboard to open the subgroup design window. You can now edit the Subgroup Details, described below.
![]() Add a New Folder - Right-click anywhere in the list of subgroup templates, and select New Folder (or press Ctrl+F on your keyboard). Type a name for your folder and click Ok. Folders are listed alphabetically in your subgroup template list.
Add a New Folder - Right-click anywhere in the list of subgroup templates, and select New Folder (or press Ctrl+F on your keyboard). Type a name for your folder and click Ok. Folders are listed alphabetically in your subgroup template list.![]() Rename a Folder - Right-click the folder you want to change, and select Rename Folder (or press Ctrl+M on your keyboard). Then type a new name for your folder and click Ok.
Rename a Folder - Right-click the folder you want to change, and select Rename Folder (or press Ctrl+M on your keyboard). Then type a new name for your folder and click Ok. ![]() Cut / Copy / Paste a Subgroup - Click a subgroup name, then use the
Cut / Copy / Paste a Subgroup - Click a subgroup name, then use the  Cut,
Cut,  Copy, and
  Paste icons in the subgroup toolbar (or, right-click the subgroup name and use the tools from the popup menu) to either copy (duplicate) the subgroup, or cut (move) it from one folder to another. You can also use standard keyboard shortcuts to Cut (Ctrl+X), Copy (Ctrl+C) and Paste (Ctrl+V) subgroups.
![]() Print Criteria - Choose the subgroup to work with, then click the
Print Criteria - Choose the subgroup to work with, then click the  Print icon in the subgroup toolbar (or, right-click and select Print from the popup menu, or press Ctrl+P on your keyboard) to print the list of that subgroup's criteria.
![]() Audit Subgroup - Right-click a subgroup name, and select Created or Last Modified from the popup menu to display an audit window for that subgroup. After reviewing the information, click Ok to close the window.
Audit Subgroup - Right-click a subgroup name, and select Created or Last Modified from the popup menu to display an audit window for that subgroup. After reviewing the information, click Ok to close the window.![]() Delete a Subgroup or Folder - Click a subgroup or folder name, then click the
Delete a Subgroup or Folder - Click a subgroup or folder name, then click the  Delete icon on the subgroup toolbar (or, right-click and select Delete, or press the Delete key on your keyboard). You can only delete empty folders. Deleted subgroups and folders are stored in the recycle bin folder that appears at the bottom of the subgroup template list, until you permanently delete them.
![]() Empty Recycle Bin - To permanently delete a subgroup, you must either open the recycle bin folder and delete it individually (described above), or right-click the recycle bin folder and choose Empty Recycle Bin to permanently delete all stored subgroups.
Empty Recycle Bin - To permanently delete a subgroup, you must either open the recycle bin folder and delete it individually (described above), or right-click the recycle bin folder and choose Empty Recycle Bin to permanently delete all stored subgroups.![]() Edit Subgroup Templates - Your subgroups are comprised of a list of criteria that determine how ViewPoint will evaluate patient records for inclusion / exclusion. After opening an existing subgroup template, or creating a new subgroup, the Subgroup Fields window opens, where you can add, remove, and change the criteria.
Edit Subgroup Templates - Your subgroups are comprised of a list of criteria that determine how ViewPoint will evaluate patient records for inclusion / exclusion. After opening an existing subgroup template, or creating a new subgroup, the Subgroup Fields window opens, where you can add, remove, and change the criteria.


