Edit Filmstrip Image / Video
Use the visual and auditory editing tools at the right edge of your Edge Animations window to edit, annotate, and morph filmstrip items to enhance your presentation.
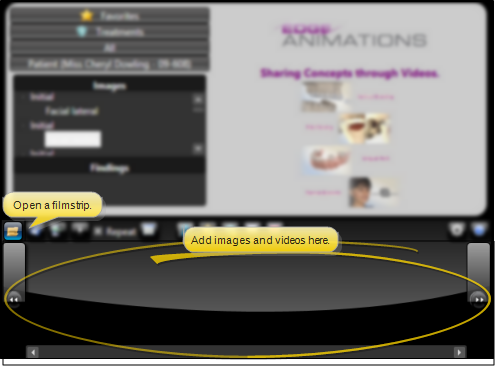
 Create or Edit a Filmstrip - To create a new filmstrip, adding images and videos to the viewing bar at the bottom of the Edge Animations screen. Or, to edit or play an existing filmstrip, click
  Open from the filmstrip ribbon bar, and choose an Edge Animations filmstrip that you have saved. This clears the viewing area at, and replaces it with your selected filmstrip.
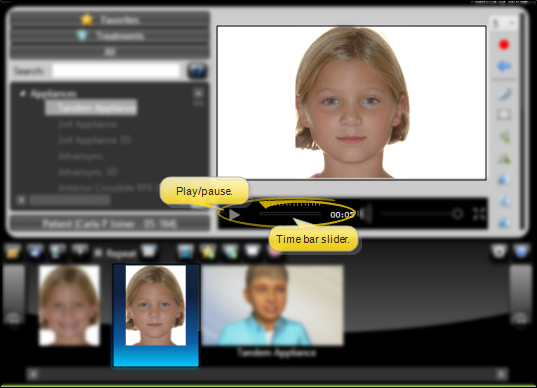
Open a Filmstrip Image / Video - Double-click the filmstrip image or video you want to work with. It will open it in the playback section of your Edge Animations window. You can use the  Full Screen icon to toggle between viewing the item with the filmstrip bar below it, or viewing the item in the full Edge Animations window.

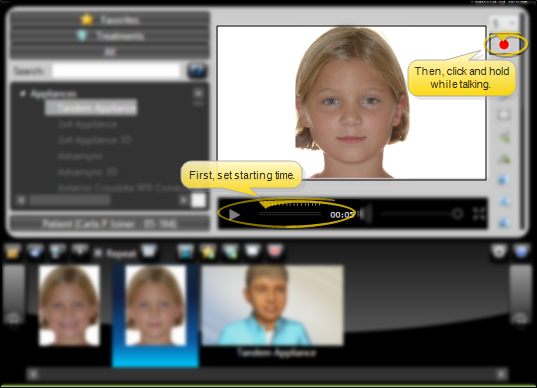
Preview Image / Video - Use the time selection bar at the bottom of the image viewer to preview this item. (See "Play Edge Animations Filmstrips" for details about previewing the entire filmstrip.)
Edit, Annotate & Morph Image / Video - Use the visual and auditory editing tools at the right edge of your Edge Animations window to edit, annotate, and morph filmstrip items to enhance your presentation. Certain tools are available only to certain types of filmstrip items: Only the editing tools available for the currently selected item will be shown on your screen.
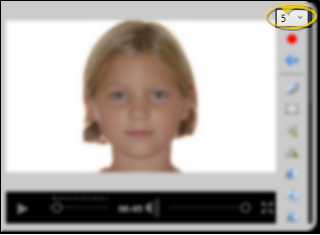
Image Duration - (Available only for individual images, such as patient photos.) Use the number field at the top of the editing tools bar to specify the number of the seconds this image should remain on the screen when the filmstrip is played. (The duration of videos you have added to the filmstrip is predetermined by the video file itself and cannot be changed here.)
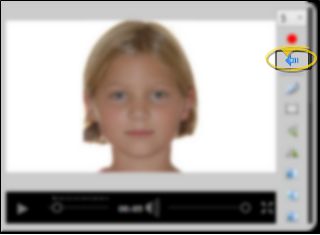
 Voice Recording - Use voice recording to add audio descriptions and explanations to the selected image or video. First, use the Play / Pause button or the time bar slider at the bottom of the playback window to select the time to start. Then, click and hold the Voice Record button while you speak. When finished, release the button. (See "Set Up Edge Animations" for details about selecting the microphone to use for voice recordings.)
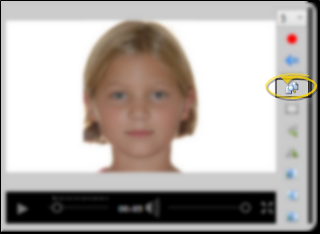
 Clear Voice Recording - Click the Clear Voice Annotation button that appears just under the Voice Record button to remove the audio recording you have made for this image / video.
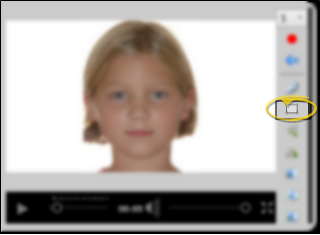
 Show Original - (Available only for individual images, such as patient photos.) Use Show Original along with image morphing tools to display / hide a silhouette of the original image onto your morphed image.
If you save your changes with the Show Original option enabled, the silhouette is saved also, providing you with a "before" and "after" view in a single image.
 Clear Selection - (Available only for individual images, such as patient photos.) Click Clear Selection to remove the focus from the currently active morphing or annotation tool.
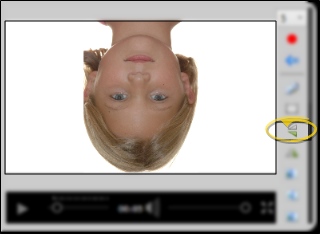
 Flip - (Available only for individual images, such as patient photos.) When you "flip" an image, you turn it on its horizontal axis. (Think upside down.)
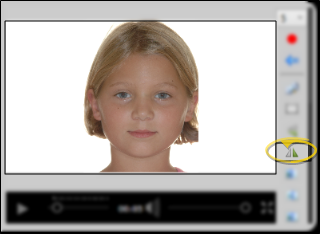
 Mirror - (Available only for individual images, such as patient photos.) When you "mirror" an image, you turn it on its vertical axis. (Think of looking in a mirror.)
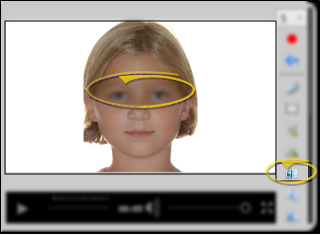
 Blur - (Available only for individual images, such as patient photos.) Use Blur to soften the entire image, or the currently selected area. Each time you click Blur, the image is softened further.
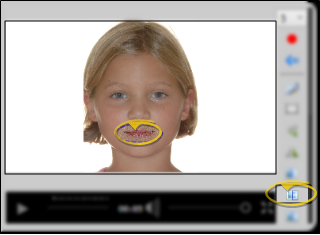
 Sharpen - (Available only for individual images, such as patient photos.) Use Sharpen to enhance the clarity of the image, or the currently selected area. Each time you click Sharpen, the image is affected further.
 Smooth - (Available only for individual images, such as patient photos.) Use Smooth to smooth the image, or the currently selected area. Each time you click Smooth, the image is affected further.
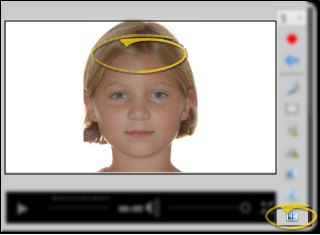
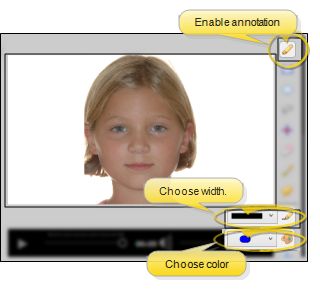
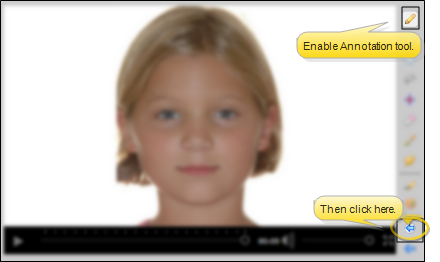
 Annotate - Use the annotation tools to draw free-hand illustrations on an image or video at any point in time during playback.
Annotation Settings - Select the  Color and/or
  Width to use when drawing on your image. You can change these values at any time, and continue drawing. If you are working with an individual image, and not a video, you must first enable the Annotation tool: The tool is always enabled when you are working with a video.
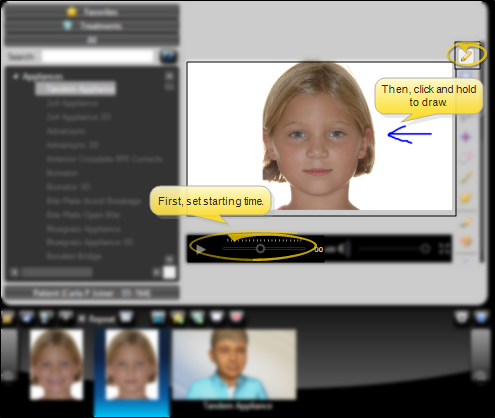
Draw Annotation - Use the Play/ Pause button or the time slider bar at the bottom of the playback window to select the time the annotation should appear. Then, click and drag your cursor to draw a free-hand illustration. If you are working with an individual image, and not a video, you must first enable the Annotation tool: The tool is always enabled when you are working with a video.
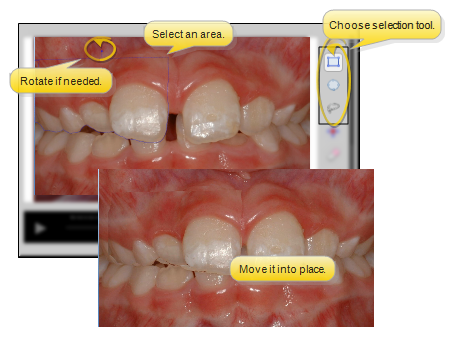
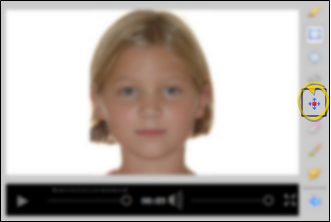
Select, Move, and Rotate an Area - Use the Rectangle,  Ellipse, and
  Lasso (free-hand) selection tools to outline an area of the image you want to move and/or rotate independently from the rest of the image. These tools are especially useful for showing the potential for straightening and realigning teeth.
Enable a selection tool, then draw around the area you want to work with. You can then click inside the selected area and drag it to a new location, and use the rotate handle at the top of the selection to rotate the area. (After moving and rotating an area, you will likely want to smudge or brush away rough edges, described below.)
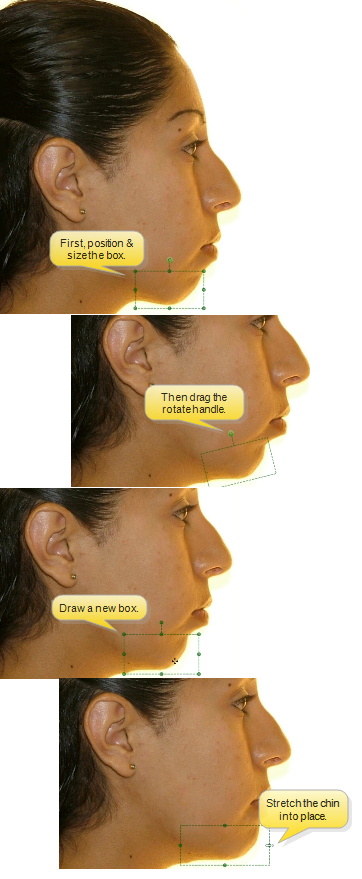
 Stretch - (Available only for individual images, such as patient photos.) Use the Stretch tool to elongate a portion of the image, such as the chin.
Enable Stretch, then draw a box around the area you wish to work with. You can click inside the box and drag it to a new location, and use the corner handles to resize the box. Once the box is in the optimal position, use the side, top, and bottom handles to stretch the area.
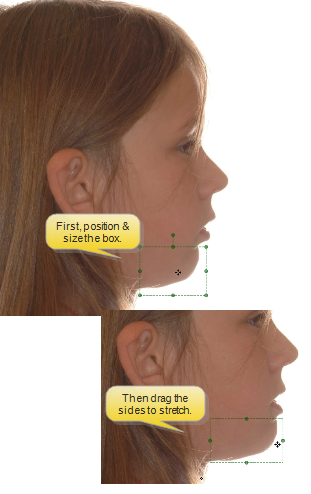
Rotate and stretch by clicking and dragging the rotation handle at the top of the Stretch box, bringing a portion of the image into a better position.
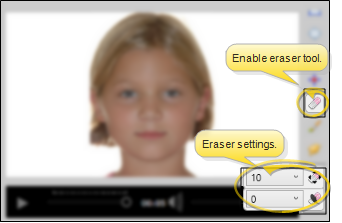
 Erase - (Available only for individual images, such as patient photos.) After moving an area, you can use the Erase tool to remove parts of the area, exposing the original image underneath, providing you with a way to trim away any excess from the moved area. Enable
  Erase, and select the radius (width) and softness (transparency) of the tool. Then, click and drag to "erase" portions of an area that has been moved.
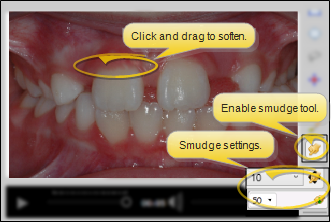
 Smudge - (Available only for individual images, such as patient photos.) Use the Smudge tool to soften harsh lines and blend different areas of the image. It is especially useful for smoothing lines around a moved section. To use this tool, enable Smudge, and select the radius (width) and pressure (movement) of the tool. Then click and drag the tool over the area you want softened.
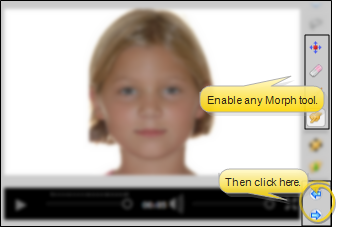
Undo / Redo Morph Changes - (Available only for individual images, such as patient photos.) Enable any morphing tool (such as stretch or smudge), then click  Undo/
Undo/  Redo at the bottom of the editing tools to remove / re-apply the most recent morphing change you have made to the image. (This is different from undoing annotations, described below.)
Undo / Clear Annotations - You can use the Undo Annotation tool to remove the most recent annotation you have made to the image or video, or use the Clear Annotation tool, along with the timer, to remove a specific annotation. For example, you may draw an annotation on an image at the first second of the image playing, then choose to clear the annotation when the image timer reaches three seconds.
Undo Most Recent Annotation - Enable the Annotation tool, if needed, and click Undo at the bottom of the editing tools to remove the most recent annotation you have made to the image or video.
Clear Annotation - First, use Play and Pause or the time bar slider to select the time you want to clear the annotation from the image or video. Then enable the Annotation tool, if needed, and click the Clear Annotations icon.
Video Properties - Right-click a video in your filmstrip, and select Properties. You can then review the details about the item.
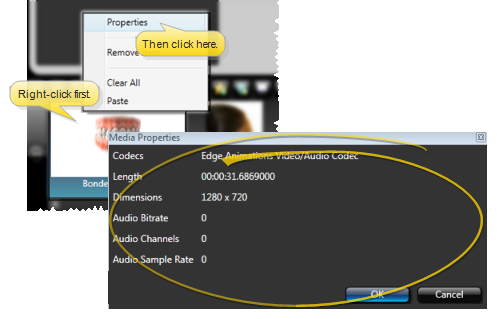
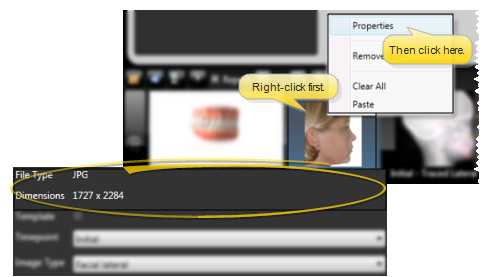
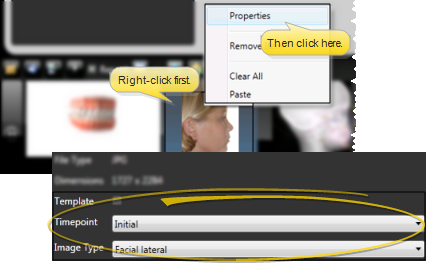
Image Properties - Right-click an image in your filmstrip, and select Properties. You can then review the details about the item, and edit template options, if available.
Media Properties - You can review the image file type and dimensions, but you cannot change them here.
Image Template Option - When you add an image to a filmstrip from the Patient list at the left of your Edge Animations window, you can choose whether to "hard code" that exact image into the filmstrip, or make the image a template. If an image is flagged as a template, when you open the filmstrip for a different patient, the template is replaced by the corresponding image type and timepoint from the active patient. To toggle the template flag, right click the image in the filmstrip and select Properties. Then enable / disable the Template option, and select the image type and timepoint you want to use. When you open the filmstrip for a patient that does not have the corresponding image type / timepoint required by the template, an image placeholder will appear in the filmstrip instead. Also, the template option is not available if you cut and paste the patient image into the filmstrip.
Reorder Filmstrip Items - To reorder items in your filmstrip, drag and drop them into place.

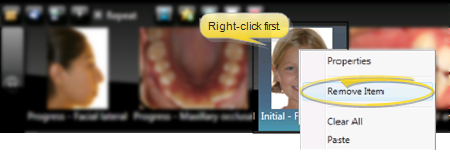
Remove Filmstrip Items - Right-click and select Remove Item to delete an item from the filmstrip.
Remove All Filmstrip Items - Right-click any item in your filmstrip and select Clear All to remove all items from the filmstrip. You might do this, for example, after playing, saving or publishing a filmstrip so that you can begin working with another filmstrip.

Save Filmstrip to a File - Click  Save from the filmstrip ribbon bar and enter a descriptive filename: You want to be able to recognize your filmstrip name easily when you need to open it again in Edge Animations. By default, the filmstrip files are saved in the Jobs folder of your Edge Animations data file location, in .XML format: Filmstrips saved in this manner do not appear in your Favorites or Treatments lists, described below.
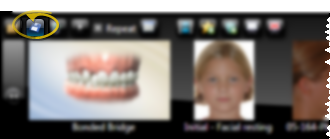
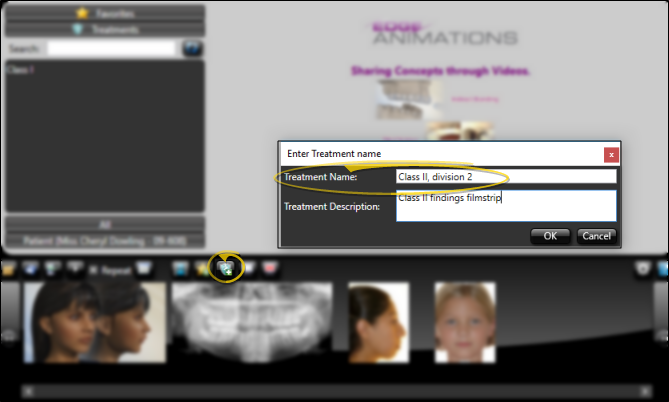
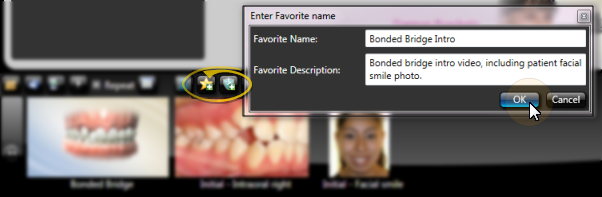
Save Favorites and Treatments Filmstrips - To save the current filmstrip to a list, click  Add to Favorites or
  Add to Treatments from the filmstrip ribbon bar, then provide a file name and description. The filmstrip will be saved to the list you selected. By default, the filmstrip files are saved in the corresponding Assets folder of your Edge Animations data file location, in .XML format.
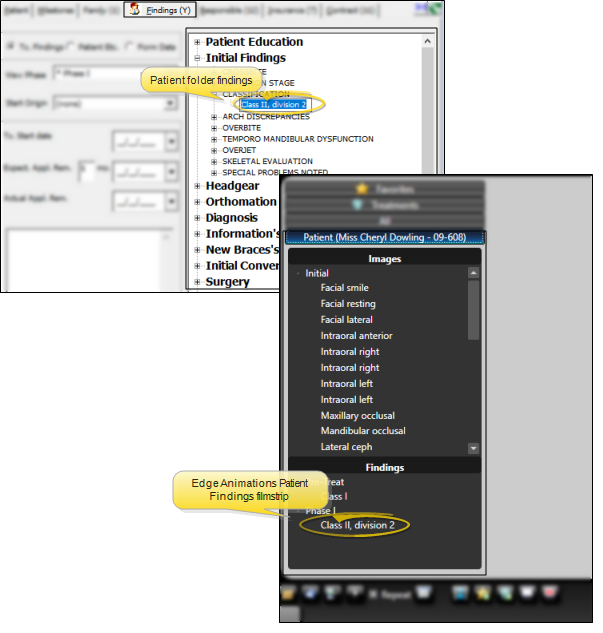
Treatments Filmstrips and Patient Findings – You can create Edge Animations filmstrips for specific patient findings that will automatically appear in a patient's Edge Animations list. For example, you might create a filmstrip containing videos you’d like to present to a patient with Class II, division 2 crowding. Once you have everything the way you want it, save that filmstrip to your Treatments tab. The filmstrip name must match your patient findings description EXACTLY. Then, when you launch Edge Animations for a patient with Class II, division 2 classification, and click the Patient tab, your Class II division 2 filmstrip will appear under the Findings heading. Clicking that finding will load the saved Treatments filmstrip.
-
Save your filmstrip to the Treatments list, with EXACT findings description.
-
Launch Edge Animations for a patient and click the Patient tab. Matching Treatments filmstrips are loaded automatically.
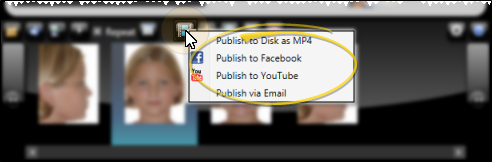
Publish Filmstrip as a Video - Use the Edge Animations publisher to save filmstrips in video file format on your computer, upload video files to YouTube or Facebook, or send a link to videos via email. See "Publish & Share Edge Animations Videos" for details.