Initiate Mail Merge![]() You can open this feature in multiple ways: Use the method that's most convenient for you.
You can open this feature in multiple ways: Use the method that's most convenient for you.
Use the Print mail merge action to send merge documents to a printer, as well as the appropriate correspondence histories. You may choose to generate an envelope along with the document to facilitate mailing.
Electronic Signatures - Documents that need to be signed with an e-Pad device must use the View mail merge action, not the Print action. Once the document is signed, you can print it from the View mode. See "View Mail Merge Documents" for details.
Initiate Mail Merge![]() You can open this feature in multiple ways: Use the method that's most convenient for you.
You can open this feature in multiple ways: Use the method that's most convenient for you.
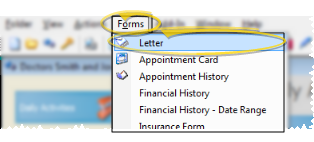
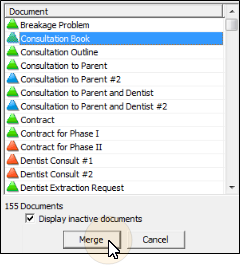
Choose Document to Merge![]() Select the document to merge, then click Merge at the bottom of the window, or double-click the document name. You can merge any document that is preceded by a green or yellow icon. (Documents preceded by other colors are not ready to merge. See "Letter Library" for details.) You can use the scroll bar to view additional letters in your list, or simply begin typing the document name.
Select the document to merge, then click Merge at the bottom of the window, or double-click the document name. You can merge any document that is preceded by a green or yellow icon. (Documents preceded by other colors are not ready to merge. See "Letter Library" for details.) You can use the scroll bar to view additional letters in your list, or simply begin typing the document name.
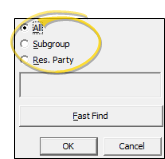
Choose Recipient(s)![]() Choose whether to merge the document for all records, a subgroup of records, or a single record. The choices you have for selecting recipients depend on the "type" of document you chose to merge. (See "Letter Library" for details about assigning the document "type".)
Choose whether to merge the document for all records, a subgroup of records, or a single record. The choices you have for selecting recipients depend on the "type" of document you chose to merge. (See "Letter Library" for details about assigning the document "type".)
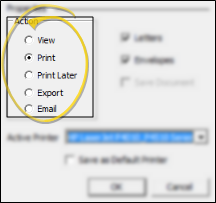
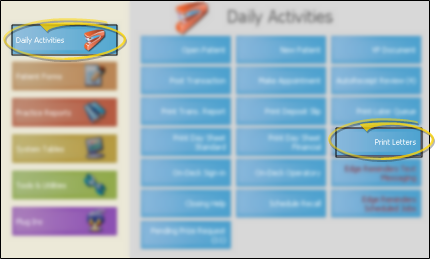
Choose Merge Action![]() Choose the Print merge action.
Choose the Print merge action.
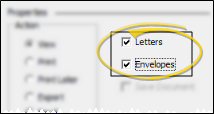
Include / Omit Letters & Envelopes![]() Enable the
Enable the  Letters option to print the body of the document; enable the Envelopes option to print the corresponding envelope (if available). Note that you can choose to print only the letter, only the envelope, or both as needed. However, each portion that you select will be sent to the same printer. (See "Mail Merge Envelopes" for details.)
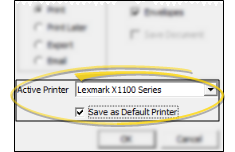
Choose Printer![]() You can print your merged document to any printer available to your workstation. You may optionally enable the Save as Default Printer option to set this printer as the default for this document.
You can print your merged document to any printer available to your workstation. You may optionally enable the Save as Default Printer option to set this printer as the default for this document.
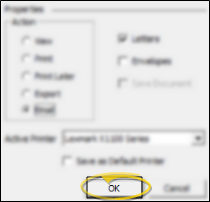
Finish![]() Click Ok to complete the merge immediately. The document(s) will be sent to the printer that you have selected, and permanently added to the appropriate correspondence history.
Click Ok to complete the merge immediately. The document(s) will be sent to the printer that you have selected, and permanently added to the appropriate correspondence history.
Correspondence History Records - Once processed, your mail merge documents are automatically added to the appropriate correspondence history, in .PDF format. Depending on the document selection type, it may be recorded in multiple correspondence histories, such as both the dentist and patient histories.
View Then Print Option - You can also print a merged document after first Viewing it. See "View Mail Merge Documents" for details. However, the document will not be saved in the appropriate correspondence history unless you first Capture it from the viewing window, then print it.
 │
│  │
│  │
│ 
Ortho2.com │1107 Buckeye Avenue │ Ames, Iowa 50010 │ Sales: (800) 678-4644 │ Support: (800) 346-4504 │ Contact Us
Chat with Software Support │Chat with Network Engineering │ Chat with New Customer Care
Remote Support │Email Support │ Online Help Ver. 12/18/2015


 Letter.