After selecting the electronic insurance forms you want to submit, use the Electronic Insurance integration to review and upload the claims.
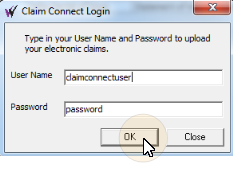
Save Claim Connect Credentials (Recommended ) - You can save your Claim Connect credentials in your ViewPoint System Settings to facilitate uploading your electronic insurance forms to the claims processing clearinghouse. See "Set Up System Settings" for details.
Accumulate Electronic Insurance Forms to Upload - Depending on your office protocol, you may accumulate electronic insurance claims throughout the day or week. You then choose to upload the pending claims to the processing clearinghouse as described below.
ViewPoint Toolbar ![]()
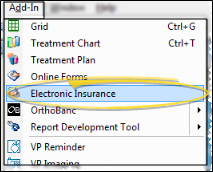
 Electronic Insurance.
ViewPoint Shortcut Menu![]() Add-In > Electronic Insurance. (Or, press Alt+D on your keyboard to open the Add-In menu options.)
Add-In > Electronic Insurance. (Or, press Alt+D on your keyboard to open the Add-In menu options.)
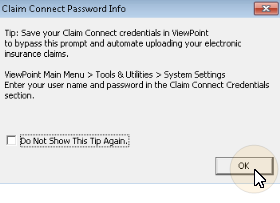
Note: Claim Connect Credentials Message![]() If you have not saved your Claim Connect user name and password in your ViewPoint System Settings, you will see a message box that encourages you to do so as soon as you initiate the Electronic Insurance integration. If you wish, you can permanently disable the reminder by checking the
If you have not saved your Claim Connect user name and password in your ViewPoint System Settings, you will see a message box that encourages you to do so as soon as you initiate the Electronic Insurance integration. If you wish, you can permanently disable the reminder by checking the  Do Not Show This Tip Again option, and clicking Ok. Note that once disabled, the reminder window will never appear on any ViewPoint workstation again.
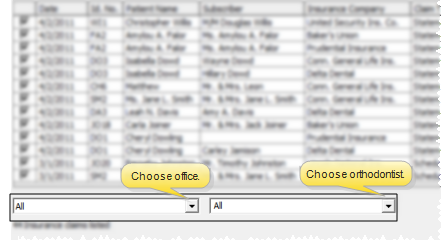
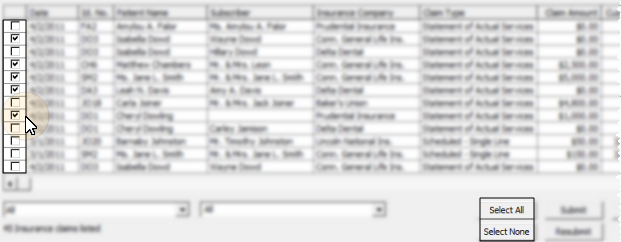
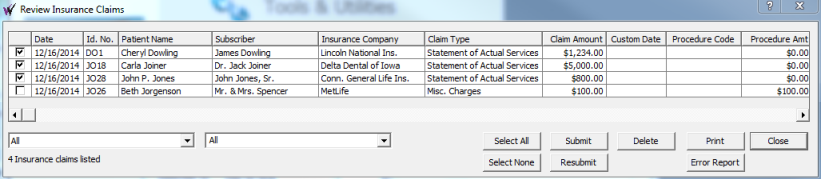
Filter Claims to Review![]() Use the Office and Orthodontist filters to review only certain claims, or select to view all pending claims.
Use the Office and Orthodontist filters to review only certain claims, or select to view all pending claims.
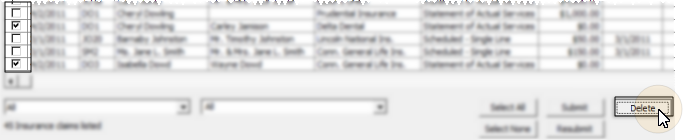
Delete Claims ![]()
Select Claims ![]() You can select claims individually by checking the box beside the claim, or choose Select All or Select None.
You can select claims individually by checking the box beside the claim, or choose Select All or Select None.
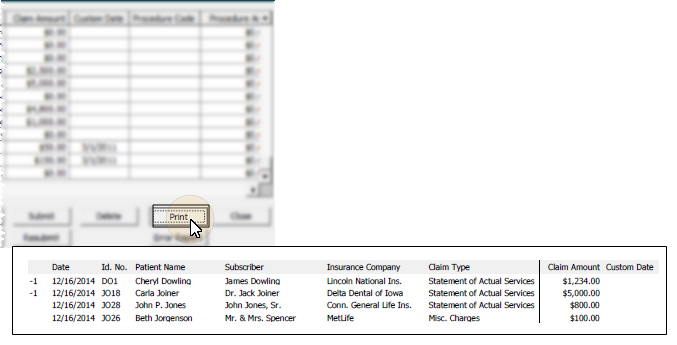
Print Pending Claims List![]() Click Print to obtain a list of the claims you are currently viewing. Note that claims you have selected for submission are indicated by ( -1) in the left-hand column of the report.
Click Print to obtain a list of the claims you are currently viewing. Note that claims you have selected for submission are indicated by ( -1) in the left-hand column of the report.
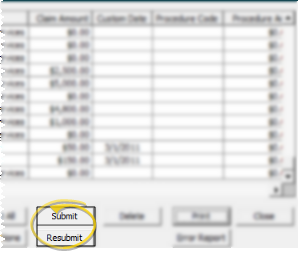
Upload Claims![]() Click Submit (or Resubmit, if appropriate) to upload the selected claims to your clearinghouse for processing. Note that you cannot transmit both first-time and re-submitted claims simultaneously. If your pending claims list includes both initial and re-submitted claims, you must upload one set first, then return to the Electronic Insurance window to upload the remaining claims. (See "Correct and Resubmit Electronic Claims" for details about claim re-submissions.)
Click Submit (or Resubmit, if appropriate) to upload the selected claims to your clearinghouse for processing. Note that you cannot transmit both first-time and re-submitted claims simultaneously. If your pending claims list includes both initial and re-submitted claims, you must upload one set first, then return to the Electronic Insurance window to upload the remaining claims. (See "Correct and Resubmit Electronic Claims" for details about claim re-submissions.)
Electronic Insurance Notices - As your insurance claims are being uploaded, You will see messages pop up in your system tray to indicate that the claims were successfully received, and that they have been added to each patient's Correspondence History.
DentalXChange Web Site - Submitting electronic claims also opens the DentalXChange web site. You may log into the web site if you wish, or simply close your browser: Your electronic claims are uploaded either way.
Verify Transmission - It is important to verify that your claims have been submitted successfully. Twenty four hours is usually required for feedback on your claims to be posted.See "Review Electronic Claims Online" for details.
Correct Errors and Resubmit - After submitting electronic claims, be sure to clean up any transmission or records errors, and re-submit if needed.See "Correct and Resubmit Electronic Claims" for details.
 │
│  │
│  │
│ 
Ortho2.com │1107 Buckeye Avenue │ Ames, Iowa 50010 │ Sales: (800) 678-4644 │ Support: (800) 346-4504 │ Contact Us
Chat with Software Support │Chat with Network Engineering │ Chat with New Customer Care
Remote Support │Email Support │ Online Help Ver. 12/18/2015