Recall Appointments
You can schedule recall appointments for patients that do have not a specific upcoming appointment, such as patients due for annual retainer checks and pre-treatment exams, to help prevent them from falling through the cracks.
Watch the movie. (Windows Media Player, an active Internet connection, and a valid Ortho2 customer login are required to run video tutorials, webinars, and training programs.)
-
 Open Recall Appointment window - You can open this feature in multiple ways: Use the method that's most convenient for you.
ViewPoint Main Menu - Daily Activities > Schedule Recall.
ViewPoint Shortcut Menu - Actions > Schedule Recall (Or, press Alt+A on your keyboard to open the Actions menu options.)
Processing Appointment - When you process a patient's appointment, and no future appointment exists, you are prompted to either place the patient on your Needs Appointment list, or to schedule a recall appointment. (See "Process Appointments" for details.)
-
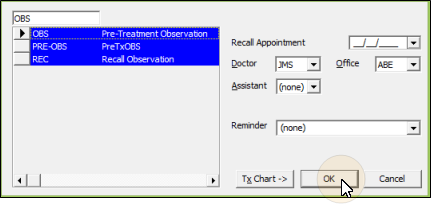
 Recall Appointment Details - Enter the procedure and date, and optionally the doctor, office, and assistant to assign to this recall appointment. You can also assign a reminder to appear with this recall appointment.

Procedure - Choose the reason for the recall appointment. Only procedure descriptions flagged as "recall" in your Appointment Procedure List will appear here.
Date - Enter a date for the recall appointment. The recall appointment will not be placed on your scheduling grid for that date, but appears in the patient folder, without a specific time, for your reference and follow-up.
Doctor, Office, Assistant (Optional.) - Select the doctor, office and chair-side assistant to schedule with this recall. These may or may not be the orthodontist, office, or assistant assigned to the patient folder.
Reminder - (Optional.) Select a reminder to appear with this recall appointment.
-
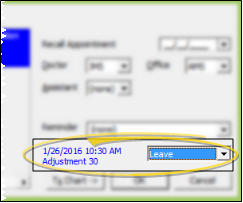
 Process Scheduled Appointments - (Available only if needed.) If the patient has other appointments scheduled, you are prompted to process the earliest appointment. To keep the additional appointment as-is, select the Leave processing option.
-
 Finish - Click Ok to finish scheduling the recall appointment.
 View Treatment Chart - Click Tx Chart at the bottom of the appointment details screen to toggle viewing the patient's treatment chart information.

View Scheduled Recalls - You can view a patient's scheduled recall appointments from the Appointment History. See "Appointment History" for details.
Recall Report - Run a Recall appointment report to obtain a list of patients with recall appointments during any range of dates. The report includes the patient name, nickname, status, procedure, phone number, office, doctor, and age, and is sorted by recall date. See "Recall Appointment Report" for details.
Process Recall Appointments - When you schedule a regular appointment for a patient with a recall appointment,
you are prompted to process all of the patient'
recall appointments as Kept, Delete or Leave. You can also process recall appointments individually from the patient's Appointment History. See "Appointment History" for details.


