Grid Scheduler Properties
Use your
![]() Open
Open
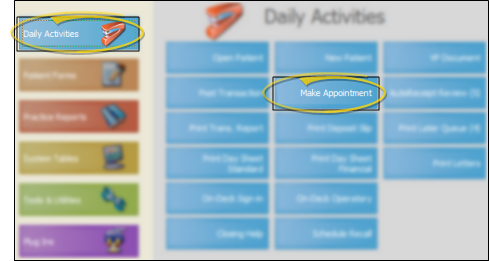
From the
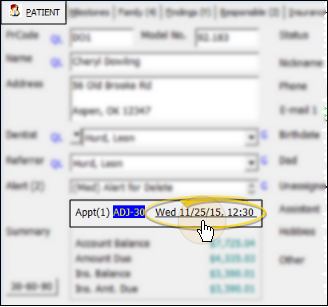
You can open your

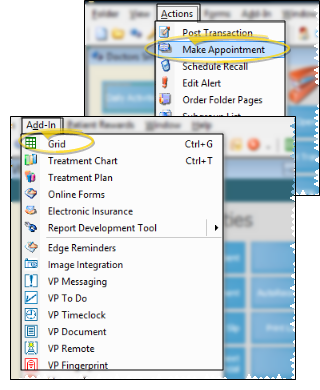
From the ViewPoint shortcut menu, either open the Actions menu (Alt+A) and choose Make Appointment, or open the Add-In menu (Alt+D) and choose Grid.
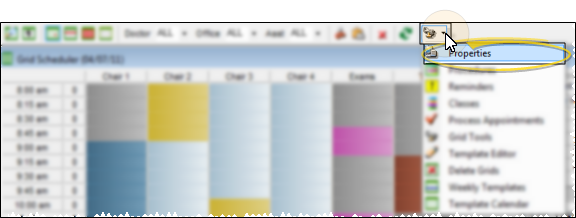
Choose the General tab at the top of the
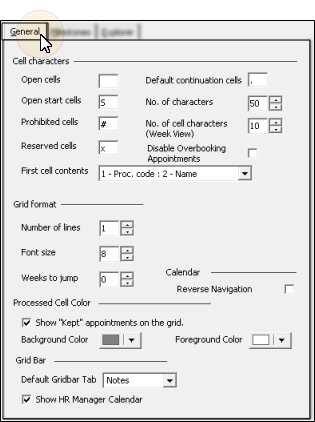
Open Cells - The open cell character displays in unappointed grid cells that have no class assigned to them. Many offices use a period (.) or leave open cells blank. If you change the default character in your
Open Start Cells - You flag cells as open start to show time slots that are appropriate for starting an appointment. If you change the default character in your
Prohibited Cells - You flag cells as prohibited to show time slots that are not appropriate for patient appointments. You cannot schedule to these cells. If you change the default character in your
Reserved cells - You flag cells as reserved to show time slots that should only be scheduled as a last resort. If you change the default character in your
First Cell Contents - The first cell contents setting in your
Multiple Line Requirement - If the setting requires two or more lines to display properly, that choice is indicated with the format 1-Field : 2-Field. In this case, be sure the number of lines property setting (described below), is at least two. Otherwise, the second portion of your first cell contents information will be omitted from your
Width Requirement - If the number of characters in your first cell contents exceeds the width of your grid cells (determined when you create a grid), the information will be truncated as needed.
Default Continuation Cells - The default continuation character displays in all but the first cell of multiple unit appointments, unless the scheduled procedure has its own continuation characters defined in the Procedure table. (The first cell contents setting, described above, displays in the first cell of all appointments.)
Number of Characters - This setting indicates the number of times to repeat the default continuation character (described above) in each cell of multiple-unit appointments, assuming the cell width is equal to or less than this setting.
Number of Cell Characters (week view) - The Number of Cell Characters (Week View) setting of your
Disable Overbooking Appointments - Enable the Disable Overbooking Appointments setting in your
Number of Lines (Workstation-specific.) - Define the number of lines to display for each grid cell. If you display multiple lines per cell, you type notes into the additional line, or select a two-line option for your first cell contents setting (described above).
Font Size - Select the text size. The bigger the number, the bigger the text.
Weeks to Jump - The Weeks to Jump setting is your default number of weeks to jump ahead in your schedule, generally the average amount of time between adjustment visits.
Reverse Navigation - When the Reverse Navigation option of your
Show Kept Appointments on the Grid - Appointments that have been processed as Kept can appear dimmed on your schedule, or can be removed from your schedule entirely. If the appointments appear on the schedule, you can hover over them to view the details and open the patient folder, just as you can with currently scheduled appointments. In addition, the amount of doctor time assigned to that appointment remains visible on your
Background / Foreground Colors - If you choose to show kept appointments, you can select the colors to use for those cells.
Default Grid Bar Tab - You can select whether you would like the grid bar Clipboard, Notes, or Needs Appointment section to open when you first enter the
Show HR Calendar in Grid Bar - You can optionally display the appointments from your HR Manager calendar on the Notes tab of your Grid Bar.
Use the Milestones tab of your
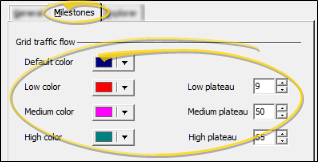
Default color - Choose the color to use when the number of scheduled appointments is equal to or more than the low plateau number, and less than (but not equal to) the medium plateau number.
Low Plateau / Color - Enter the number of appointments for which you consider the day underscheduled. If the number scheduled for the day is less than (not equal to) the low plateau number, the date appears in the low plateau color.
Medium Plateau / Color - Enter the number of appointments above which you consider it to be a moderate day. If the number scheduled for the day is equal to or above the medium plateau number, the date appears in the medium plateau color.
High Plateau - Enter the number of appointments above which you consider it to be a heavy / busy day. If the number scheduled for the day is equal to or above the high plateau number, the date appears in the high plateau color.
Open the Explorer tab of your
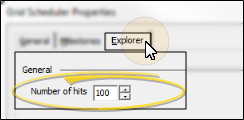
Enter the number of available appointment time slots that you want to appear in your list before Explore pauses for your input. You may need to experiment to determine the most effective setting. A number too low will pause too often and delay the scheduling process. A number too high will cause a lengthy initial process before any openings appear.
Click Ok to save the changes you have made and close the editing window.


