Calibration
Calibration is the process of relating the image on the screen to a standard measurement such as millimeters or inches in order to make accurate measurements. If you have configured SmartCeph to calibrate using millimeters, you will be prompted to calibrate at the beginning of each trace. Otherwise, the measurements are calculated according to your DPI device settings. Generally, calibration is performed when you first trace a ceph and recalibration is not necessary. If, however, recalibration of the ceph or the facial photo is needed, you can use the Calibration tools to realign the images.
Important - Proper calibration is required to achieve accurate measurements. The factors that have the greatest effect upon the accuracy of the measurement is the precision of the calibration and the accuracy of the user selecting the exact two points to measure. Users must perform the calibration until they have confirmed the accuracy of the results, and are comfortable that they can measure the calibration object accurately and that the displayed results have the accuracy needed. It is the user's responsibility to properly calibrate prior to clinical measurements and to determine if the accuracy achieved is within the error range required.
Set Up Your Calibration Method - You set up whether to calibrate your images with a known millimeter scale or by device DPI in your Trace Options. See "Trace Options" for details.
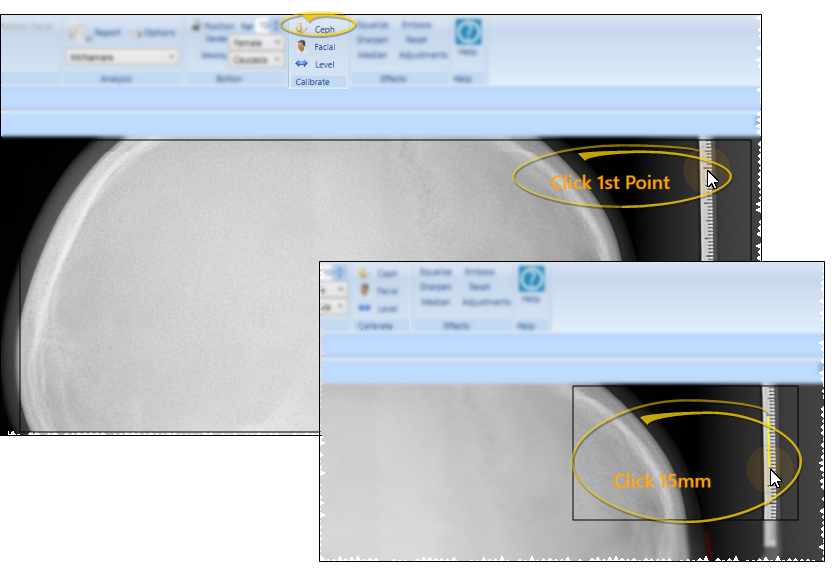
Calibrate a Ceph - If you have configured SmartCeph to calibrate using millimeters, you will be prompted to calibrate when you first click "Trace" to begin tracing a ceph. When the prompt “Click 1st Point” appears, click the bottom-most tick mark on the scale. When the prompt “Click #mm” appears, click the tick mark the appropriate number of millimeters above. The trace will then proceed.
Precise Calibration – To be the most precise when calibrating the ceph, be sure to use to use the zoom window in the bottom right corner of the screen.
Recalibrate a Ceph - If at any time you need to correct the calibration of the ceph, click  Ceph in the Calibrate section of the Main ribbon bar. You will be prompted to click the two calibration points to indicate the measurement ratio to use. To assure the tracing is most accurate, consider clicking Trace and choosing to remove all the structures and re-trace the ceph entirely.
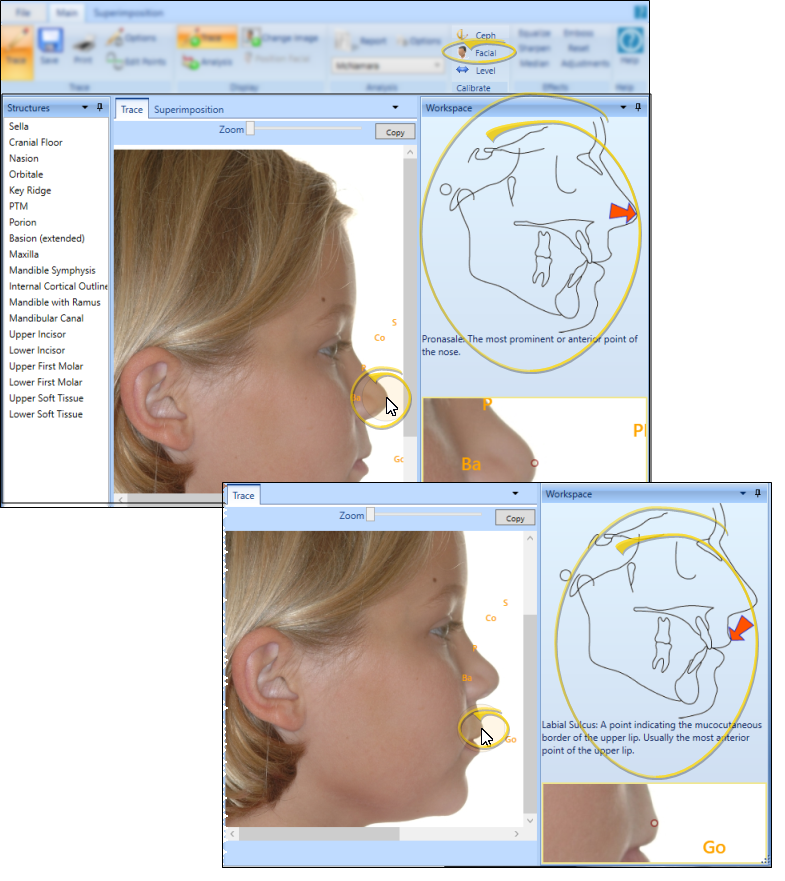
Calibrate a Photo - If after you complete the trace, the photo does not line up with the ceph, click  Facial in the Calibrate section of the Main ribbon bar. You will prompted to identify Pronasale and Labial Sulcus. This is particularly useful if the lateral facial photo was not present when the ceph was originally traced.
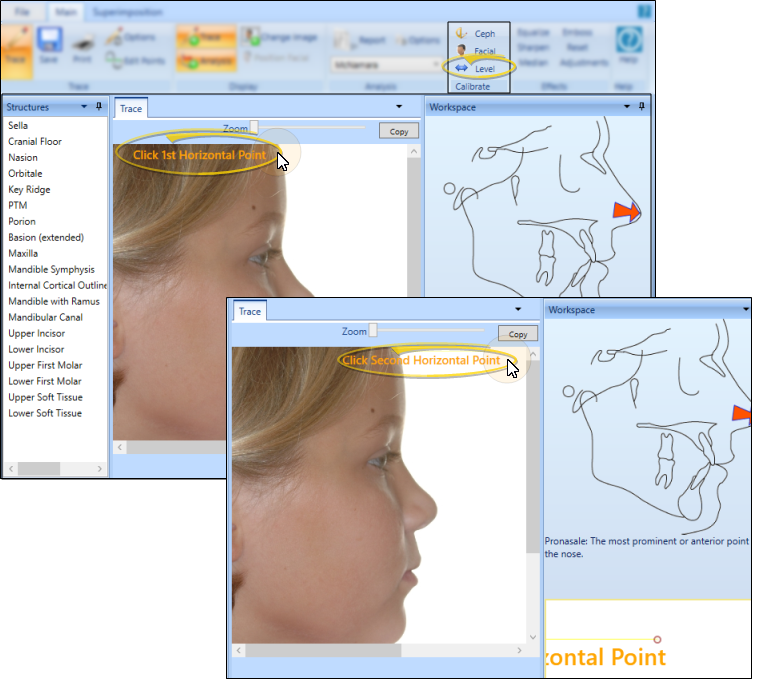
Identify a Level Plane - To calibrate the ceph and / or facial photo to a horizontal plane, click  Level in the Calibrate section of the Main ribbon bar. You will be prompted to click two calibration points to indicate the plane. The image will adjust so it is level with your selected horizontal position.