Acquire Patient Fingerprints
Obtaining fingerprint data allows your patients to sign into your
64-Bit Data Update - Need to convert 32-bit fingerprint data to 64-bit fingerprint data? Click here.
This feature does not store actual fingerprints. Ten data points or markers are stored that enable the fingerprint matching. Except for during the initial fingerprint acquisition process when fingerprints are shown on the screen, fingerprints cannot be viewed, printed, or reconstructed in any way from the stored data.
Get Started
Install Fingerprint Sensors - Install fingerprint sensors at your workstations so that your office staff can simply touch the sensor to log into
Use This Feature
-
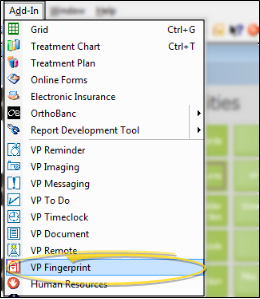
 Initiate VP Fingerprint - You can open this feature in multiple ways: Use the method that's most convenient for you. When a patient is active in your
 -
Acquire Fingerprint - Following the instructions on your screen, place the user's right index finger on the sensor to acquire the first fingerprint sample. A graphic of the fingerprint appears in the first section of the Acquire Fingerprint screen. Repeat three more times: The system uses all four samples to create the file. Note the Quality notation below the fingerprint samples: Samples that are not of good quality must be redone.
-
Register Files - Click Register when four good samples have been acquired, then click Yes to verify the fingerprint data.
-
Test Match - Ask the user to touch the sensor once more. You should see a screen indicating that the fingerprint matched
-
Confirm Fingerprint Registration - Before exiting, you are given the opportunity to change / overwrite the stored fingerprint if needed. This allows you to re-register existing fingerprint samples when necessary.
 VP Fingerprint. If a patient record is already active, that patient's information will be loaded automatically. Otherwise, you use Fast Find (either typing information or swiping a registered reward card) to search for the patient to work with.

Now, the patient can log into your system
More Information
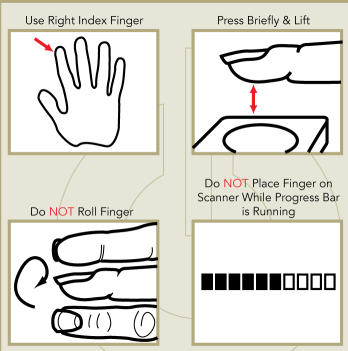
![]() How to Use the Fingerprint Reader - Always use the right index finger to acquire fingerprints or to log into your system. Press the sensor briefly and lift. Do not roll the finger on the sensor, and do not touch the sensor while the progress bar is running.
How to Use the Fingerprint Reader - Always use the right index finger to acquire fingerprints or to log into your system. Press the sensor briefly and lift. Do not roll the finger on the sensor, and do not touch the sensor while the progress bar is running.
Patient Folder Action - Use the Fingerprint tab of your Main Menu properties window to select an area of the patient folder to open when a patient presses the fingerprint sensor at your workstation. You might use this feature, for example, to quickly access a patient's treatment chart at a chair-side workstation, or to initiate posting a payment at a front-desk station. See "ViewPointProperties" for details.