Appointment requests appear in the Appointment Queue at the bottom of the HR Manager calendar window, waiting for an administer to accept or deny them. Accepted absence requests will appear in your HR Manager calendar
Add Requests - Staff members can request time off
HR Manager Ribbon Bar![]() -
-  Calendar. (See "HR Manager" for details about opening your HR Manager module.)
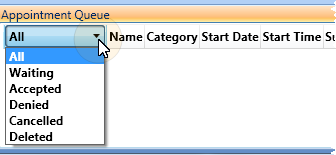
Filter Requests![]() - Click the filter at the left of the Appointment Queue to select the request statuses to include.
- Click the filter at the left of the Appointment Queue to select the request statuses to include.
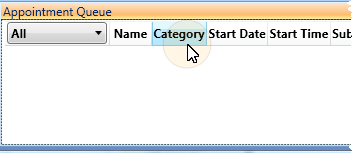
Sort Appointments![]() - Click a column heading to sort appointments by that information. Click the heading again to reverse the sort order.
- Click a column heading to sort appointments by that information. Click the heading again to reverse the sort order.
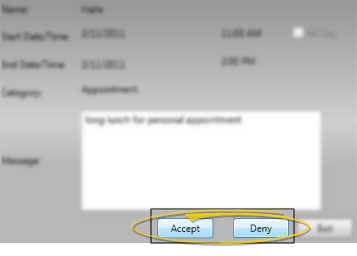
Accept / Deny Request![]() - Double-click a Waiting appointment request, then click to Accept or Deny it. Note that you cannot edit the request from this window. Accepted requests appear as events in your HR Manager calendar, and can be edited from there. (See "Add & Edit Events" for details.) Denied requests remain in the Appointment Queue for future reference.
- Double-click a Waiting appointment request, then click to Accept or Deny it. Note that you cannot edit the request from this window. Accepted requests appear as events in your HR Manager calendar, and can be edited from there. (See "Add & Edit Events" for details.) Denied requests remain in the Appointment Queue for future reference.
Adjust Columns![]() You can adjust both the width and location of the columns in the window. All columns return to the defaults when you exit and re-enter.
You can adjust both the width and location of the columns in the window. All columns return to the defaults when you exit and re-enter.
Resize Queue - Click the bar between the HR Manager calendar and the Appointment Queue to change the space allotted to each section.
 │
│  │
│  │
│ 
Ortho2.com │1107 Buckeye Avenue │ Ames, Iowa 50010 │ Sales: (800) 678-4644 │ Support: (800) 346-4504 │ Contact Us
Chat with Software Support │Chat with Network Engineering │ Chat with New Customer Care
Remote Support │Email Support │ Online Help Ver. 12/18/2015